
Reasons for this include replacing a damaged or rusting hatch, or perhaps, installing a spoiler-equipped hatch instead of non-spoiler hatch, e.g. Early C4 avant or Euro UrS4 avant (my situation). (I know some of you (hunker7 and majorcina) might have already done this but I thought it might be worthwhile writing something up anyway.)
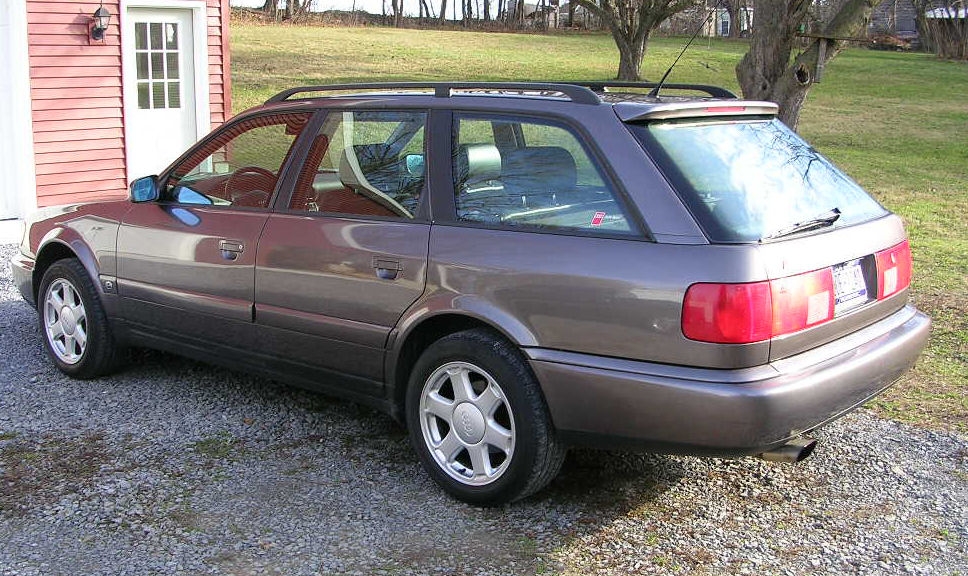
For example, you might like this style of hatch spoiler:
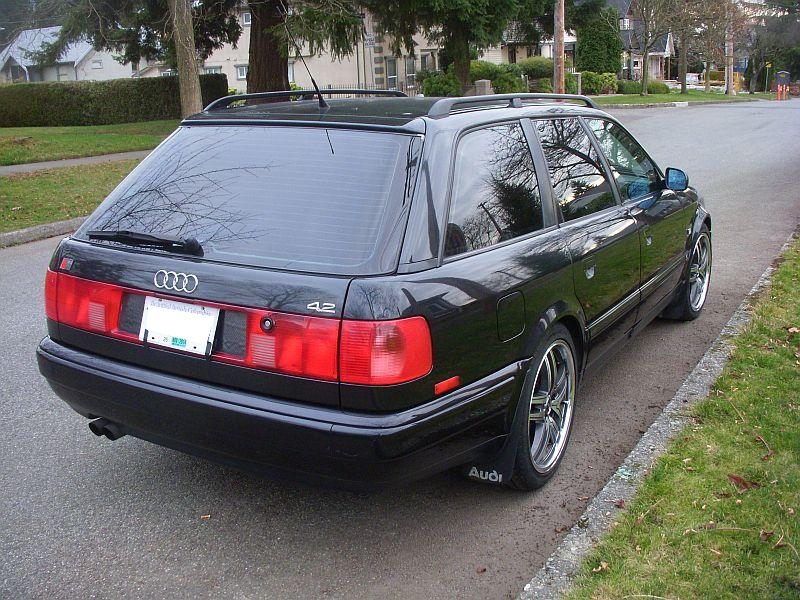
But you have this style of spoilerless hatch:
Removing the spoiler-less hatch is relatively simple. The hinge nuts/bolts are visible when you open the hatch.
The spoiler hatch is a bit more complicated.
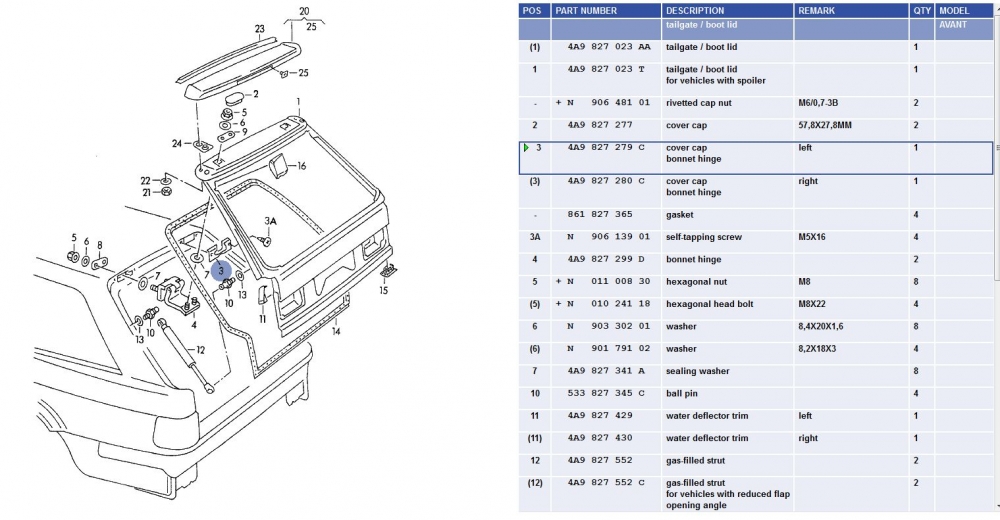
The basic situation is shown in this diagram, showing the spoiler and the hinges.
Step 1: Removing the external spoiler.
Because the access to the avant hinge nuts is under the spoiler, you need to start with removal of the spoiler. Open the hatch. Remove trim piece 10 in the diagram below. Disconnect the third brake light wiring. Now pull back the rubber wiring gaiter where it comes out of the hatch. This gives you access to the Item 21 nut in the diagram above (which is Item 2 in this diagram):
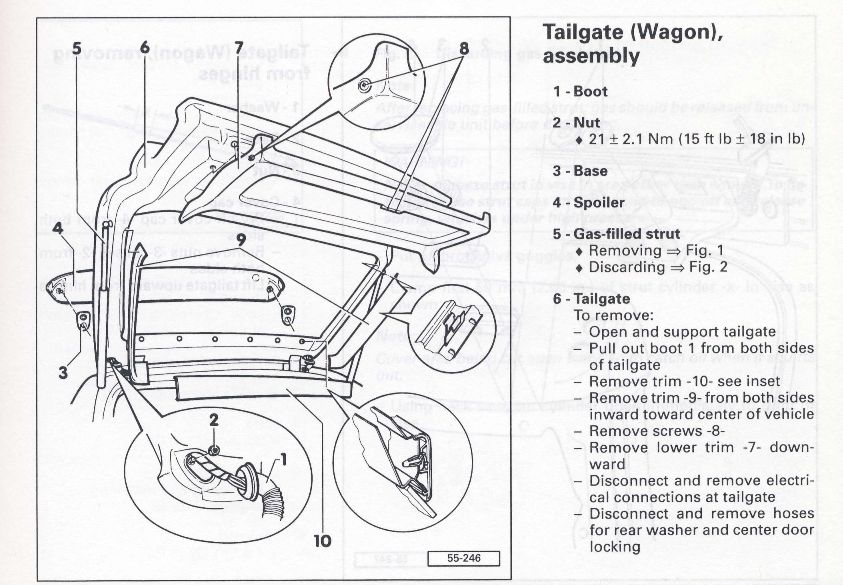
Remove the two nuts. The spoiler will be loose. Put the hatch back down and lift the spoiler up. Manage the third brake light wire (disconnect locally and/or pull through grommet) and lift the spoiler off the hatch.
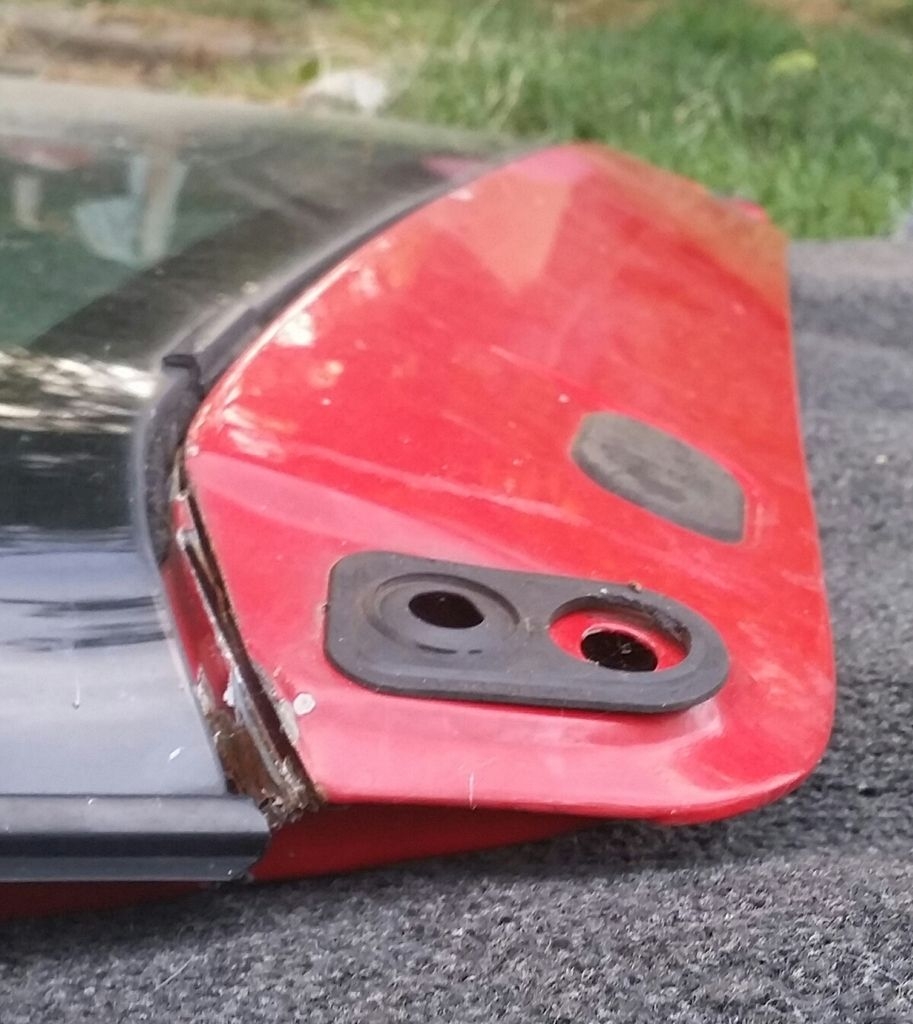
You should be looking at something like this (only still on the car):

2. Disconnect the hatch wiring.
This part isn't fun but unless you have a new harness to install, it is necessary. (Please only cut the harness in the most extreme situations).
You have two choices (neither is pretty).
i). Remove the hatch wiring from the hatch. To do this you will need to remove the hatch trim.
Hints to do this are found in this Hatch Trim Removal and Repair post: http://forums.quattroworld.com/s4s6/msgs/93572.phtml
Now you have access to the hatch wiring. Hints as to what goes where is found in this hatch wiring post: http://forums.quattroworld.com/s4s6/msgs/260654.phtml
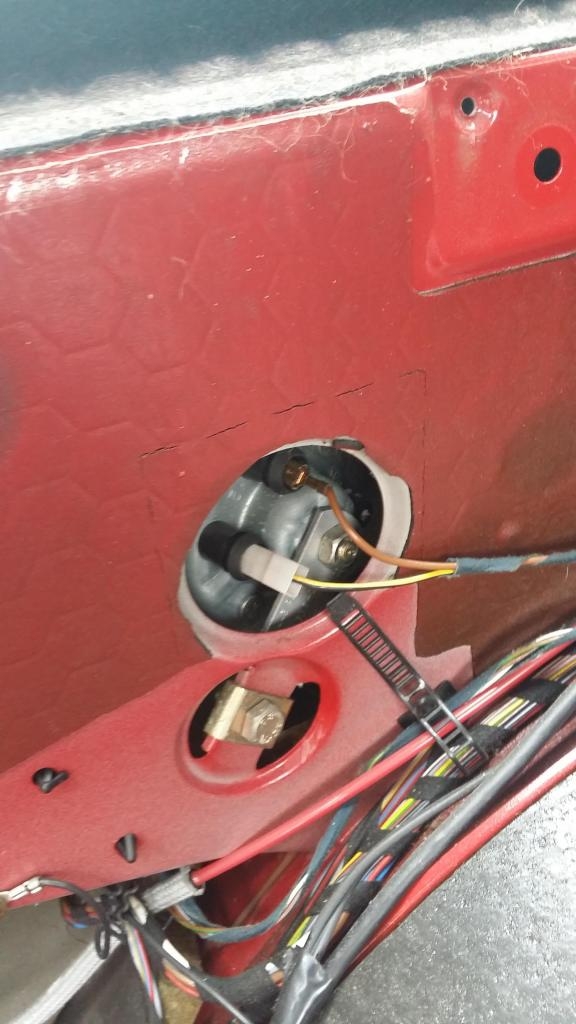
ii) Otherwise, you will need to disconnect the two hatch harness connectors which are behind the left side cargo hold cover by the alarm horn.
The two hatch harness connectors are attached to the avant body frame by the two black pins in the lower left corner of this alarm horn photo:
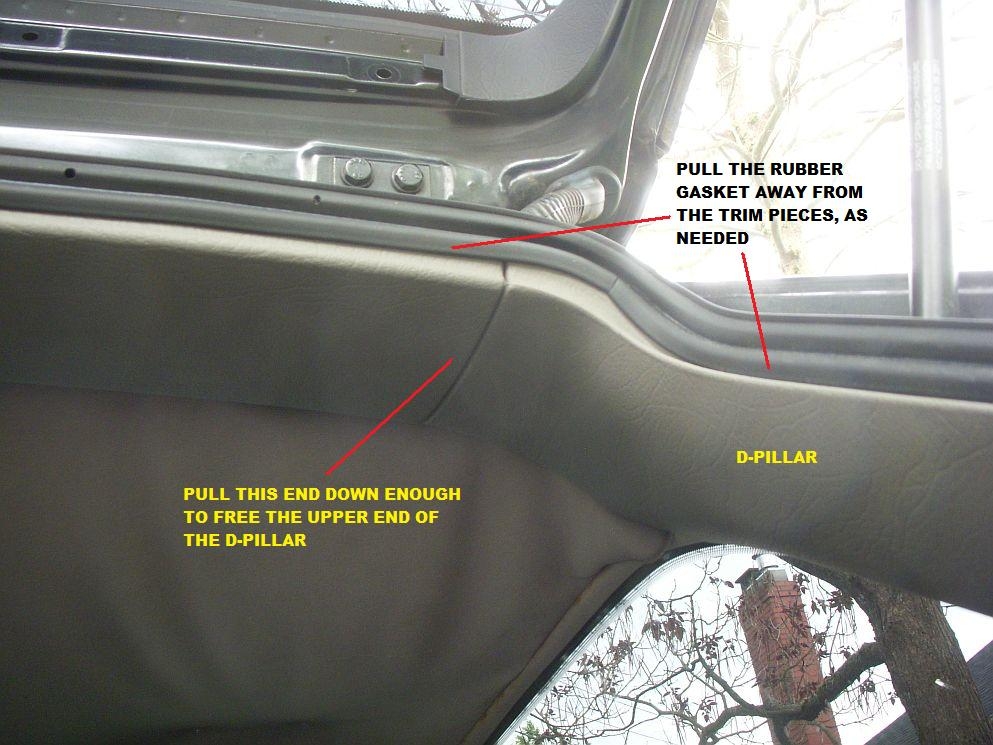
You can access the connectors and at least part of the hatch harness by removing the left side storage (or CD changer) cubby cover. With the cubby cover off you can see the black plastic pins and reach behind and feel the harness connectors. With them disconnected, you can start to remove the harness. However, you will need to remove the D-pillar cover to complete the task since there are a number of clips holding the harness as it goes up inside the D-pillar:
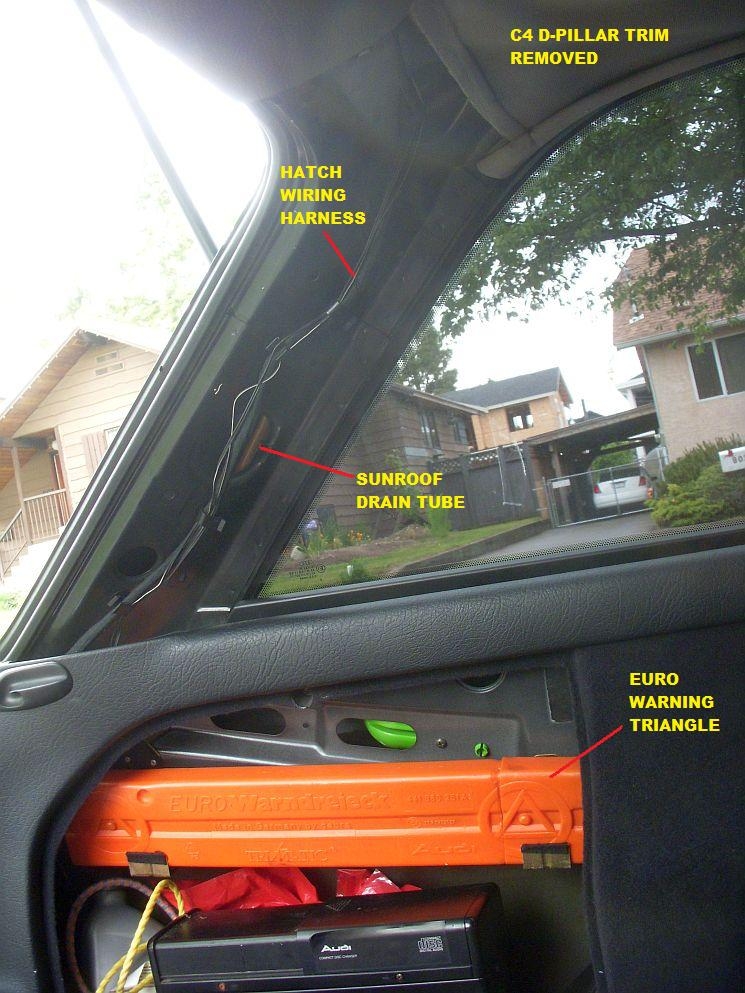
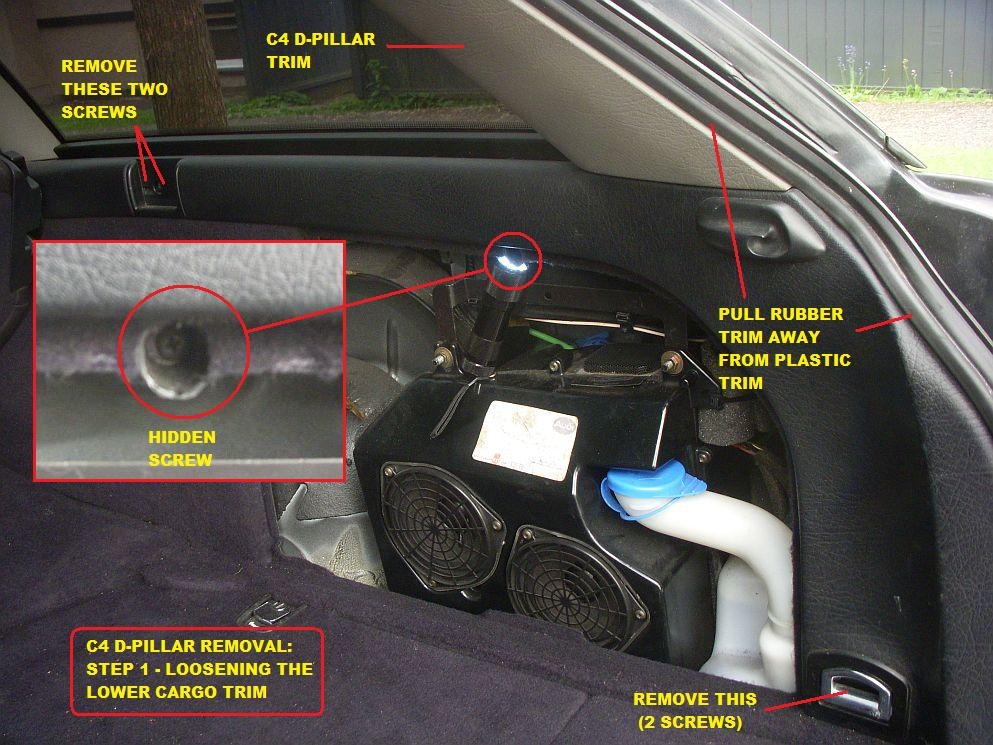
Removal and replacement of the D-pillar covers is found here:

Unfortunately there is still something else to be done before you remove the hatch.
3. Removal/disconnection of the hatch lock vacuum line and rear wiper washer fluid lines.
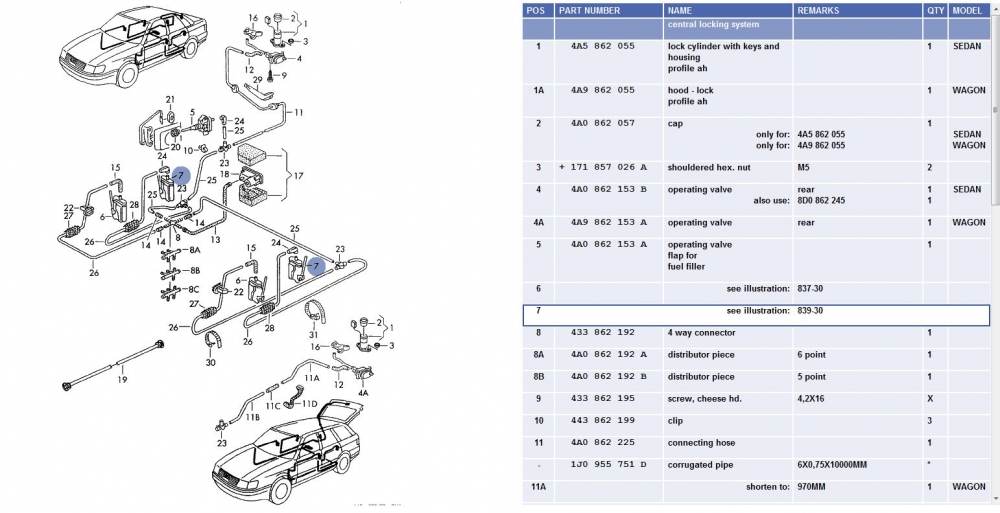
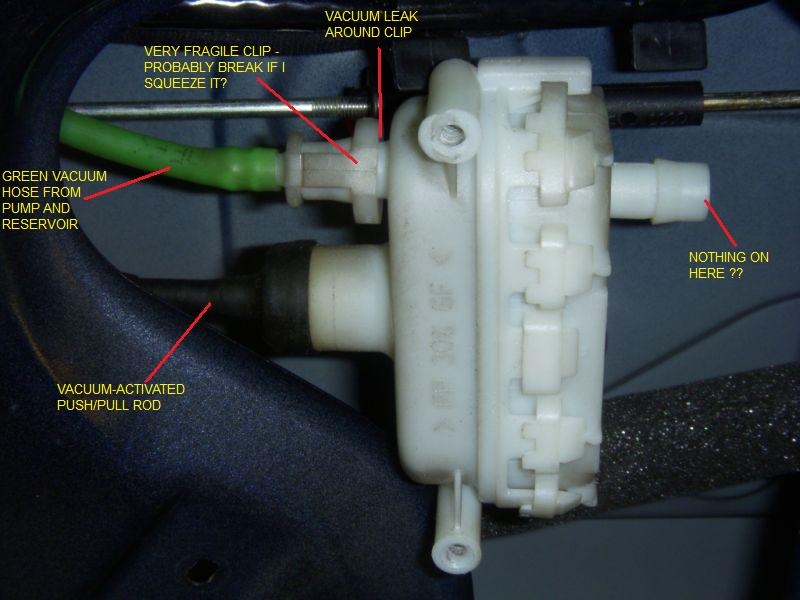
These two lines are on the right side of the hatch in the similar position as the hatch wiring on the left side of the hatch. The vacuum line is the green plastic tubing, the wiper fluid is a black plastic tubing.
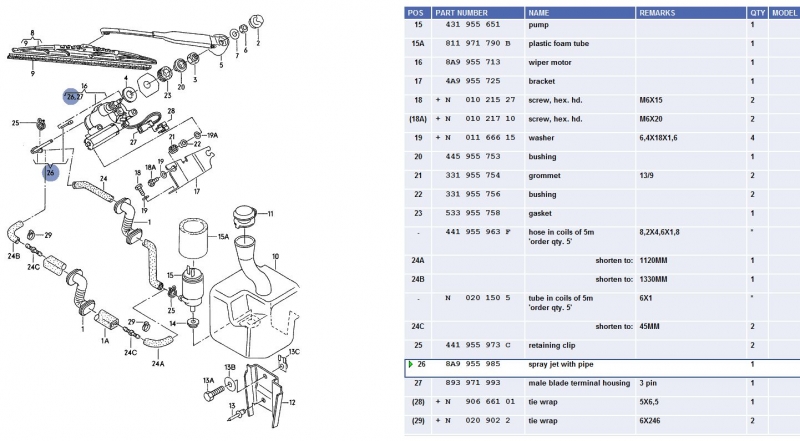
Rear Hatch Wiper components:
Central Locking Vacuum Line schematic:
Termination of the hatch lock vacuum line:
Hatch trim will need to be off and/or the D-pillar trim on the right side of the body. I do not have any photos of these (HINT, HINT) but they are there. Disconnect at the hatch or elsewhere (behind the cargo trim)
Okay now you are ready to tackle the hinges. (You might want to have a friend handy to help)
4. Removal of the hatch hinge nuts.
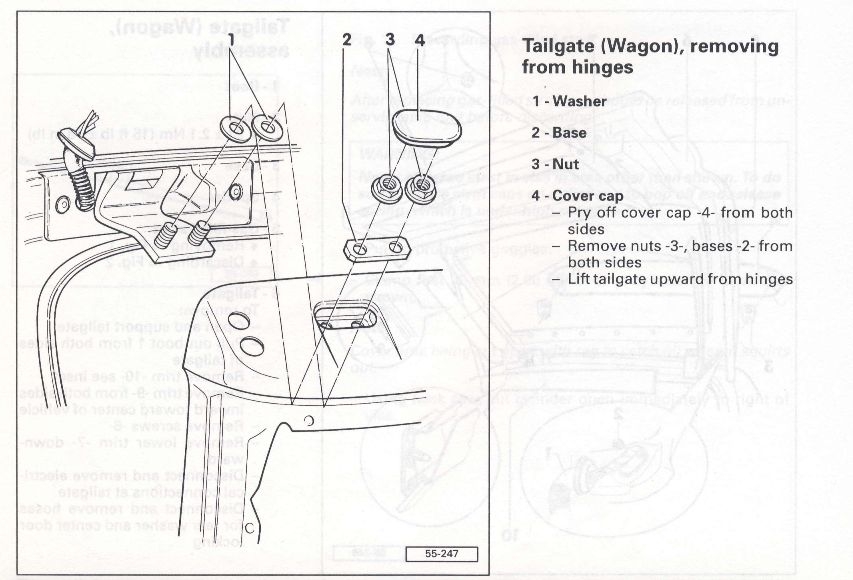
Remove the oblong black plastic cover (Item 4 below) and then remove the four nuts (2 per side). The hatch should be ready to be lifted off. (One person per side - handle with care and don't let it fall and break the glass).
The removed hatch will fit inside another C4 avant and apparently also inside a Mk.4 VW GTI (according to Cash68).
There is one issue that I unfortunately just discovered while putting this post together. It won't affect any NAmerica avants but it would affect me if I actually did want to do this. Here is the hint:
Anyway, hope it helps somebody somewhere sometime.
For example, you might like this style of hatch spoiler:
But you have this style of spoilerless hatch:
Removing the spoiler-less hatch is relatively simple. The hinge nuts/bolts are visible when you open the hatch.
The spoiler hatch is a bit more complicated.
The basic situation is shown in this diagram, showing the spoiler and the hinges.
Step 1: Removing the external spoiler.
Because the access to the avant hinge nuts is under the spoiler, you need to start with removal of the spoiler. Open the hatch. Remove trim piece 10 in the diagram below. Disconnect the third brake light wiring. Now pull back the rubber wiring gaiter where it comes out of the hatch. This gives you access to the Item 21 nut in the diagram above (which is Item 2 in this diagram):
Remove the two nuts. The spoiler will be loose. Put the hatch back down and lift the spoiler up. Manage the third brake light wire (disconnect locally and/or pull through grommet) and lift the spoiler off the hatch.
You should be looking at something like this (only still on the car):
2. Disconnect the hatch wiring.
This part isn't fun but unless you have a new harness to install, it is necessary. (Please only cut the harness in the most extreme situations).
You have two choices (neither is pretty).
i). Remove the hatch wiring from the hatch. To do this you will need to remove the hatch trim.
Hints to do this are found in this Hatch Trim Removal and Repair post: http://forums.quattroworld.com/s4s6/msgs/93572.phtml
Now you have access to the hatch wiring. Hints as to what goes where is found in this hatch wiring post: http://forums.quattroworld.com/s4s6/msgs/260654.phtml
ii) Otherwise, you will need to disconnect the two hatch harness connectors which are behind the left side cargo hold cover by the alarm horn.
The two hatch harness connectors are attached to the avant body frame by the two black pins in the lower left corner of this alarm horn photo:
You can access the connectors and at least part of the hatch harness by removing the left side storage (or CD changer) cubby cover. With the cubby cover off you can see the black plastic pins and reach behind and feel the harness connectors. With them disconnected, you can start to remove the harness. However, you will need to remove the D-pillar cover to complete the task since there are a number of clips holding the harness as it goes up inside the D-pillar:
Removal and replacement of the D-pillar covers is found here:
Unfortunately there is still something else to be done before you remove the hatch.
3. Removal/disconnection of the hatch lock vacuum line and rear wiper washer fluid lines.
These two lines are on the right side of the hatch in the similar position as the hatch wiring on the left side of the hatch. The vacuum line is the green plastic tubing, the wiper fluid is a black plastic tubing.
Rear Hatch Wiper components:
Central Locking Vacuum Line schematic:
Termination of the hatch lock vacuum line:
Hatch trim will need to be off and/or the D-pillar trim on the right side of the body. I do not have any photos of these (HINT, HINT) but they are there. Disconnect at the hatch or elsewhere (behind the cargo trim)
Okay now you are ready to tackle the hinges. (You might want to have a friend handy to help)
4. Removal of the hatch hinge nuts.
Remove the oblong black plastic cover (Item 4 below) and then remove the four nuts (2 per side). The hatch should be ready to be lifted off. (One person per side - handle with care and don't let it fall and break the glass).
The removed hatch will fit inside another C4 avant and apparently also inside a Mk.4 VW GTI (according to Cash68).
There is one issue that I unfortunately just discovered while putting this post together. It won't affect any NAmerica avants but it would affect me if I actually did want to do this. Here is the hint:
Anyway, hope it helps somebody somewhere sometime.