Announcement

Collapse
No announcement yet.

94 2.6 V6 Manual Quattro Avant restoration project

Collapse
X
 
  • Filter
  • Time
  • Show
Clear All
new posts

  • #16
    Was round at my parents and popped into the roofspace to remind me what the leather interior looked like It was retrimmed by arec in Ballymena back in 2008 and got minimal use before being taken out of the car a year later, so they're in good condition but absolutely stinking
    So im open to suggestions of detailers that want to try and clean/revive them!

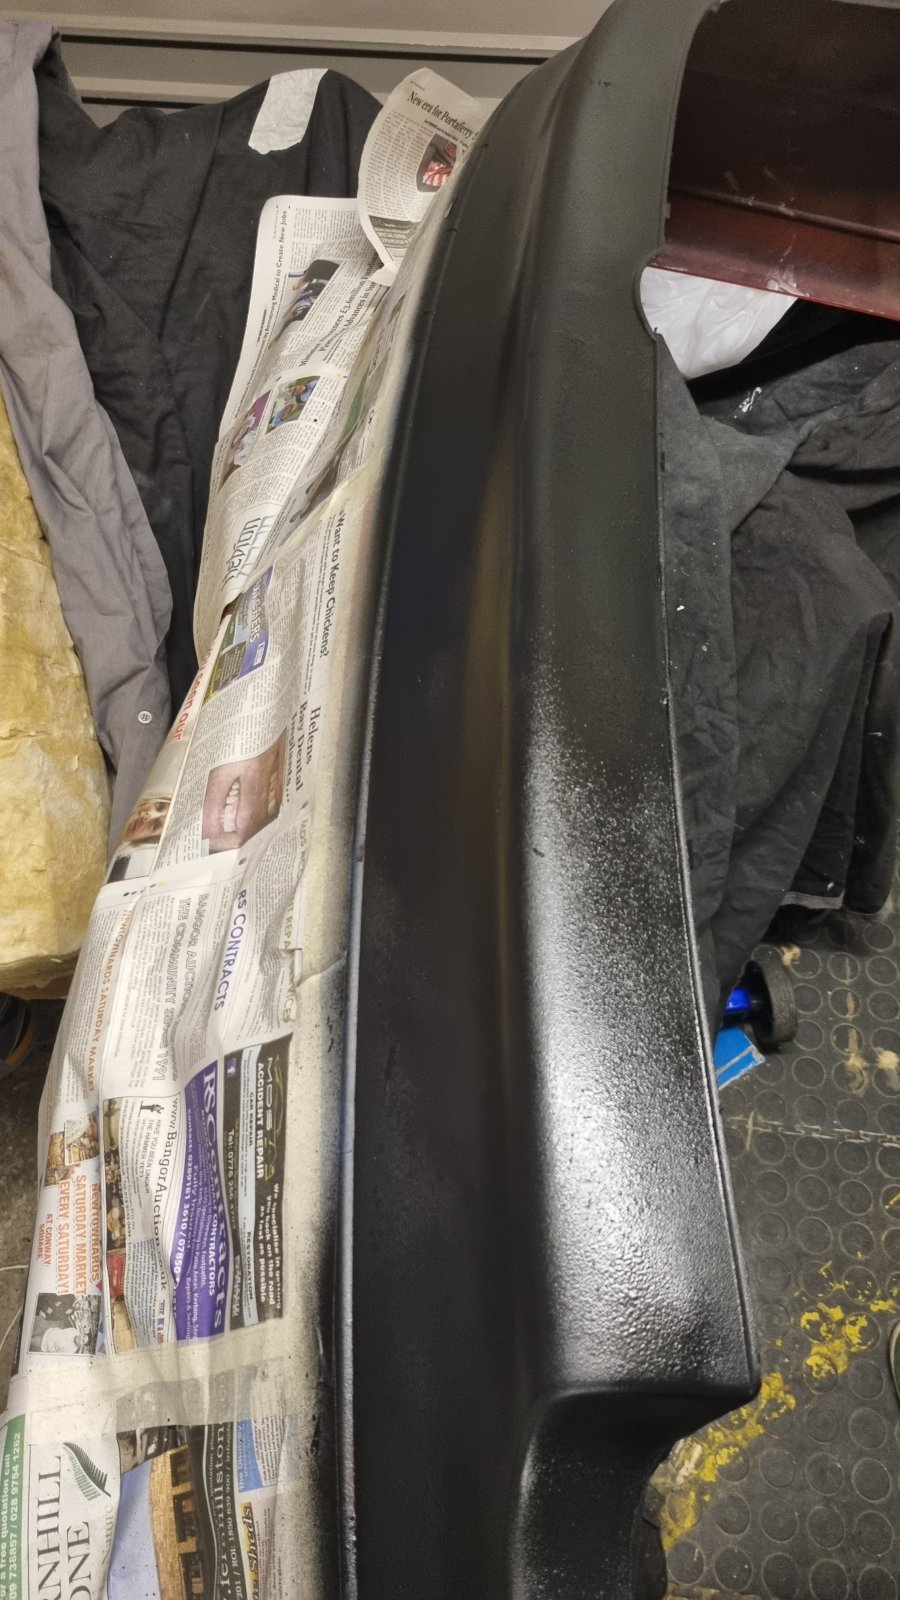
    Got the rear bumper painted with the textured bumper paint.

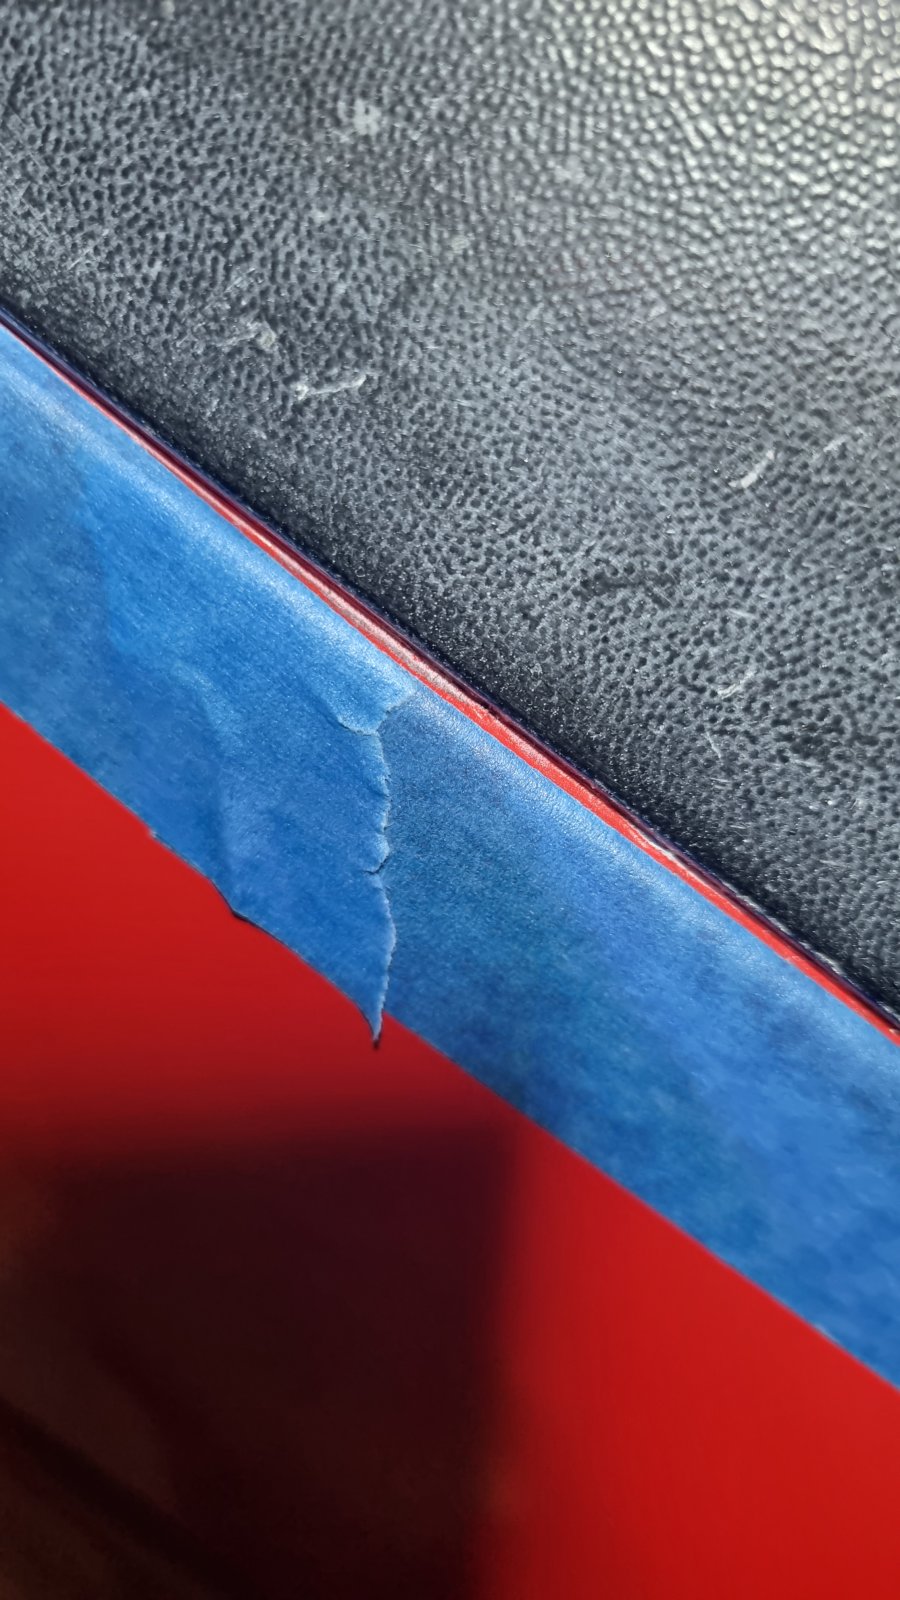
    The indent where painted and black meet needed some fine tape work to ensure a nice straight line as there were some patches where the red hadnt covered.

    The repair where the tow bar was on the tdi prepped with filler and ready to be gone for good

    Blooming love how this paint covers so easy

    towbar repair gone

    Peeled the tape off and loving the results, looks like new

    I was only planning on doing the back bumper, but it came out so well I couldn't resist doing the front

    Taped up, newspaper on

    These bits hold on some lower grills, you can't see them, but my ocd wanted them black just so I could sleep better at night

    Really pleased with how these have turned out. Lots of these s2 bumpers end up completely colour coded which does give it a more modern look. But I adore the period correct look with the black.

    Threw the grills and fogs/indicators on just for a pic

    The next day I sanded and polished the bonnet and wing, and fitted the front bumper. Stuck the original grill on although I've a rs2 copy grill coming from Latvia for it along with a splitter.

    Need to have a hunt through the bits i have in dads garage to see how i fixed the s2 bumper onto the tdi back in 2009 as its not got the same slider brackets the standard bumper slides on with. Might have to try cutting them off the standard and bonding them on.


    Can't fit the rear bumper yet as the car came with a towbar, the tdi had a towbar so there's a pair of brackets needed to fix the bumper on. Of course it's specific to the s2 and rs2, and of course Amy for sale here are a fortune. But I found them for cheap on a Latvian breakers site, unfortunately they wouldn't post to UK. So I got them delivered to the man in Latvia that's making my grill and splitter and he's throwing them in the box for me.
    Time waits for no man. Unless that man is Chuck Norris.

    Comment


    • #17
      Good lord it's been a while since I updated this! That said, it doesn't feel like there's been much progress since, but I'll hunt out the photos..
      De-wipered the tailgate

      Number plate lights weren't working, on closer inspection one had been replaced with an under bonnet light with a switch

      Wiring on both had seen better days

      Changed the wiring ends and fitted some led replacements. Battery was flat at this point so couldn't show them illuminated lol

      You'll just have to trust me that they work and look much better Might actually get round to getting some new plates made too!

      Fitted the new gearknob from @builtbybasil


      Turns out the front s2 bumper is held on with rivnuts into the wing rather than a bracket on the regular bumpers.

      The scraped paint from where I had to tighten in the rivnut (didn't have the correct rivnut gun so used bolt/nut) makes me appreciate all those people who have built proper show cars without marking the paint when building it back together.
      Bumper on and lined up perfectly


      I then set about starting to try and polish/flatten out the paint on the new painted parts. Theyre far from perfect, but kind of match the rest of the oem paint condition. Should shine up alright with a bit of tlc

      more to follow, i'll try to keep this up to date. This brings me up to the start of November.

      I'm really enjoying just pottering away at it in the evenings, taking my time ove all the little details, rather than the old days of rushing two weeks before a show!
      Time waits for no man. Unless that man is Chuck Norris.

      Comment


      • #18
        Drove the car over to my mechanics in Bangor. He changed the gearbox and diff oils, tried to bleed the brakes some more, change a rear arm and change the fuel filter.
        For some reason on the quattro models they put the filter strapped to the tank, so you need to drop the fuel tank to change it. I've no photos but he reckons it hadn't been changed in a very long time!

        Having a bit of a mare with the rear arms. Autodoc app suggested one that would fit so I ordered them, only for them to be too long

        Hopefully I've got the right part number ordered this time and once my refund is through onto my autodoc account I'll order them up. Until then I can't get it the alignment it needs. With changing 75% of the chassis it's safe to say its all over the place!

        Began to focus my attention to the interior, started to strip it out. I've got a full leather interior and the loom for electric windows on all four doors to fit.
        Previous owner had fitted rubber sheeting under the mats


        Which meant the carpet is in incredible condition for the age and mileage

        Drivers mat was worn at the heel as all mats do...

        But thanks to the rubber sheet the carpet is hole free!

        Driver seat foam is done. When the budget allows I might get the fronts retrimmed in leather to match my biscuit leather as these are a much more supportive sporty seat than the ones from the tdi. For now they're getting lifted out and stored.

        Seats out

        Started stripping down the dash and centre console


        I spotted a post on one of the s2/80 owners Facebook groups asking if anyone had the little brackets that fix the side skirts on as they are no longer available. I messaged the guy and now one of my brackets are off to Ohio USA to be scanned and 3d printed.

        Nothing in it for me, but with cars this age, we need to to all we can to keep them on the road!
        Time waits for no man. Unless that man is Chuck Norris.

        Comment


        • #19
          So started the tedious process of removing the existing electric window loom from both doors all the way back to the fuse box, including in behind the dashboard tucked up at the back of the heater blower

          In at the fuse/relay box is a bit of a mess

          Started off by running the new loom to the rear drivers side door

          Then ran it down along the oem wiring route

          You can see in that photo how the glue from the door card has given up and the cloth is no longer sticking That orange foam/glue sticks to everything

          Drivers door needed two plugs out and five plugs in. Which is no mean feat through the tiny opening in the door jamb


          Ended up needing to take the carpet out and move the sound deadening out of the way to get access to the loom where the transmission tunnel meets the heater blowers. Loom was tucked up tight, was worried I was going to have to take the dashboard out, but thankfully got it all out and swapped the new loom in.

          This has all been done as always in my driveway, I've setup the tripod floodlight inside the car so I can work in the dark

          So after a lot of faffing about I finally had everything wired up and miraculously it worked!

          Tried uploading videos of the rear windows going up and down but couldn't get them to load. But you get the idea

          While the carpet was out I gave it a good hoover

          Around the drivers footwell could probably do with a proper shampoo/wetvac but it came up pretty good for 28years old and 184k miles

          Also threw in the start of the leather interior just for fun


          That brings us right up to date, I've most of the dash all built back up, I want to tidy up the loom around the relays and fuse box then I'll focus on the seats and doorcards. Headcloth needs rerrimmed/glued at some point too.
          Time waits for no man. Unless that man is Chuck Norris.

          Comment


          • #20
            I had a set of mk4 golf heated seat elements sitting that I originally bought to run heated seats in the anni, but they wouldn't have matched up to the recaros. But the layout matched up with the leather seats I have for this, so I started looking at the wiring

            Similar wiring colours but different plug, so I chopped the plug off the mk4 elements and tried them roughly with the audi plug to make sure they worked. Glad I did as they just weren't working! Saved me the hassle of trying to get the leather off!
            So I threw in the (unheated) leather front seats

            I'm loving the contrast of the biscuit against the red, bit of an old school ferrari colour combo going on!
            Gear gaiter and the built by basil knob with its homage to the audi sport colours fitted

            Blaupunkt head unit in, although I need to swap some wires about to get the power to it

            Amazing how small they are when there's no cd player!
            Need to get the leather and foam stuck back onto the door cards and get them fired back in.

            I then turned my attention to the engine.
            Autodoc bringing the goodies...


            There is a fairly fresh radiator in the car which suggests a previous one had a leak. in the pipes/expansion tank has hints that Radweld has been used

            So plan is to change expansion tank and oil cooler, and generally flush out as much of the system as i can in a bid to make the cooling system as efficient as possible.

            Old expansion tank had seen better days

            Gave in behind the tank a clean..


            This is never going to be a show winner, but im just trying to tidy things up with a bit of attention to detail as i go..

            Should probably have not sprayed the driveway stones

            Much Better..

            Time waits for no man. Unless that man is Chuck Norris.

            Comment


            • #21
              Engine maintenance work now

              The oil cooler on these is prone to causing heating issues, so it got replaced

              The bottom half of the engine has two different gaskets, both of which appear to have been leaking over the years. So in a bid to make the engine as healthy as possible I decided to change them both

              56 bolts, one driveshaft and a starter motor later and they were both out

              As always, awkward as hell when your only at axle stand height, in the dark. Hard to get a decent photo but you get the jist.

              Sump cleaned and new gasket on

              New oil cooler and filter fitted

              The bolts along where the gearbox meets the engine were exceptionally hard to access. One of them fell off the socket on the way back in, landing inside the gearbox Bell housing
              Thankfully my mechanic leant me a super strong tiny bendy magnet from a dsg service kit and I was able to retrieve it

              Oil and coolant filled up and its good to go. I've got rocker cover gaskets to change, but I want to do a bit of inlet port matching and a few mods to the inlet/crankcase breathing but that can wait till after dubshed.
              Time waits for no man. Unless that man is Chuck Norris.

              Comment


              • #22
                Engine back together and running it was time to focus on the door cards.
                Original interior suffered from the same issue they all do, foam/glue disintegrates over time and the cloth hangs off.

                I'd had the s2 door cards retrimmed by arek in Ballymena back in 09 to match the leather of the seats he'd done in 08. But sitting in an attic for 14 years meant they too were starting to come apart.
                What arek appears to have done is glued the leather to the cloth in a bid to avoid touching the sticky foam.

                So step one was to get the sticky foam off the plastic of the door cards. Power washer took 95% of it off

                Then scrape it off the fabric/leather

                Then cut some closed cell polyethylene foam to the required size. Closed cell so when the spray glue is applied the foam doesn't soak it all up and loose its shape when you try to push it down.

                Taped off around the area to be sprayed with masking tape

                Sprayed with glue, then put the foam on.

                Sprayed that and the underside of the fabric/leather.

                Then took off the masking tape And stuck the leather down

                Fit all handles and speakers back on. Then repeat on the front cards


                Finally started to fit the rs2 carbon trim that's been in a box for 15 years
                Time waits for no man. Unless that man is Chuck Norris.

                Comment


                • #23
                  So the front door pockets on the s2 door cards I had started trying to make fibreglass speaker pods back in 08, but they weren't working out so ended up beyond using
                  So I carefully drilled out the pockets from the quattro script door cards

                  This left me with small bits that went into the holes that I was able to melt into the s2 door cards


                  Holding well

                  Factory insulation and foam block installed


                  So back in 08/09 when I'd bought the s2 door cards and electric window kit I'd managed to get some of the rare (even back then) carbon trim with the blue weave. I think I'm right in saying its just from the rs2 but it might have been on the s2 too?

                  Either way, they're now like hens teeth and a Kings ransom if you can find a set!


                  And finally after 15 years they're fitted in the car


                  Obviously back when I had the retrim the tdi 80 was metallic blue so it contrasted well. My wife hates the biscuit leather against the red, but I love it! There's a 80s ferrari vibe going on
                  Time waits for no man. Unless that man is Chuck Norris.

                  Comment


                  • #24
                    Front window was knackered, delaminating, pebble dashed with stone chips making it hard to see out of and the wipers sounded like sandpaper

                    So car got booked into auto windscreens and motorspares in Bangor for a new screen and trim.


                    Then I brought it home and got it up on stands to fit a new droplink, clean the arches and paint the calipers

                    Before


                    Good snowfoam and agitate with a brush...

                    And they came put amazing! Could do with a few hours of tar remover, but they're looking good for the age of car! Calipers painted black as I think red just wouldn't look right


                    I think next winter when it comes off the road I'll do a full chassis refurb, but for now I'm happy with that!
                    Time waits for no man. Unless that man is Chuck Norris.

                    Comment


                    • #25
                      Got the car booked into streetracer in Bangor for a full stainless exhaust.

                      Original one was like a patchwork quilt and the standard cats were hanging quite low, which meant it was catching on my driveway. And there was definitely at least one blow out, meaning the car wasn't running 100%

                      With the car being pre 2000 it didn't need a cat for mot, so the decision was made to do a straight pipe to a backbox

                      It's a bit loud and obnoxious but it's definitely breathing a lot better. Haven't really driven it enough, but there is space under there to fit a resonator in the future if I feel the need.

                      Had it booked for mot on 18th March which it passed with no issue, which I crazy considering how much has changed

                      My classic insurance policy was priced off 1500 miles a year, but with it being off the road for all the work it's covered a whopping 200 miles!

                      Oh and I finally fitted the centre caps to the wheels. When nuluk did the refurb the centres were very hard to remove even before being mounted to the car, so it was always a fear that with all the work being done that someone would break a centre trying to rip it off to get a wheel off. But hopefully there should be no need for the next while for the wheels to be off

                      Time waits for no man. Unless that man is Chuck Norris.

                      Comment


                      • #26
                        Nice work. Enjoyed reading.
                        Nothelle S2 Avant
                        Black Ur project
                        Ocianic Ur project gone
                        S2 Coupe project gone
                        Urs6 plus project gone

                        Comment


                        • #27
                          Cheers, its been a long year of tinkering since i bought it in May 22, but at least now im able to get out and enjoy driving it! V6 is a lovely engine, obviously not as nice as the 5cyl turbo, but sadly S2 avants are way out of my budget now!

                          Next up was the s2 sideskirts i'd refurbed last year and the new lower door trims

                          Removed the existing sill covers

                          Those little squares are used to screw down the skirts

                          You might recall I'd sent a plastic bracket to ohio for 3d printing. He'd asked me for the measurements of where it attached, so once we'd them riveted on I took a few photos for him

                          Some of the old s2forum posts suggest you can fit the skirts without these but I had them, so wanted to have everything as oem as possible

                          Bottom of the skirt utilises holes that come with bungs in them on the lesser cars

                          Which gets filled with a plastic part that's no longer available, so I'm using b5 rs4 ones as they're practically identical apart from that rectangular bit at the front

                          Little plastic plugs into the holes


                          Skirt on, metal clips fitted and screwed into the plugs.

                          There's 8 of these on both sides, but I've only 5 for each side and they're not available anywhere. But i made do with 3 on the front door bit and 2 on the rear. Holds it secure and with the sill cover on you'd never know

                          Bung plugs on bottom get these little plastic screws fitted. Again NLA but someone in Norway 3d prints them, not cheap but again when trying to do things right you need to have deep pockets


                          Lower door mouldings on and doors closed


                          They're a very subtle addition, but I love how they compliment the lower bits of the bumpers

                          Just needed to get some decent double sided foam tape to fit the bits of trim to the wings and quarters.
                          Time waits for no man. Unless that man is Chuck Norris.

                          Comment


                          • #28
                            Fitted the last bits of trim to the skirts...

                            These bits got a hit with the textured paint

                            Fits on the end by the rear arch


                            The sill covers had foam sticky tape that was at least 16years old, which needed picked off so I could fit some fresh tape

                            Soul destroying job

                            New tape on and fitted


                            The Latvian that made my carbon rs2 grill also made these carbon copies of the 80 competition splitter. For the money I couldn't resist. Fitted to the bumper with some self tapper screws


                            This photo from dubshed shows the carbon from the splitter and grill, goes well with the black headlights


                            When I'd taken out the carpet to fit the window looms I'd had to break the footrest.

                            So a replacement was bought from ebay

                            And fitted

                            Obviously interior needs a good hoover, but a vast improvement
                            Time waits for no man. Unless that man is Chuck Norris.

                            Comment


                            • #29
                              This was such a juicy read, I must thank you for going into great detail.
                              I'm glad you could share your journey with us. You must be really proud, it's a fantastic looking 80!

                              I'm actually very jealous

                              Comment


                              • #30
                                Huge effort put in and refreshing to see a V6 getting the love it deserves. I have owned a 2.6 fwd avant for 22 years and have looked at what's possible, i think you'll get at least 20bhp extra port matching if you follow the recommendations on 12V.org ( i think it is) which will make all the difference and being quattro you'll need it. Great job.
                                96 URS6 plus speck saloon
                                96 URS6 plus speck estate
                                94 2.6 80 Avant
                                99 2.8 final edition Cabriolet

                                Comment

                                Working...
                                X