
 Tweet
Tweet
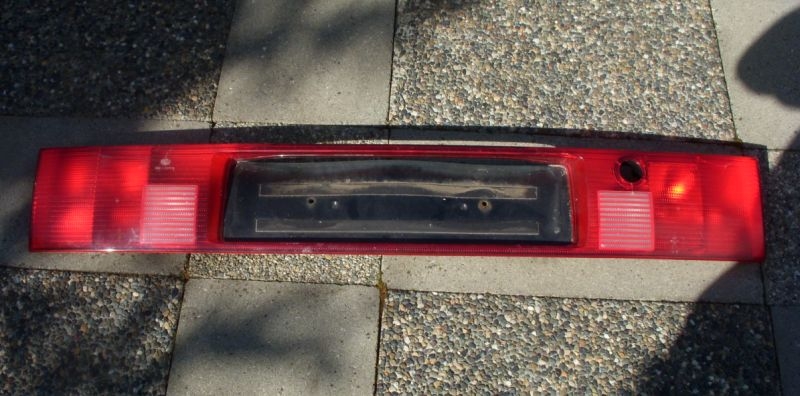
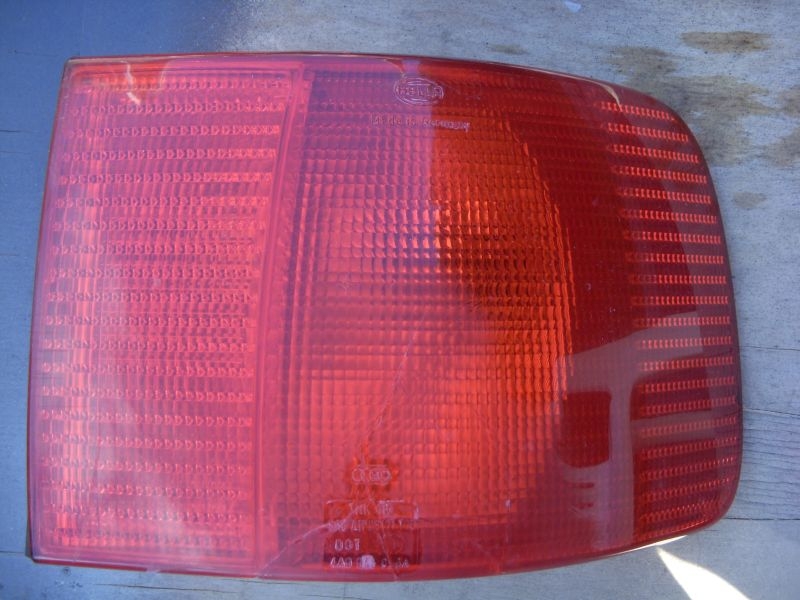
I recently got a parcel from the UK (thanks Tristan/Merlin) with this in it:
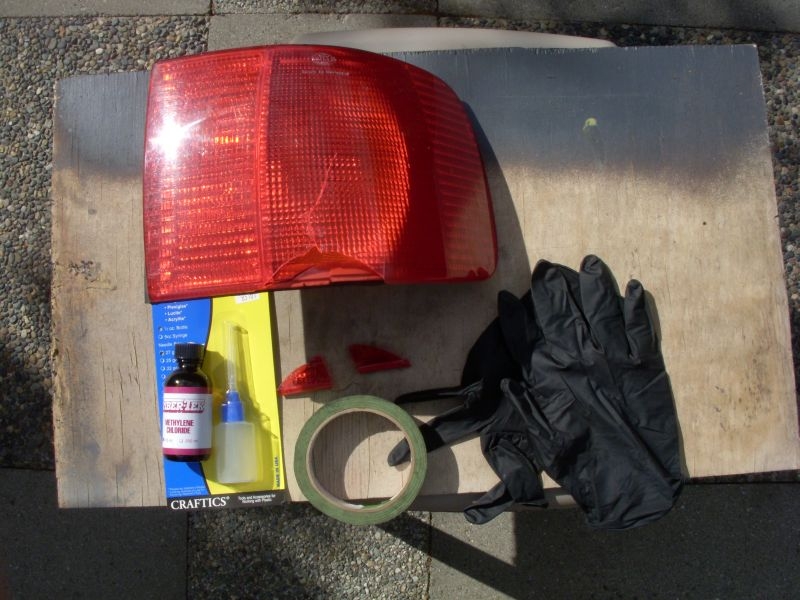
I knew it had a couple of cracks in it before I bought it. I figured that I would be able to improve it using something like methylene chloride to seal/weld the cracks. Today, I went to my local fibreglas/acrylic plastics supplier (same one that I bought the carbon fibre (real) and surfboard resin to do the climate control surround.) Yes they had methylene chloride in small quantities and the application needle (27 gauge). Bought a small bottle of the methylene chloride and needle/bottle applicator for $9 taxes in. Decided to try it out on the broken avant corner taillight that I replaced back in February. Found the two major pieces (in the shadow, just above the masking tape)(one small piece is gone to meet its maker - no biggy). Here are the "tools", including the nitrile gloves.
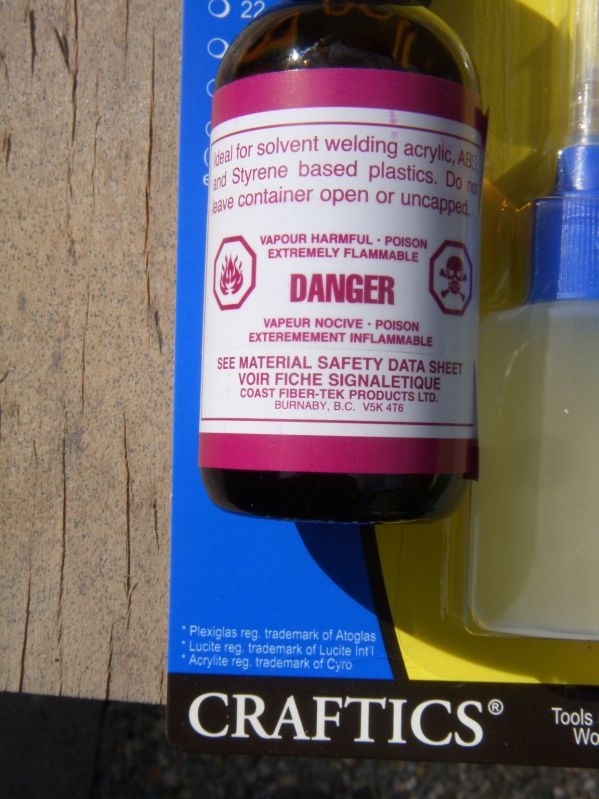
Here is a close up of the bottle showing the list of plastics that the methylene chloride works with (acrylic, ABS and styrene - hey those taillight lenses are very likely styrene!!)
You load the methylene chloride (MCl for the rest of this write-up) into the syring bottle by squeezing some air out of the bottle and then releasing, letting the bottle suck the liquid (very thin - not viscous at all (which is good)).
I started with the substructure (the solid colour plastic). Snapped the pieces into place and dribbled the MCl along the crack, relying on capilliary action to sucK the MCl into the crack (which it does). Welded up real quick. Then I snappped the two pieces of transparent red plastic into place. I thought I was going to need masking tape to hold them in place but they fit together so well that I didn't need or use the tape. Then, holding the taillight from behind, I tilted the syringe bottle and aimed the tip of the needle at the cracks, dribbling MCl into the cracks, manipulating the tailight to minmize (I thought) the runs. Wasn't perfect. The MCl is like water and it does run. (I will have to be a little more cautious when I do the Euro center). Not really a big problem, even where there were runs. Most were clear runs, some were a bit cloudy (might have been a reaction with the solvent I had used to remove the glue left when I removed the clear tape that I had patched the taillight with back in January). Don't know.
Here was the result of the first trial:

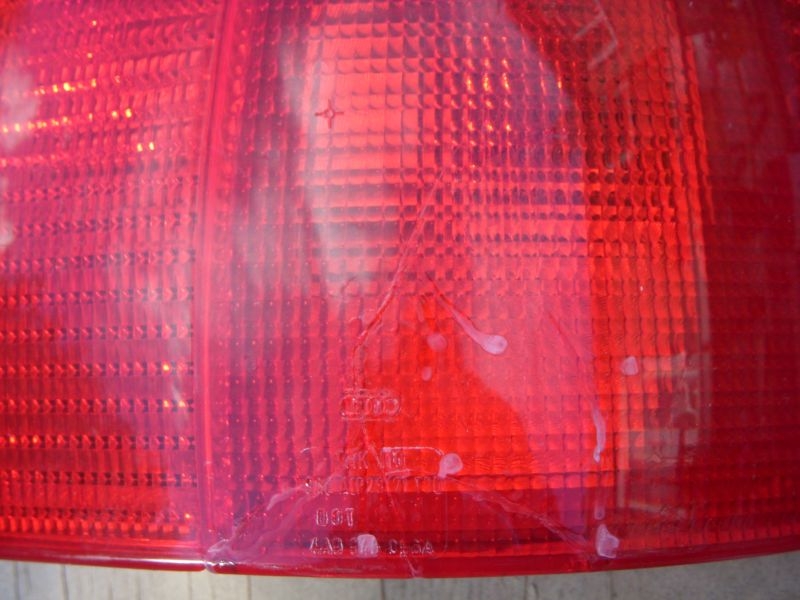
Here is a close-up the "fixed" crack and the runs (some clear, some cloudy):
The MCl will not fill in major gaps, it just goes into the tight cracks and solvent welds them. Since this taillight had lost some tiny chunks along the crack lines, the end result is not perfect. But it is probably water tight.
I couldn't find the piece of 2000 grit wet and dry sand paper that I thought I had so I used a small bit of 1200 grit that I did find. About 4 minutes with that resulted in this:
Could use some 2000 grit and polish to make it pretty.
I pushed (tentatively) on the cracks where the two pieces were installed and they seemed quite strong (enough). Not saying that I would live with this as a final product but it definitely was better than some "fixes" I saw on the internet.
So, as a first trial, I am happy, not win the lotto happy but happy enough to move on to the Euro center. The Euro center is nowhere near as bad as the avant corner so the result should be better. I will pick-up some 2000 grit before I start to fix it.
BTW, I did this outside on the patio because huffing MCl is not good for your liver (or brain probably).
I knew it had a couple of cracks in it before I bought it. I figured that I would be able to improve it using something like methylene chloride to seal/weld the cracks. Today, I went to my local fibreglas/acrylic plastics supplier (same one that I bought the carbon fibre (real) and surfboard resin to do the climate control surround.) Yes they had methylene chloride in small quantities and the application needle (27 gauge). Bought a small bottle of the methylene chloride and needle/bottle applicator for $9 taxes in. Decided to try it out on the broken avant corner taillight that I replaced back in February. Found the two major pieces (in the shadow, just above the masking tape)(one small piece is gone to meet its maker - no biggy). Here are the "tools", including the nitrile gloves.
Here is a close up of the bottle showing the list of plastics that the methylene chloride works with (acrylic, ABS and styrene - hey those taillight lenses are very likely styrene!!)
You load the methylene chloride (MCl for the rest of this write-up) into the syring bottle by squeezing some air out of the bottle and then releasing, letting the bottle suck the liquid (very thin - not viscous at all (which is good)).
I started with the substructure (the solid colour plastic). Snapped the pieces into place and dribbled the MCl along the crack, relying on capilliary action to sucK the MCl into the crack (which it does). Welded up real quick. Then I snappped the two pieces of transparent red plastic into place. I thought I was going to need masking tape to hold them in place but they fit together so well that I didn't need or use the tape. Then, holding the taillight from behind, I tilted the syringe bottle and aimed the tip of the needle at the cracks, dribbling MCl into the cracks, manipulating the tailight to minmize (I thought) the runs. Wasn't perfect. The MCl is like water and it does run. (I will have to be a little more cautious when I do the Euro center). Not really a big problem, even where there were runs. Most were clear runs, some were a bit cloudy (might have been a reaction with the solvent I had used to remove the glue left when I removed the clear tape that I had patched the taillight with back in January). Don't know.
Here was the result of the first trial:
Here is a close-up the "fixed" crack and the runs (some clear, some cloudy):
The MCl will not fill in major gaps, it just goes into the tight cracks and solvent welds them. Since this taillight had lost some tiny chunks along the crack lines, the end result is not perfect. But it is probably water tight.
I couldn't find the piece of 2000 grit wet and dry sand paper that I thought I had so I used a small bit of 1200 grit that I did find. About 4 minutes with that resulted in this:
Could use some 2000 grit and polish to make it pretty.
I pushed (tentatively) on the cracks where the two pieces were installed and they seemed quite strong (enough). Not saying that I would live with this as a final product but it definitely was better than some "fixes" I saw on the internet.
So, as a first trial, I am happy, not win the lotto happy but happy enough to move on to the Euro center. The Euro center is nowhere near as bad as the avant corner so the result should be better. I will pick-up some 2000 grit before I start to fix it.
BTW, I did this outside on the patio because huffing MCl is not good for your liver (or brain probably).


Comment