
 Tweet
Tweet
Ciao all.
Usual issue that almost everyone knows the headlining cloth/fabric falling down.
You need to take the headlining out of the car.
As it has been stated many times already if you have a sunroof the task it's easier and doable, so far everyone even the guru of the forum like our friend Saltinot had said that if you have an Audi 80 Avant without sunroof you'll easily end up with a broken headliner support due to the amount of glue used by Audi employees in the 90s (I believe the Audi workers had at the time some under the table benefits frome the glue supplier ) this it's definetely true if you don't take the necessary care/procedure and patience.. Patience..... LOt of it... buckets... pallets loads of.... patience.
I did took out mine yesterday and I manage to take the thing out from the car pretty much without damage I then would like to share my positive experience to help everyone that will go for the task in the future.
Here we go:
What will I encounter...
You can be lucky or (as per my case) very unlucky.
If you're lucky you can find that your 80 was made the day that the Audi workers were running out of glue and your headliner will be glued to the metal roof just with a small amount of glue on the perimeter of it's rised section like this one from Horvath (hotibi here in the forum) an Hungarian chap that is being very helpful many thanks to him and credit for the photos.
So you're a lucky chap.... your metal roof will then look like this:
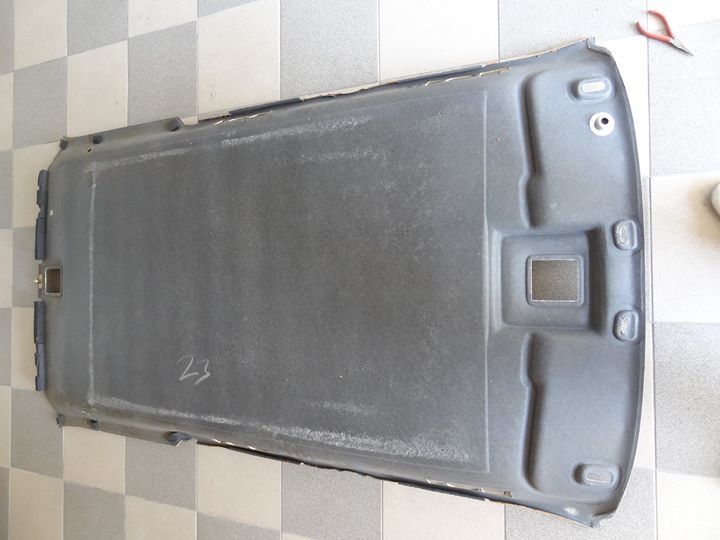
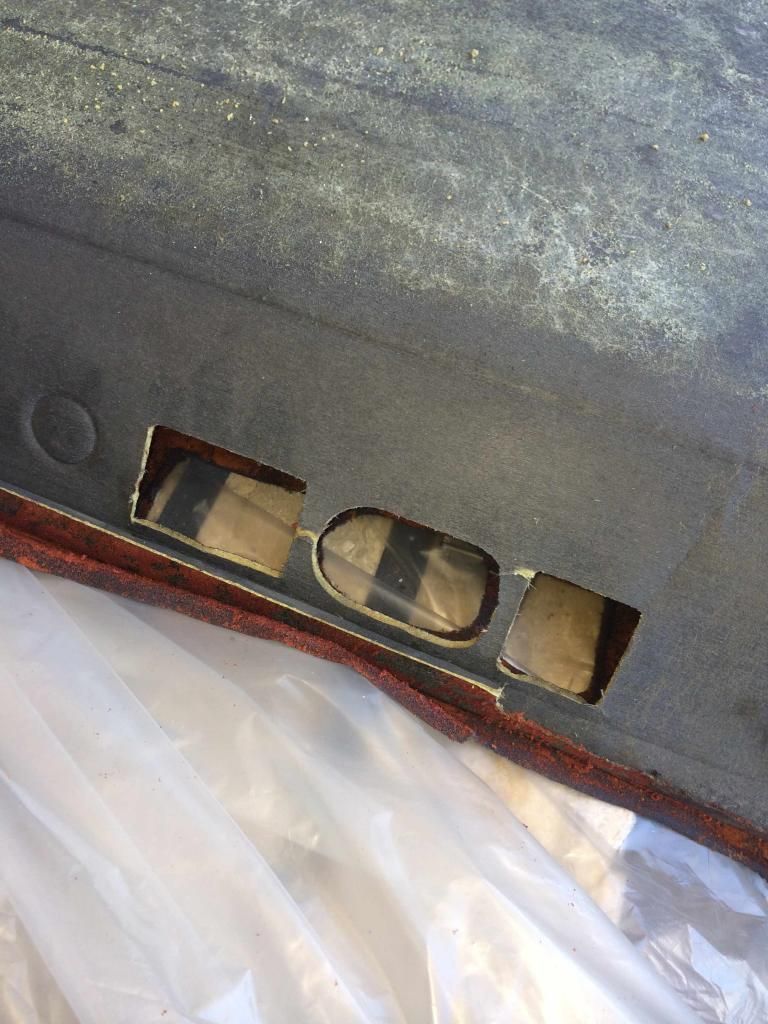
Ok let's see the darker side (you're a sad bast**d) new batch of glue delivered to the Audi/Porsche premises and employees enjoied the copious availablity and also played with the air powered glue dispenser...
This is what you'll end up with:

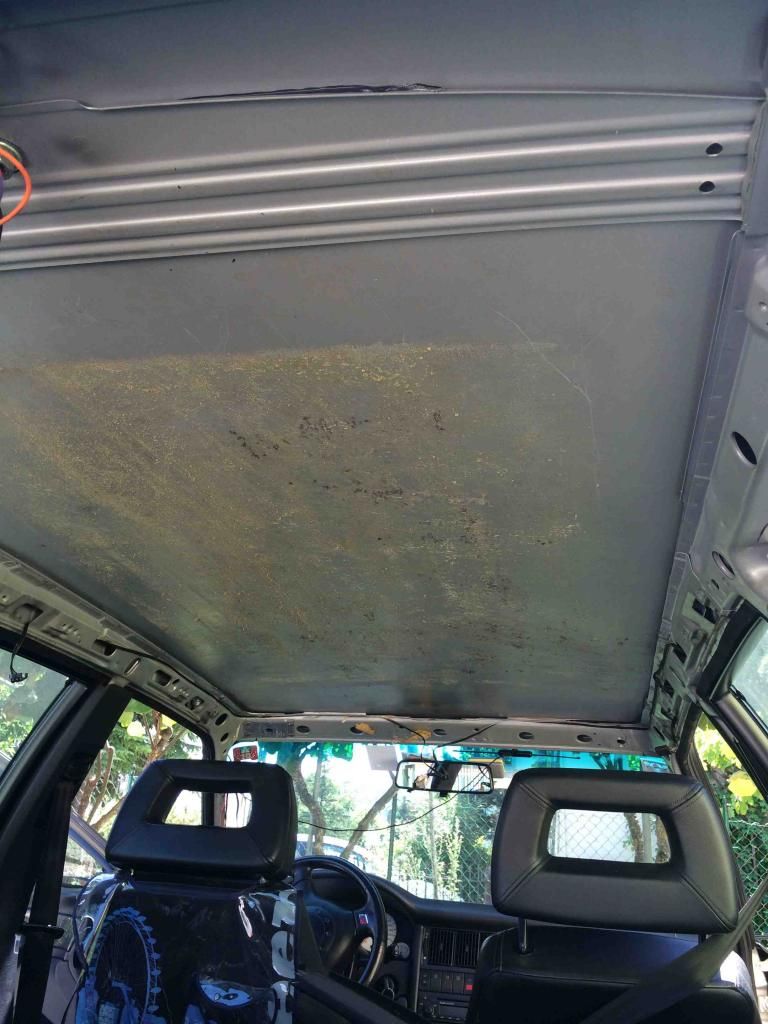
Your metal side:
Then the removing procedure
Be patient don't rush don't get nervous sit down and wait before you end up with a folded/broken headliner support that it's NLA.
1)I'm not telling you how you take off all the pillars covers sunvisors light holders etc etc it's been covered in this forum plenty of times if you can't work this out by yourself just leave the thing alone or go to a professionist just one thing to be very careful with the cover clips of the screws in the sun visors they do break easy.
2) Do not (!) attempt to do this job in a season different from an hot summer it helps a lot to park the car under a hot sun for few hours. or an hot gun with the possibility to exactly fix the temperature (80° celsius at most) can also be of help on from the outside of the metal roof.
3) Start from the back/boot side, as other had already said (i.e. Skull) do not attempt to work from the front or from (not yet) the sides.
4) get yourself a couple of cans of a good adhesive removal (Saltinot says 3M it's best and I trust him) and use it freely!
5) Cover/protect the inside of your car
6) Skull teaches again....If your cloth it's not completely down DO NOT take it off whilst in the car instead stick it up as best as you can with some tape so that the terrible orange agent (cit.) foam stays inside the thing as long as possible it sticks and it's nasty very nasty.
7) prepare a riser/support to hold the back part of the headliner (I used a two steps ladder and some rugs)
8) Make yourself a couple of the "miracle"custom tools.
Alright there's nothing special, nor unique in this how to, what got me to finally get the part coming out were this "miracle" tools.
You will assume as I did that you need long scrapers possibly joined to a broom stick to get deeply inside the two joined parts to gently separate them from each other.
The problem is that you can developed the best long scraper of the world but still the two parts are so different (metal vs pressed fiber/cardboard) that the weak one get to suffer mechanically from your efforts resulting in a collapsed broken cutted headliner also because with a metal scraper on top of a long handle you can't have any feedback of which direction you're "digging", up or down, also metal will cut trough your pressed fiber/cardboard headliner in terms of seconds if your scraper goes down....
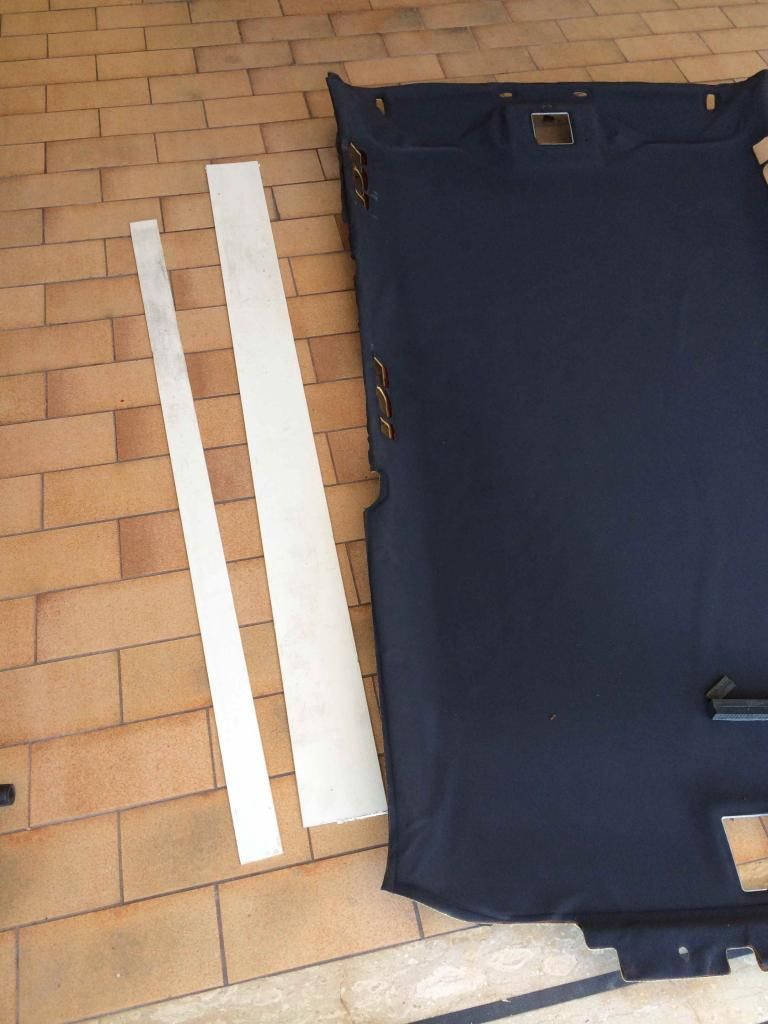
By chance and just by chance the friend ( a professional of automotive electrical/dashboard/hi fi system) that helped me in the task had some cut outs remains from the window glazing people that worked in his premises fitting new windows, PVC windows.
Two strips of PVC, tickness in the area of 4/5mm, length 1.70 mt one large 12/14cm the other 7 cm.
Very useful perfect for the job material, flexible but still very reliable and strong enough when pushed between the two materials coupled together.
If you can, get them long 2 meters instead of 170 like mine.
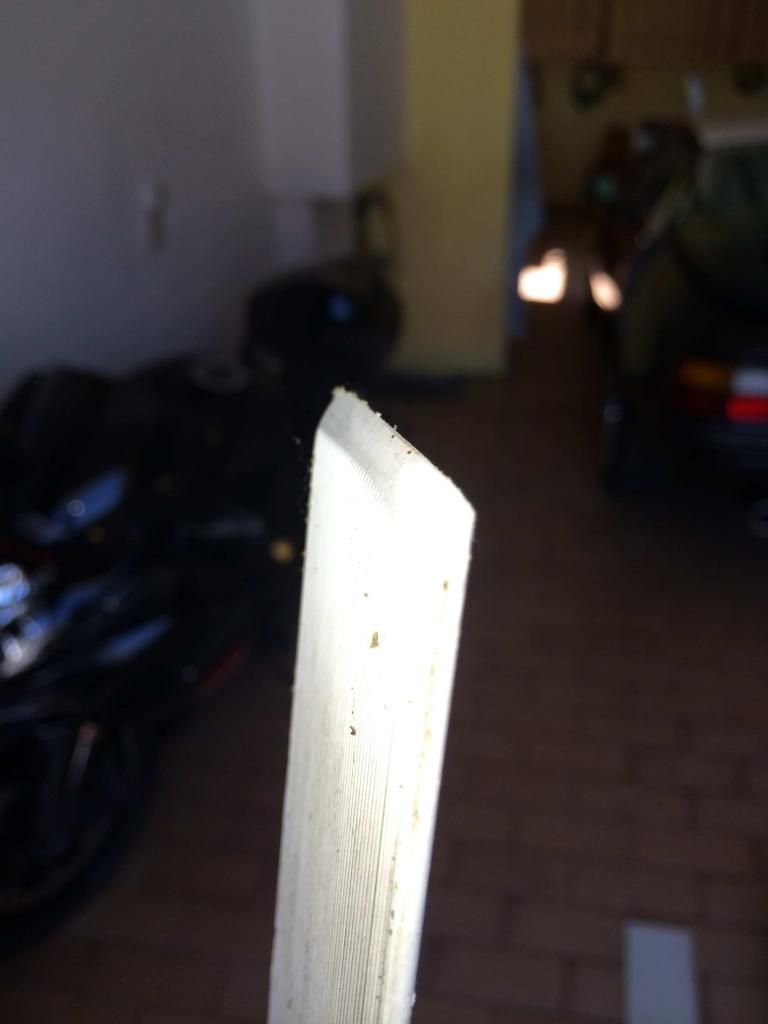
Using a grinder get a single side wedge on one of the edges like this:
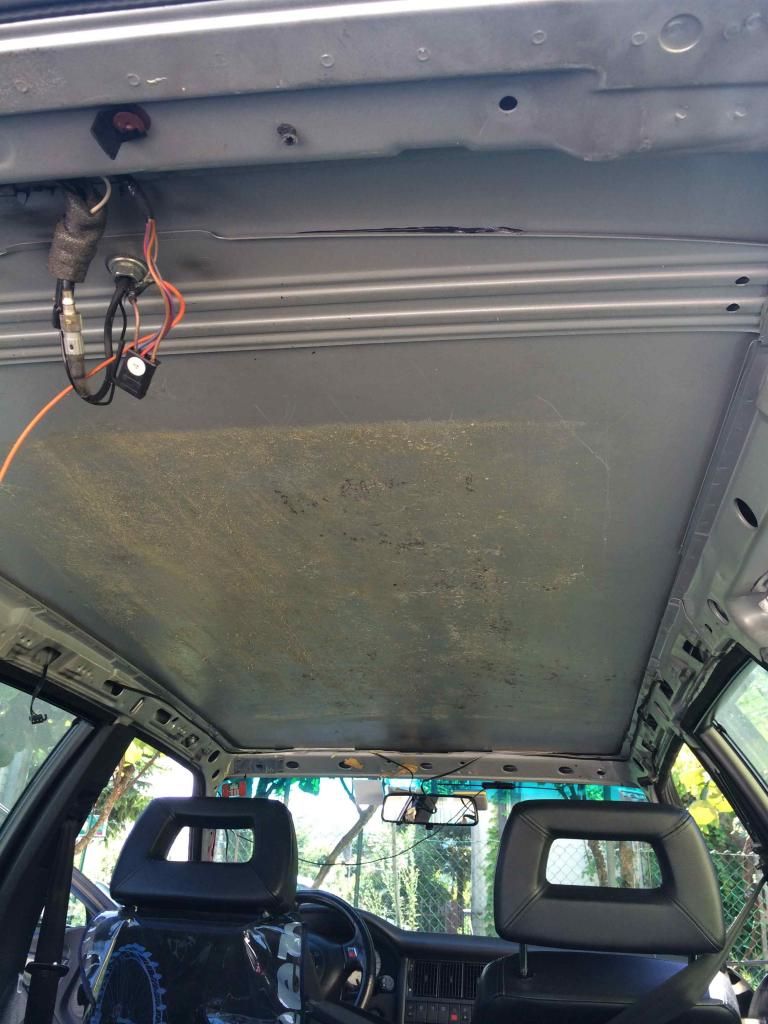
As you can see the back of the metal roof has some "less" glue so start to make your way trough from there gently with your hands don't try to get a wide opening, don't try to "have look on how it looks down there...." all of us know what I mean... curiosity killed the cat remember!
So when you can get the PVC tool inside use that and wait when you have the thing out for a display of the underneath...
Once you have room enough start to push the larger "miracle" tool from the boot area toward and trough the front, VERY important, remember to push the wedge with the longer part facing UP so that the force its against th metal roof and NOT on the fiber headliner.
The best it's to get somebody to push and gently wiggle left and right the PVC tool and another person on his back to litterally feel by hand the tool making it's way between the two parts, the separation from the two it's audible, push and stop, wait half a minute (remember? patience!) let the wedge work trough with it's own thickness to separate the two parts, somewhere it will go better then others but eventually you'll get trough.
Take it out clean it and spray more adhesive remover, use plenty to clean it.
We found a pretty strong patch over the driver side (left) so eventually when we had room from the passenger side already loose, and so, well open we push the 7 cm wedge from the front passenger side, I'm confident that if you can get a longer PVC strip/blade (2.0 mts) you don't need to get trough the side.
The process will take up to one/one an half hours, take your time.
When your pulling out the wedge remember to use the adhesive cleaner on your tool, clean it from the glue that get stick on it and before pushing it back in spray again some of the product on the first 20/30 cms to gain some chemical help and to lubricate the tool.
Do your runs side by side as deep as 40/50cm do not attempt to go trough all the way, patience!
If you find a tougher point leave it and work on it's side/sides, do not push madly, the secret it's to get the thickness of the blade and it's wedge to do the separation.
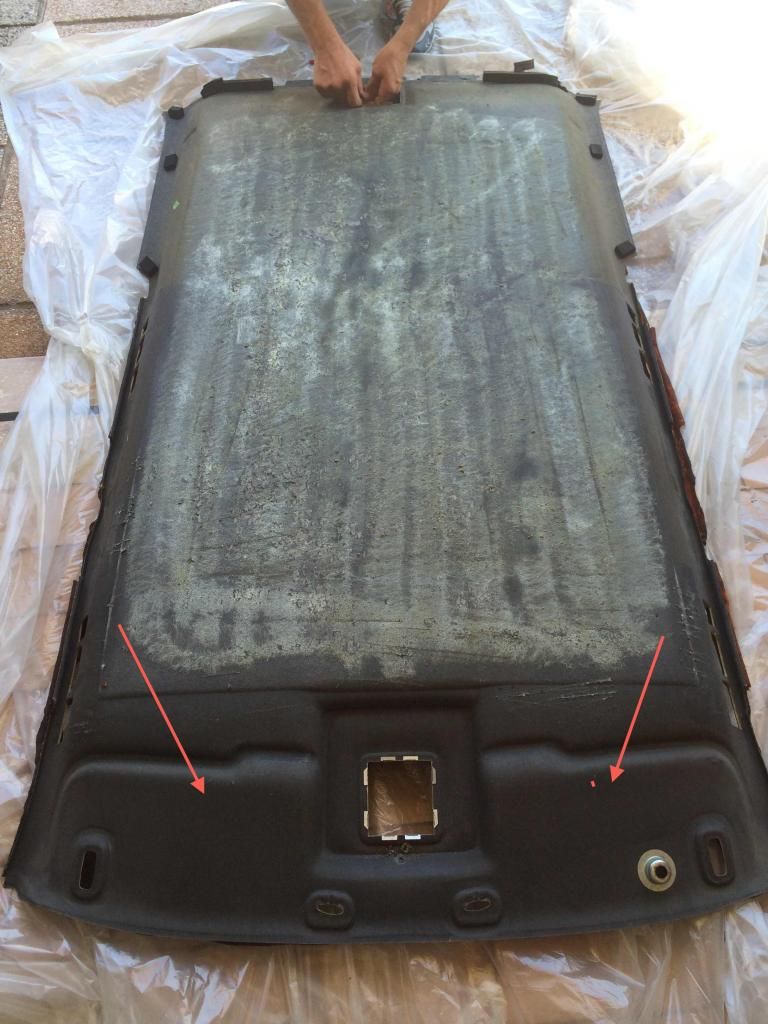
Once you get the headliner free/loose close to the rear passengers lights start to support it from the back:
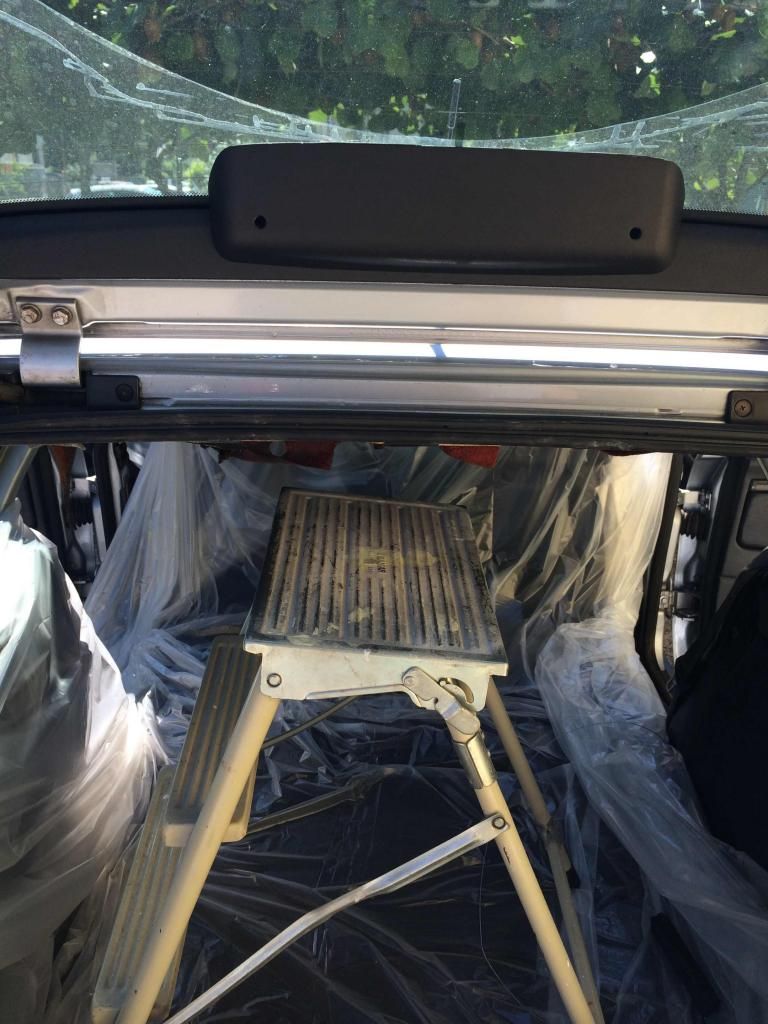
Close the gap that you can see between the ladder and the headliner with any soft material i.e. rugs polistyrene etc
This supporting will avoid this:
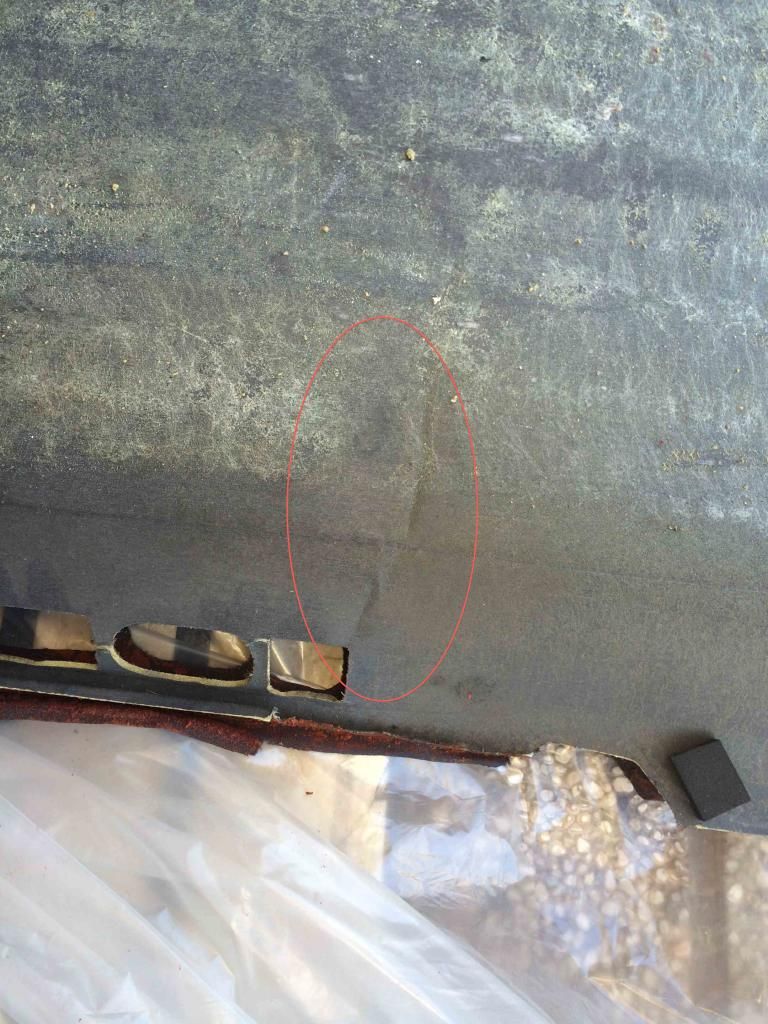
There should be no glue on the front part:
So eventually you'll get the headliner to drop down support it by the front headrests and the back support (ladder) if it comes that you have a side that it's dropping and the other stays use the headrest and take advantage of the up/down seat motor to close the gap so that you want put stress/leverage on the headliner
The only damage that I got apart from the little cracks on the lights recess was this:
It's been repaired already (it's not a separated crack anyway) with some fiberglass net and epoxy resin.
I'm pretty sure that if I do another one I could get it done without any damage.
Feel free to ask any question or further detail.
Stefano
Usual issue that almost everyone knows the headlining cloth/fabric falling down.
You need to take the headlining out of the car.
As it has been stated many times already if you have a sunroof the task it's easier and doable, so far everyone even the guru of the forum like our friend Saltinot had said that if you have an Audi 80 Avant without sunroof you'll easily end up with a broken headliner support due to the amount of glue used by Audi employees in the 90s (I believe the Audi workers had at the time some under the table benefits frome the glue supplier
) this it's definetely true if you don't take the necessary care/procedure and patience.. Patience..... LOt of it... buckets... pallets loads of.... patience.I did took out mine yesterday and I manage to take the thing out from the car pretty much without damage I then would like to share my positive experience to help everyone that will go for the task in the future.
Here we go:
What will I encounter...
You can be lucky or (as per my case) very unlucky.
If you're lucky you can find that your 80 was made the day that the Audi workers were running out of glue and your headliner will be glued to the metal roof just with a small amount of glue on the perimeter of it's rised section like this one from Horvath (hotibi here in the forum) an Hungarian chap that is being very helpful many thanks to him and credit for the photos.

So you're a lucky chap.... your metal roof will then look like this:

Ok let's see the darker side (you're a sad bast**d) new batch of glue delivered to the Audi/Porsche premises and employees enjoied the copious availablity and also played with the air powered glue dispenser...
This is what you'll end up with:

Your metal side:

Then the removing procedure
Be patient don't rush don't get nervous sit down and wait before you end up with a folded/broken headliner support that it's NLA.
1)I'm not telling you how you take off all the pillars covers sunvisors light holders etc etc it's been covered in this forum plenty of times if you can't work this out by yourself just leave the thing alone or go to a professionist just one thing to be very careful with the cover clips of the screws in the sun visors they do break easy.
2) Do not (!) attempt to do this job in a season different from an hot summer it helps a lot to park the car under a hot sun for few hours. or an hot gun with the possibility to exactly fix the temperature (80° celsius at most) can also be of help on from the outside of the metal roof.
3) Start from the back/boot side, as other had already said (i.e. Skull) do not attempt to work from the front or from (not yet) the sides.
4) get yourself a couple of cans of a good adhesive removal (Saltinot says 3M it's best and I trust him) and use it freely!
5) Cover/protect the inside of your car
6) Skull teaches again....If your cloth it's not completely down DO NOT take it off whilst in the car instead stick it up as best as you can with some tape so that the terrible orange agent (cit.) foam stays inside the thing as long as possible it sticks and it's nasty very nasty.
7) prepare a riser/support to hold the back part of the headliner (I used a two steps ladder and some rugs)
8) Make yourself a couple of the "miracle"custom tools.
Alright there's nothing special, nor unique in this how to, what got me to finally get the part coming out were this "miracle" tools.
You will assume as I did that you need long scrapers possibly joined to a broom stick to get deeply inside the two joined parts to gently separate them from each other.
The problem is that you can developed the best long scraper of the world but still the two parts are so different (metal vs pressed fiber/cardboard) that the weak one get to suffer mechanically from your efforts resulting in a collapsed broken cutted headliner also because with a metal scraper on top of a long handle you can't have any feedback of which direction you're "digging", up or down, also metal will cut trough your pressed fiber/cardboard headliner in terms of seconds if your scraper goes down....
By chance and just by chance the friend ( a professional of automotive electrical/dashboard/hi fi system) that helped me in the task had some cut outs remains from the window glazing people that worked in his premises fitting new windows, PVC windows.
Two strips of PVC, tickness in the area of 4/5mm, length 1.70 mt one large 12/14cm the other 7 cm.
Very useful perfect for the job material, flexible but still very reliable and strong enough when pushed between the two materials coupled together.
If you can, get them long 2 meters instead of 170 like mine.


Using a grinder get a single side wedge on one of the edges like this:

As you can see the back of the metal roof has some "less" glue so start to make your way trough from there gently with your hands don't try to get a wide opening, don't try to "have look on how it looks down there...." all of us know what I mean... curiosity killed the cat remember!
So when you can get the PVC tool inside use that and wait when you have the thing out for a display of the underneath...

Once you have room enough start to push the larger "miracle" tool from the boot area toward and trough the front, VERY important, remember to push the wedge with the longer part facing UP so that the force its against th metal roof and NOT on the fiber headliner.
The best it's to get somebody to push and gently wiggle left and right the PVC tool and another person on his back to litterally feel by hand the tool making it's way between the two parts, the separation from the two it's audible, push and stop, wait half a minute (remember? patience!) let the wedge work trough with it's own thickness to separate the two parts, somewhere it will go better then others but eventually you'll get trough.
Take it out clean it and spray more adhesive remover, use plenty to clean it.
We found a pretty strong patch over the driver side (left) so eventually when we had room from the passenger side already loose, and so, well open we push the 7 cm wedge from the front passenger side, I'm confident that if you can get a longer PVC strip/blade (2.0 mts) you don't need to get trough the side.
The process will take up to one/one an half hours, take your time.
When your pulling out the wedge remember to use the adhesive cleaner on your tool, clean it from the glue that get stick on it and before pushing it back in spray again some of the product on the first 20/30 cms to gain some chemical help and to lubricate the tool.
Do your runs side by side as deep as 40/50cm do not attempt to go trough all the way, patience!
If you find a tougher point leave it and work on it's side/sides, do not push madly, the secret it's to get the thickness of the blade and it's wedge to do the separation.
Once you get the headliner free/loose close to the rear passengers lights start to support it from the back:

Close the gap that you can see between the ladder and the headliner with any soft material i.e. rugs polistyrene etc
This supporting will avoid this:

There should be no glue on the front part:

So eventually you'll get the headliner to drop down
support it by the front headrests and the back support (ladder) if it comes that you have a side that it's dropping and the other stays use the headrest and take advantage of the up/down seat motor to close the gap so that you want put stress/leverage on the headlinerThe only damage that I got apart from the little cracks on the lights recess was this:

It's been repaired already (it's not a separated crack anyway) with some fiberglass net and epoxy resin.
I'm pretty sure that if I do another one I could get it done without any damage.
Feel free to ask any question or further detail.
Stefano


Comment