
Very often when your car doesn't start, it is either the G40 Cam Senor or the Fuel Pump. This DIY is intended to confirm that your fuel pump is working or not.
I did this yesterday and wrote it up for my home forum. It applies to C4 UrS4/S6s and, with your help on S2/RS2 specifics, it might be adapted to the S2/RS2. (Will need your photos).
Here is the C4 UrS version:
**********************************
The last time I used one of these it was Sean D.'s (quattro20V's)(local to me) and it was 2004. However, the topic came up recently so I decided to put my own together and document it. NOTE: If you are not comfortable with your skills, electricty and raw fuel, DO NOT ATTEMPT THIS. (YMMV) ;>)
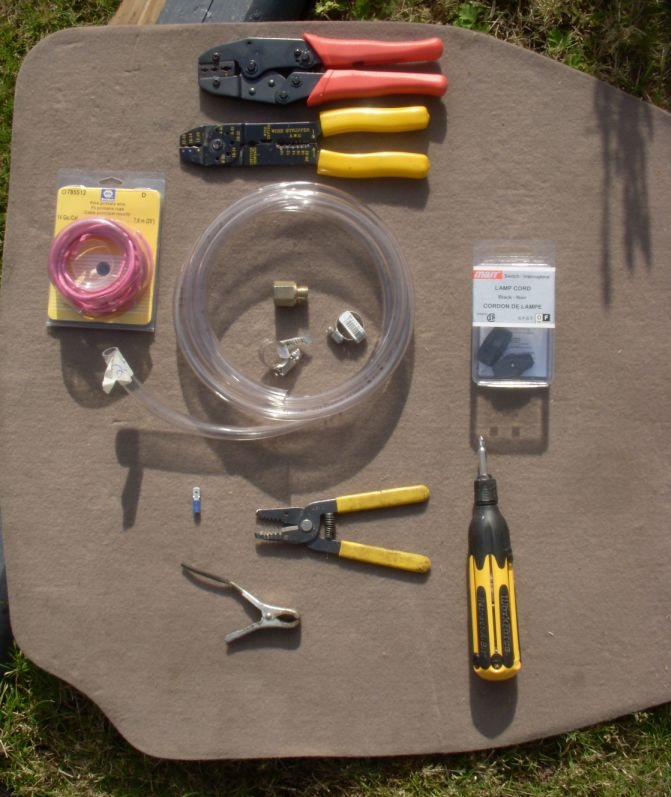
Here are the supplies:
Clockwise from the top:
1. Crimpers (I used the red-handed ratcheting one)
2. Lamp Cord rotary switches (2 in a box for $5)
3. My multi-blade screw driver (with the fine Phillips needed for the rotary switch)
4. Cheap wire stripper and cutter
5. The end off an old battery charger (normal aligator clips are too small for this application)
6. 14-16 gauge spade connector
7. A spool of 14 gauge wire
8. 6 feet of 1/2" I.D. vinyl hose (not fuel grade for this trial).
9. Gear clamps
10. Adapter fitting off a used C4 fuel filter saved for this purpose (fits on the fuel feed line, as shown later)
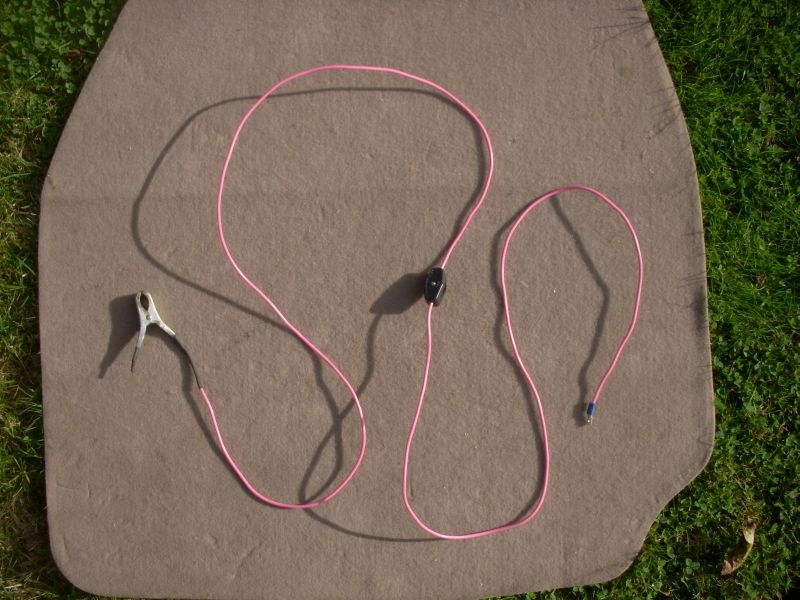
I ended up using about 82 inches (208 cm) of wire.
Step 1: Install the battery clip on one end of the wire. I stripped 1/2" of the wire, then crimped and soldered the wire to the clip. Then I put heat shrink over the wire and the clip end.
Step 2: Strip the other end of the wire (about 3/8") and crimp on the spade connector.
Step 3: Trial the location of the switch by clipping the battery clip to the plastic of the (+) post under the hood and running the spade end to the drivers end of the dash (the fuse panel). I selected a location near the strut tower plastic cap. It has a good view of the fuel coming out of the fuel line (more to follow).
Step 4: Install the rotary switch making sure that the wire is stabbed by the brass "pins". Figure out which position is off and which is on if not marked with "ON" and "OFF".
Should end up something like this, a single wire fuel pump test harness:
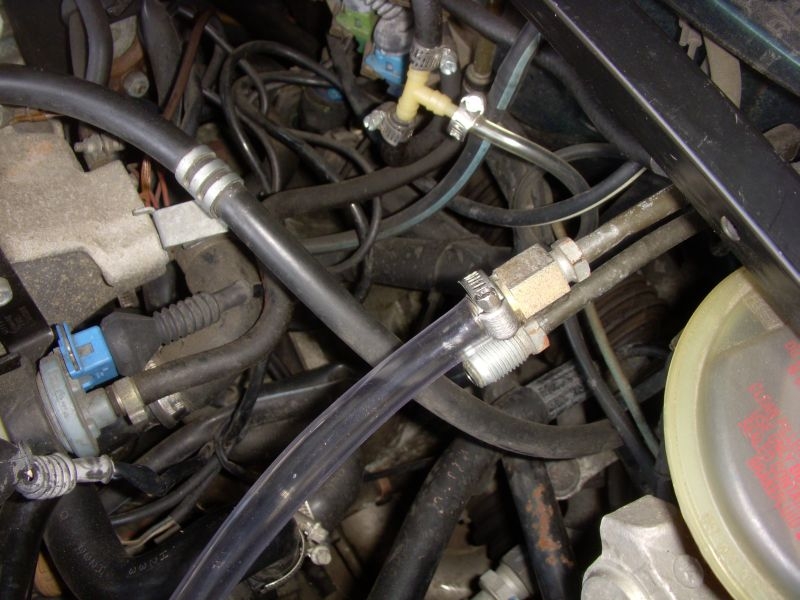
Step 5. Install the fuel filter adapter in the vinyl hose. Tighten the gear clamp.
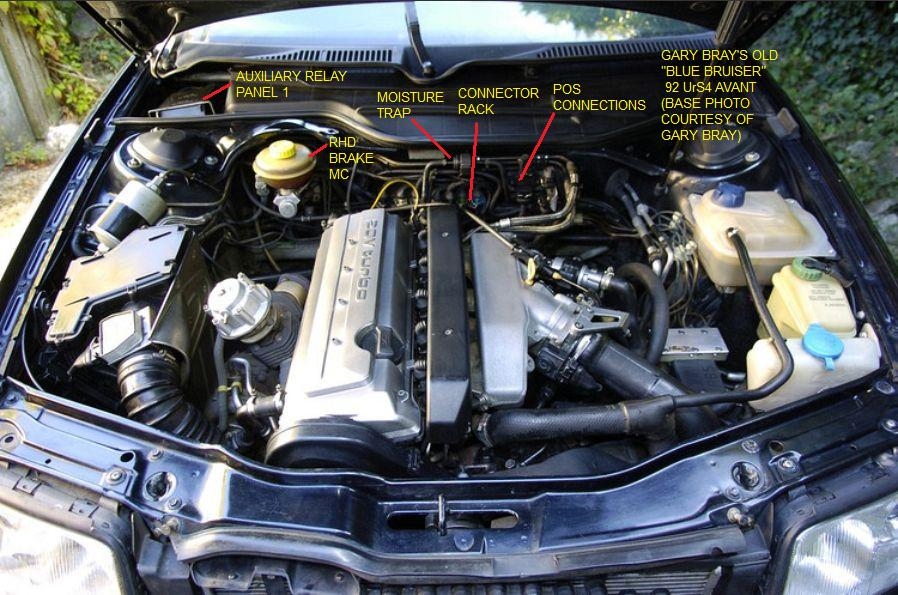
Step 6: Install fuel pump testing hose on the fuel pump feed (upper fuel line on the left side of the car, by the brake fluid reservoir). 19 mm wrench for the fitting and 14 mm for the fuel line fitting. Don't over tighten. Put the discharge end of the hose outside the car, into a stable, fuel tolerant, container.
Step 7: Remove the cover on the fuse panel on the driver's end of the dash. Find Fuse 17 - Yellow 20 Amp - third row from the left, third from the top (probably the only 20 Amp one):
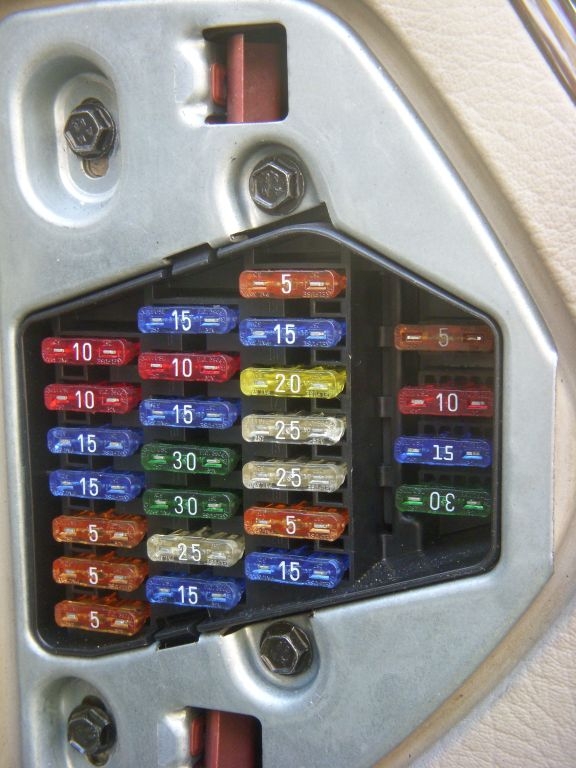
Step 8: Remove Fuse 17 and install the spade connector end of the test harness in the <b>*RIGHT*</b> female fuse receiver pin.
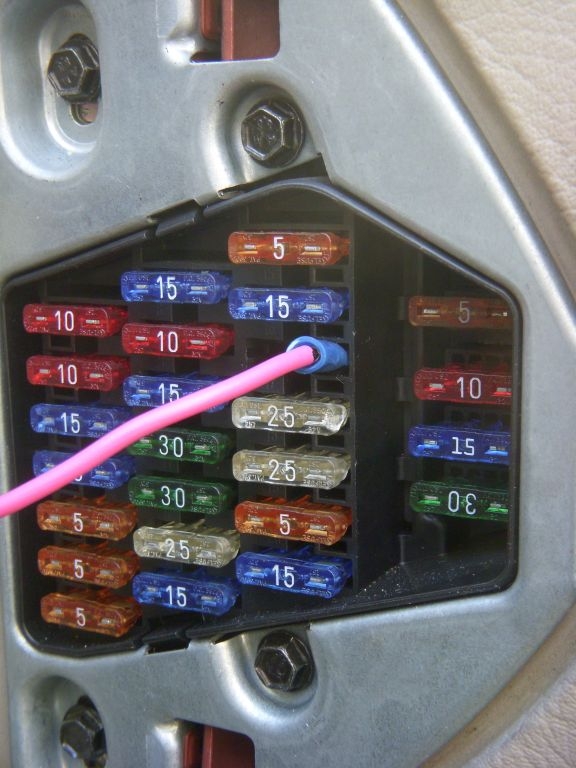
Step 9: Run the battery clip end of the fuel pump test harness over to the (+) terminal on the firewall. With the rotary switch in the OFF position AND the end of the fuel test hose in the stable fuel-tolerant container, clip the battery clip to the (+) post on the fire wall.
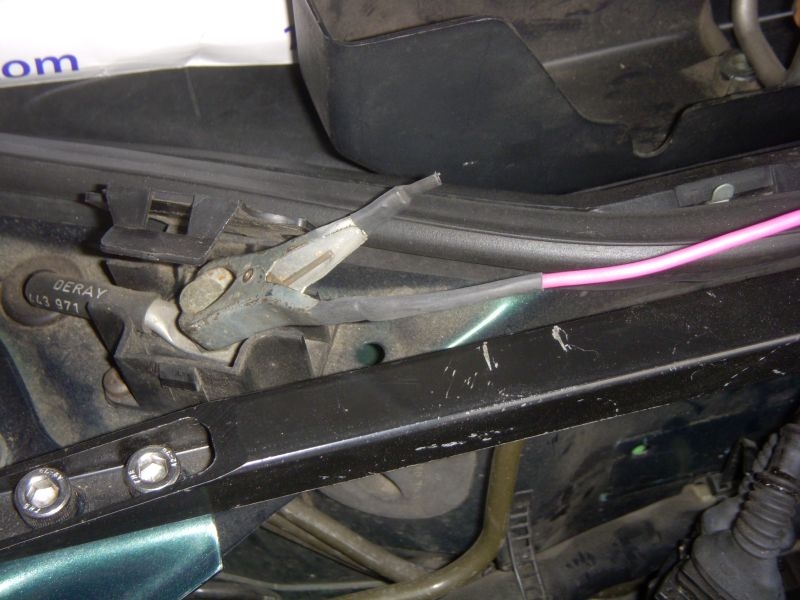
Step 10: With the switch off and the fuel receiver container empty, turn the switch to ON for exactly 15 seconds and measure the amount of fuel. Should be about 675 mL. If you get less or nothing, you have a fuel pump problem (assuming your test harness is good).
(Excuse the mess, I have the fuel rail off to replace the fuel injector inserts):
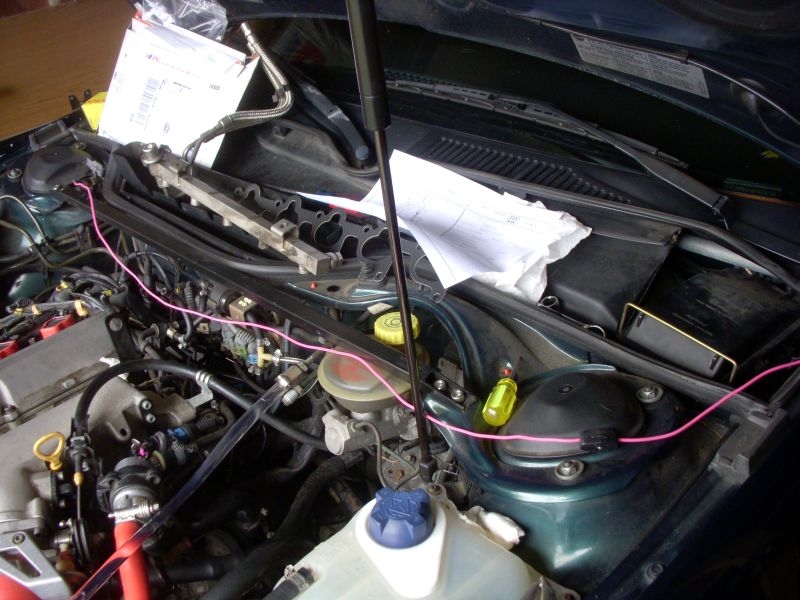
Here are the test specs:

I did this yesterday and wrote it up for my home forum. It applies to C4 UrS4/S6s and, with your help on S2/RS2 specifics, it might be adapted to the S2/RS2. (Will need your photos).
Here is the C4 UrS version:
**********************************
The last time I used one of these it was Sean D.'s (quattro20V's)(local to me) and it was 2004. However, the topic came up recently so I decided to put my own together and document it. NOTE: If you are not comfortable with your skills, electricty and raw fuel, DO NOT ATTEMPT THIS. (YMMV) ;>)
Here are the supplies:
Clockwise from the top:
1. Crimpers (I used the red-handed ratcheting one)
2. Lamp Cord rotary switches (2 in a box for $5)
3. My multi-blade screw driver (with the fine Phillips needed for the rotary switch)
4. Cheap wire stripper and cutter
5. The end off an old battery charger (normal aligator clips are too small for this application)
6. 14-16 gauge spade connector
7. A spool of 14 gauge wire
8. 6 feet of 1/2" I.D. vinyl hose (not fuel grade for this trial).
9. Gear clamps
10. Adapter fitting off a used C4 fuel filter saved for this purpose (fits on the fuel feed line, as shown later)
I ended up using about 82 inches (208 cm) of wire.
Step 1: Install the battery clip on one end of the wire. I stripped 1/2" of the wire, then crimped and soldered the wire to the clip. Then I put heat shrink over the wire and the clip end.
Step 2: Strip the other end of the wire (about 3/8") and crimp on the spade connector.
Step 3: Trial the location of the switch by clipping the battery clip to the plastic of the (+) post under the hood and running the spade end to the drivers end of the dash (the fuse panel). I selected a location near the strut tower plastic cap. It has a good view of the fuel coming out of the fuel line (more to follow).
Step 4: Install the rotary switch making sure that the wire is stabbed by the brass "pins". Figure out which position is off and which is on if not marked with "ON" and "OFF".
Should end up something like this, a single wire fuel pump test harness:
Step 5. Install the fuel filter adapter in the vinyl hose. Tighten the gear clamp.
Step 6: Install fuel pump testing hose on the fuel pump feed (upper fuel line on the left side of the car, by the brake fluid reservoir). 19 mm wrench for the fitting and 14 mm for the fuel line fitting. Don't over tighten. Put the discharge end of the hose outside the car, into a stable, fuel tolerant, container.
Step 7: Remove the cover on the fuse panel on the driver's end of the dash. Find Fuse 17 - Yellow 20 Amp - third row from the left, third from the top (probably the only 20 Amp one):
Step 8: Remove Fuse 17 and install the spade connector end of the test harness in the <b>*RIGHT*</b> female fuse receiver pin.
Step 9: Run the battery clip end of the fuel pump test harness over to the (+) terminal on the firewall. With the rotary switch in the OFF position AND the end of the fuel test hose in the stable fuel-tolerant container, clip the battery clip to the (+) post on the fire wall.
Step 10: With the switch off and the fuel receiver container empty, turn the switch to ON for exactly 15 seconds and measure the amount of fuel. Should be about 675 mL. If you get less or nothing, you have a fuel pump problem (assuming your test harness is good).
(Excuse the mess, I have the fuel rail off to replace the fuel injector inserts):
Here are the test specs:




Comment