
Now before I start this, I did look here for a thread on OBD or OBD1 or OBD2 connectors but search didn't show anything up. I thought somebody was offering a kit for this (setting up an OBD2 style port to work on our ECU K and L ports to retreive engine malfunction codes etc.). I couldn't find anything. Maybe my search string was wrong. That said, here is my post:
*************************
While I await receiving a professionally done 2 x 2 x "OBD2" dongle from an eBay.co.uk seller, at the prompting/goading/poking of some quattroworld forum members, I got an OBD2 connector out of a 2000 Audi A6 to play with. I almost got a borrowed professional dongle today but we didn't connect as needed. Okay, so back to playing with the OBD2 connector.
The intent was to remove unnecessary wires and move the remaining needed wires to the correct position in the plug to be compatible with a VW/Audi/Skoda OBD2 (and OBD1) scanner.
Here was the starting point, factory OBD2 connector and two wiring diagrams from my UrS OBD1 diagnostic port post:
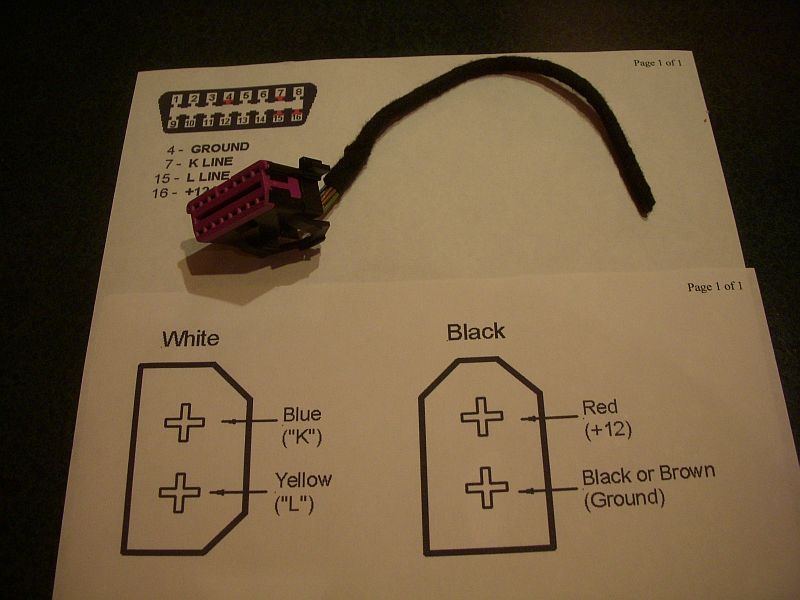
Here is the same connector from the back, showing the six wires that it came with.

First challenge was to figure out the purple pin lock. One side has a "lock" that you need to pry up a bit. Then the lock just slides off in the opposite direction:
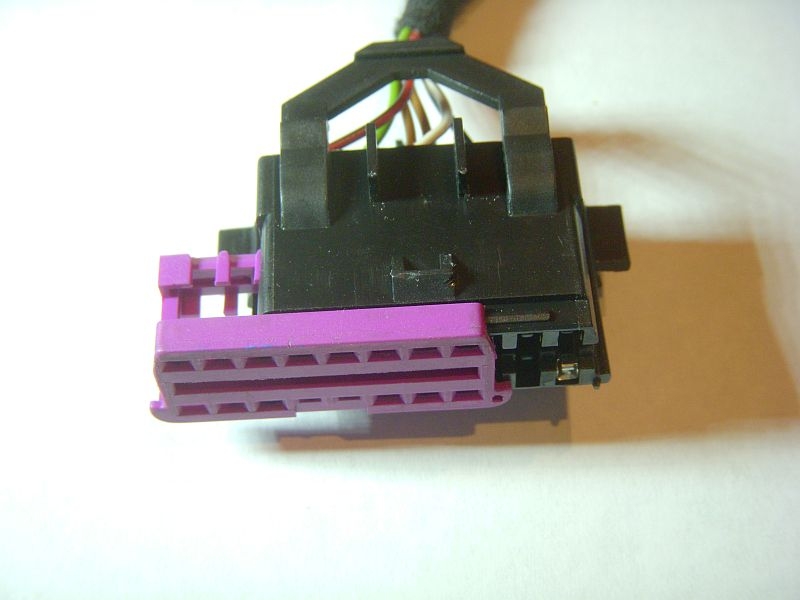
This reveals the six pins and their positions from the front side. Only two of the required four pin positions are populated properly. Okay going need to move some pins around and remove 2 others.
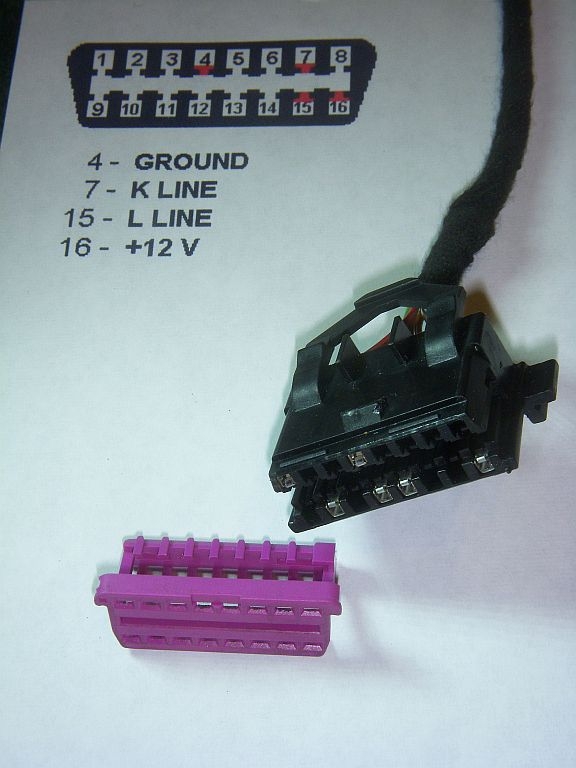
Okay time to remove the black fuzzy sticky tape covering the wires. Yuck. Needed solvent to clean the sticky off the wires. Tossed the tape.
Now I could see what I was working with, six wires, two brown, one blue/black, one red/black, one white/black and one green.
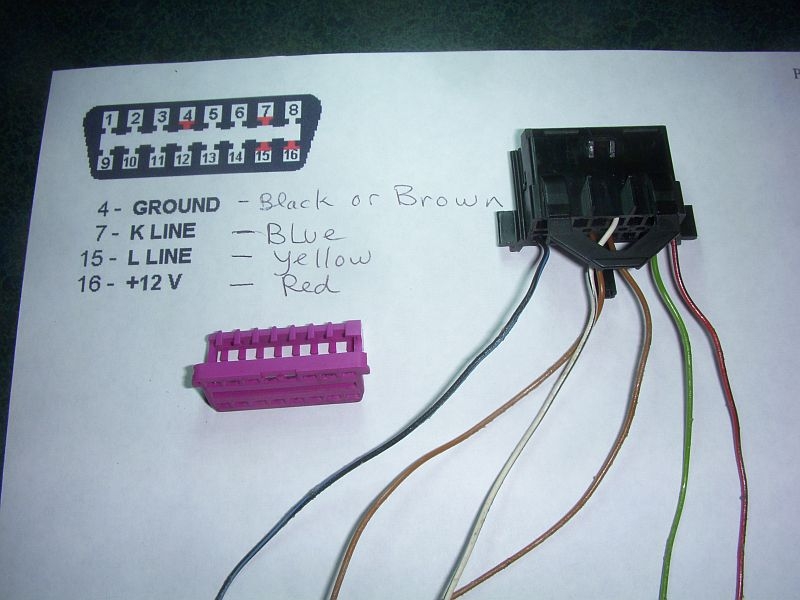
Based on the wire colours that were used in the OBD1 connectors, I decided to remove one of the grounds (not needed) and ditch the green wire. Nice to say but first I had to figure out how to remove the pins.
Through a bit of trial and error I found that a small safety pin inserted between the metal of the pin and the plastic of the housing was enough to release the pin:

With the safety pin releasing the pin, I then just needed to push the pin and its wire pig tail out of the front of the plastic connector housing.
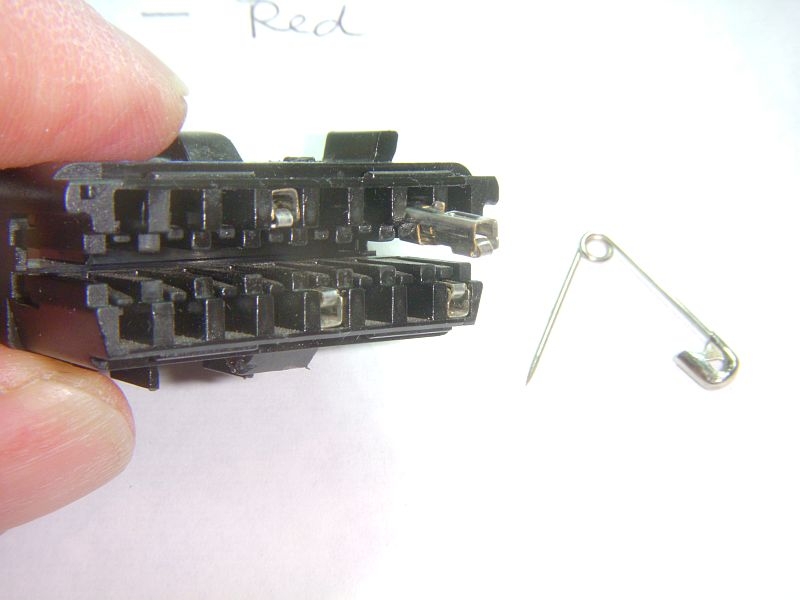
The next steps involved getting the remaining pins out (the ones in 4 and 16 were fine, both based on position and colour (brown in 4 and red/black in 16). I put the blue/black wire and pin in No. 7 and the white/black wire and pin into No. 15. The pins had to be loaded into the connector from the back, then they clicked in.

Final step for today was sliding the purple pin lock back onto the connector:

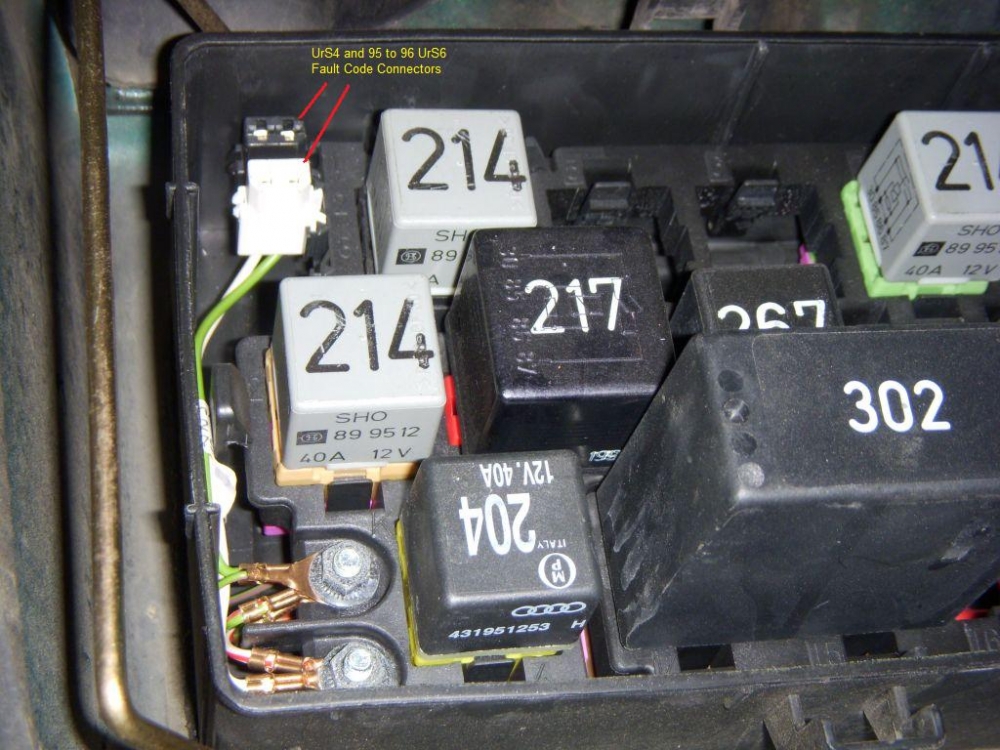
Tomorrow, I will tape the wires into the proper pairs and add small male spade connectors to fit into the white and black OE OBD1 diagnostic ports under the hood, shown below (of course, while I am out getting the small spade connectors, the mailman *WILL* deliver the professional dongle, no doubt)
Off to make paella.
Where's my beer?
*************************
While I await receiving a professionally done 2 x 2 x "OBD2" dongle from an eBay.co.uk seller, at the prompting/goading/poking of some quattroworld forum members, I got an OBD2 connector out of a 2000 Audi A6 to play with. I almost got a borrowed professional dongle today but we didn't connect as needed. Okay, so back to playing with the OBD2 connector.
The intent was to remove unnecessary wires and move the remaining needed wires to the correct position in the plug to be compatible with a VW/Audi/Skoda OBD2 (and OBD1) scanner.
Here was the starting point, factory OBD2 connector and two wiring diagrams from my UrS OBD1 diagnostic port post:
Here is the same connector from the back, showing the six wires that it came with.
First challenge was to figure out the purple pin lock. One side has a "lock" that you need to pry up a bit. Then the lock just slides off in the opposite direction:
This reveals the six pins and their positions from the front side. Only two of the required four pin positions are populated properly. Okay going need to move some pins around and remove 2 others.
Okay time to remove the black fuzzy sticky tape covering the wires. Yuck. Needed solvent to clean the sticky off the wires. Tossed the tape.
Now I could see what I was working with, six wires, two brown, one blue/black, one red/black, one white/black and one green.
Based on the wire colours that were used in the OBD1 connectors, I decided to remove one of the grounds (not needed) and ditch the green wire. Nice to say but first I had to figure out how to remove the pins.
Through a bit of trial and error I found that a small safety pin inserted between the metal of the pin and the plastic of the housing was enough to release the pin:
With the safety pin releasing the pin, I then just needed to push the pin and its wire pig tail out of the front of the plastic connector housing.
The next steps involved getting the remaining pins out (the ones in 4 and 16 were fine, both based on position and colour (brown in 4 and red/black in 16). I put the blue/black wire and pin in No. 7 and the white/black wire and pin into No. 15. The pins had to be loaded into the connector from the back, then they clicked in.
Final step for today was sliding the purple pin lock back onto the connector:
Tomorrow, I will tape the wires into the proper pairs and add small male spade connectors to fit into the white and black OE OBD1 diagnostic ports under the hood, shown below (of course, while I am out getting the small spade connectors, the mailman *WILL* deliver the professional dongle, no doubt)
Off to make paella.
Where's my beer?


 with moggies! Plus we are all privileged to have Dave and S2 Central doing us all proud with their magnificent efforts!
Comment