
 Tweet
Tweet
Great to see another thread that will overtake everyone on views within a few days. I would be interested to see the setup you use to cut and shut. I've thought of a few 'subframe mount' mounted jigs that slide the two halfs to get everything square.
-
-
Subbed. www.quattro.ca
B2: 82 Urq into Sport quattro, 82 4000 2-door, 83 80q 2 Door, 83 Ur-q CDN, 85 Ur-q Euro with 3B, 86 4kq, 59,000km
B3/B4: 91 CQ, 93 90q 2.5TDI, 94 80q avant 2.5tdi, 94 S2 AvantComment
-
This should turn into something awesome. Can't wait to see what happens. Are you going to try and procure a real all-aluminum 2.1L Turbo?1986 Audi 4000cs Turbo Quattro: 13.6 @ 98.7 MPH
2001 Dodge Dakota R/T: Summer Hot Rod
1992 Saab 900 Turbo Convertible: DD
www.hershperformance.com
www.facebook.com/hershperformanceandracingComment
-
I am thinking it will take a couple of years to get the shell sorted. Perhaps a bit less but I am in no rush.
I have drawn up the jig which I am going to go and order the steel for this week. Having sliding bits is a bit complicated there is a far simpler way around it.
No plans to go for an alloy engine. I am happy with how the current engine has been holding up.Comment
-
It's going to be a nice project given your quality standards..
Just wish I had the time to do another project...
Comment
-
Another lovely project underway! Great garage, wish I had space above the floor to hide a project from the Mrs 91 Modded 3B
14 A6 Avant Black EditionComment
-
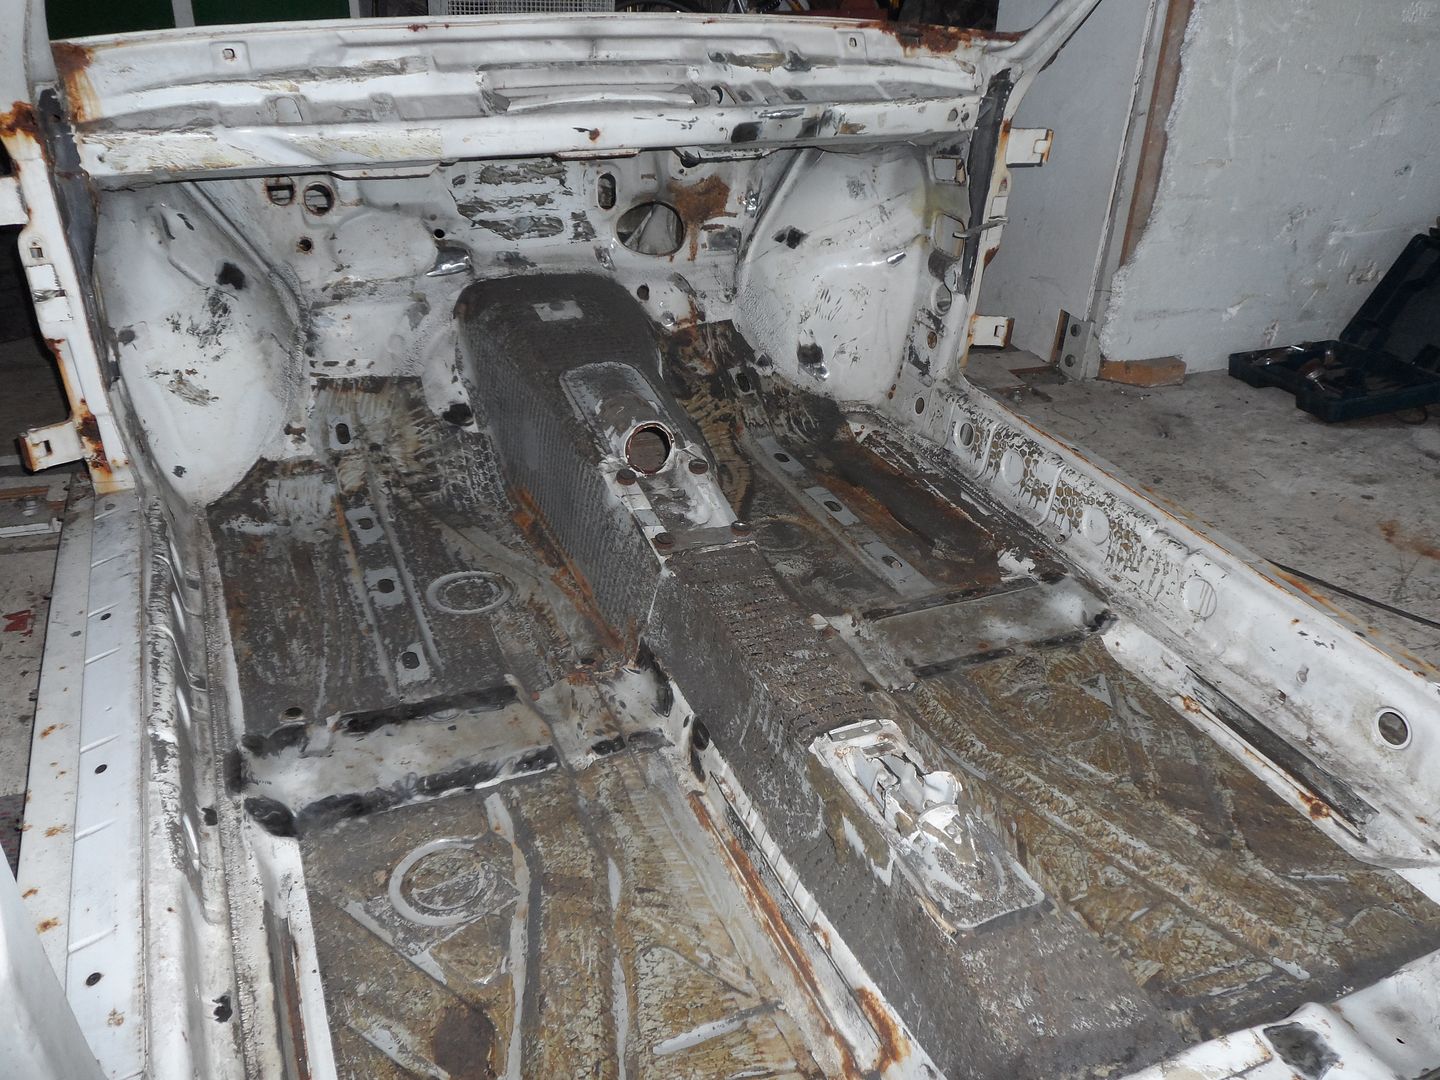
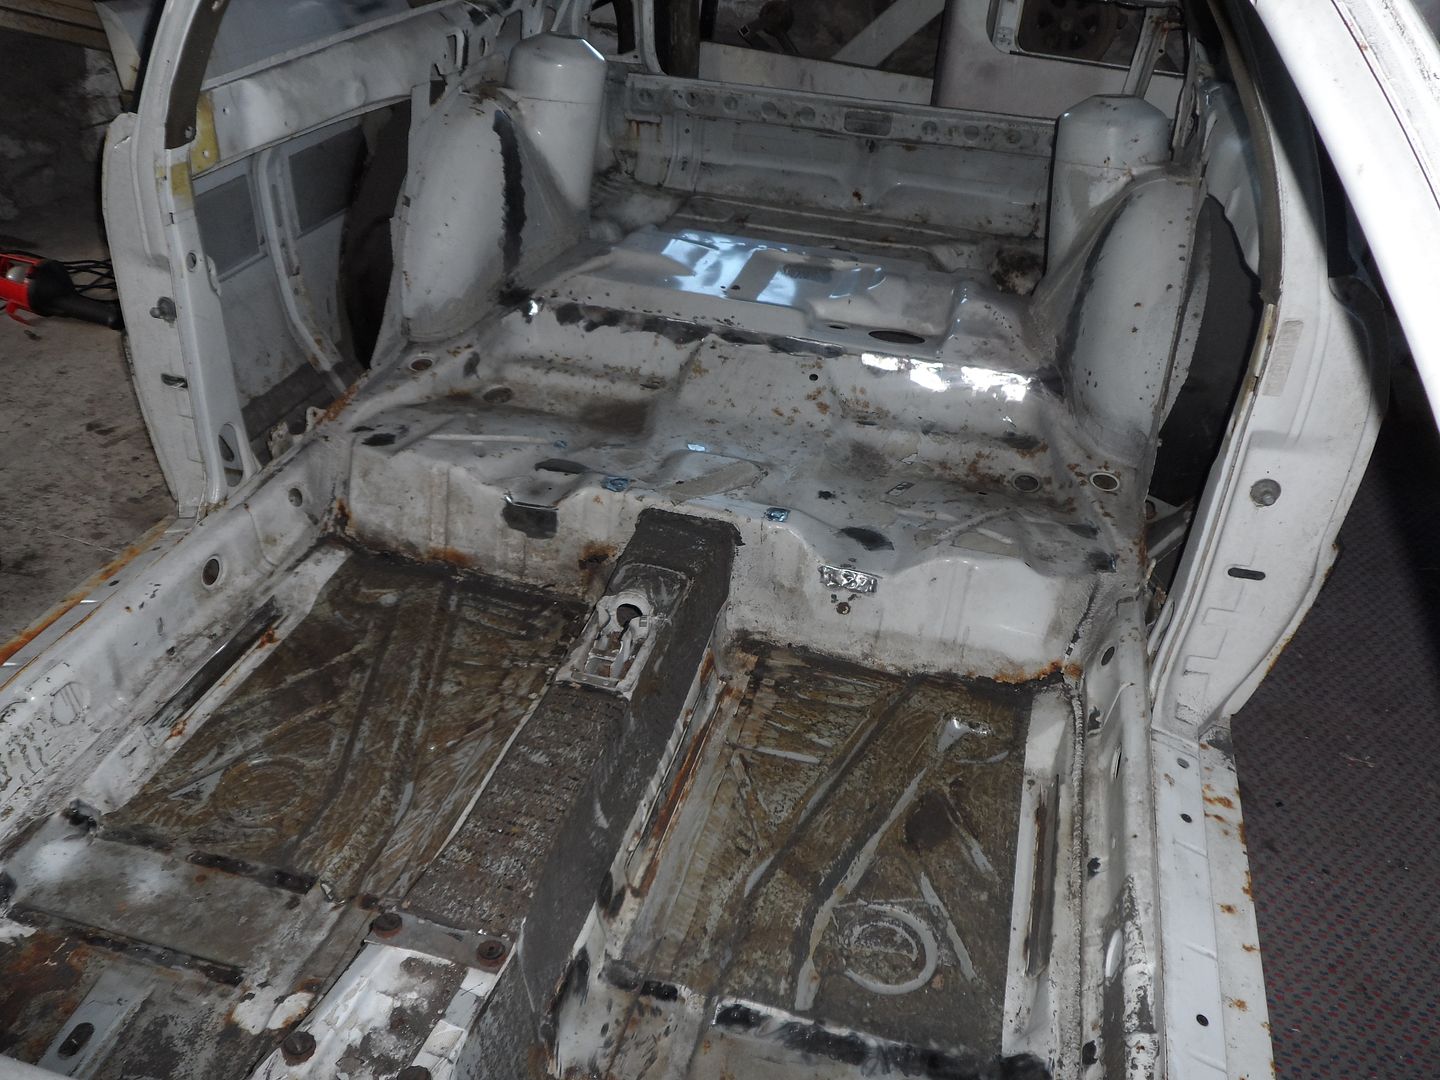
Have been getting on with cleaning the shell up so the grinding and welding can begin!
All the underseal off the floor pan. Weighed it because I am sad and there was 10kg
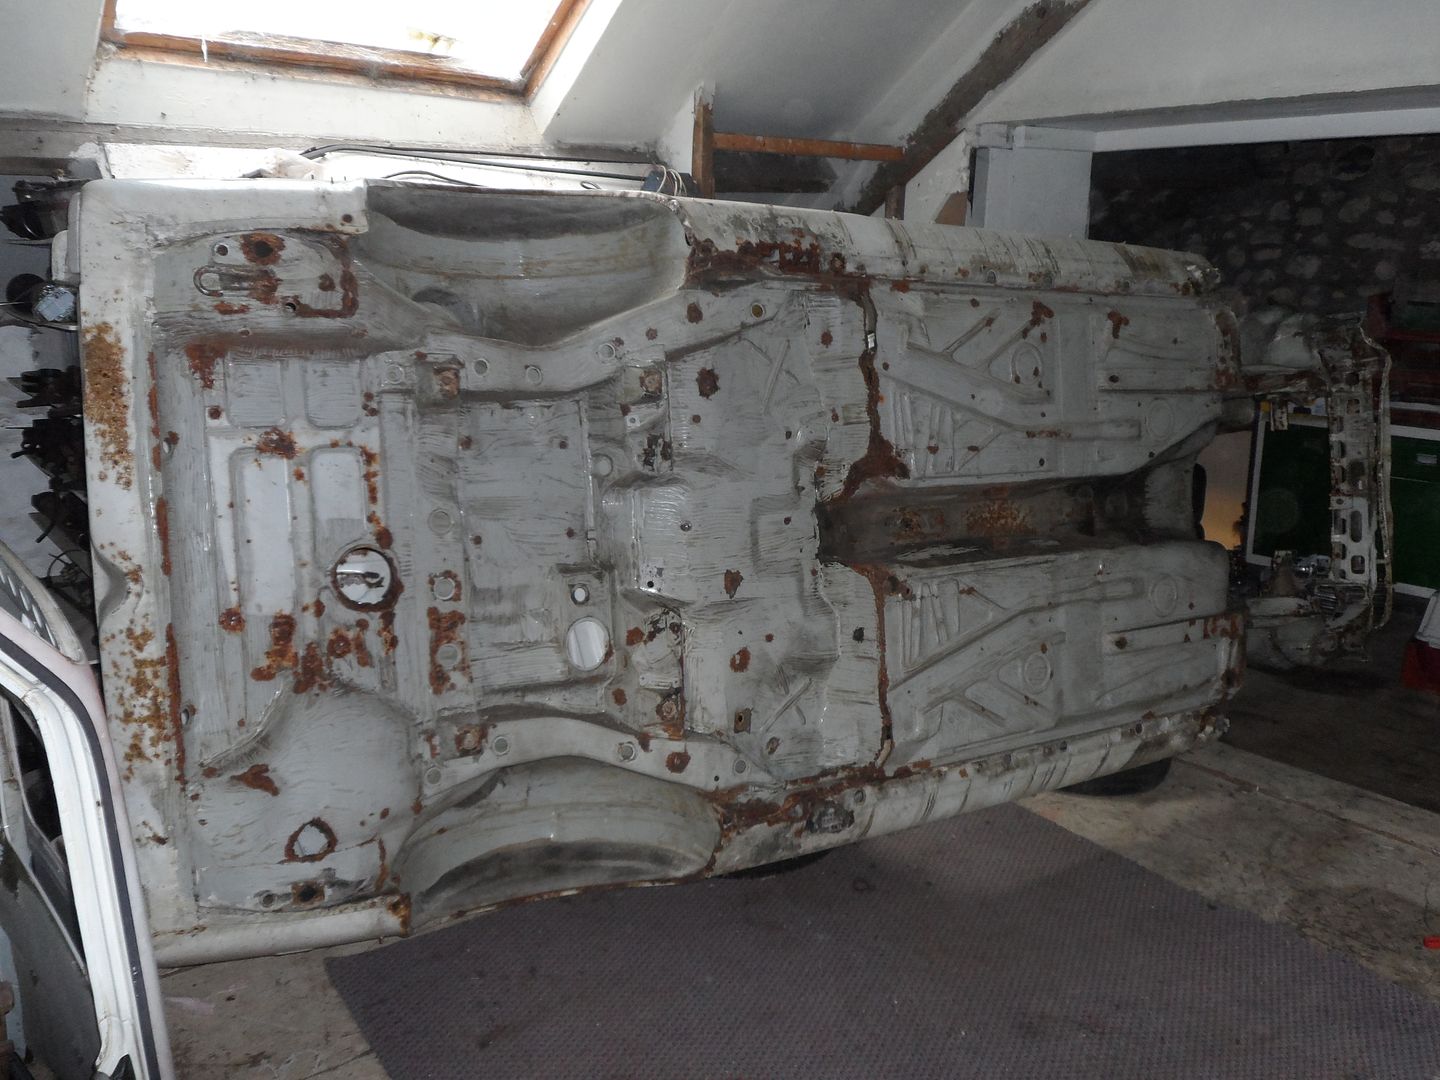
Its already made its own cut for shortening!
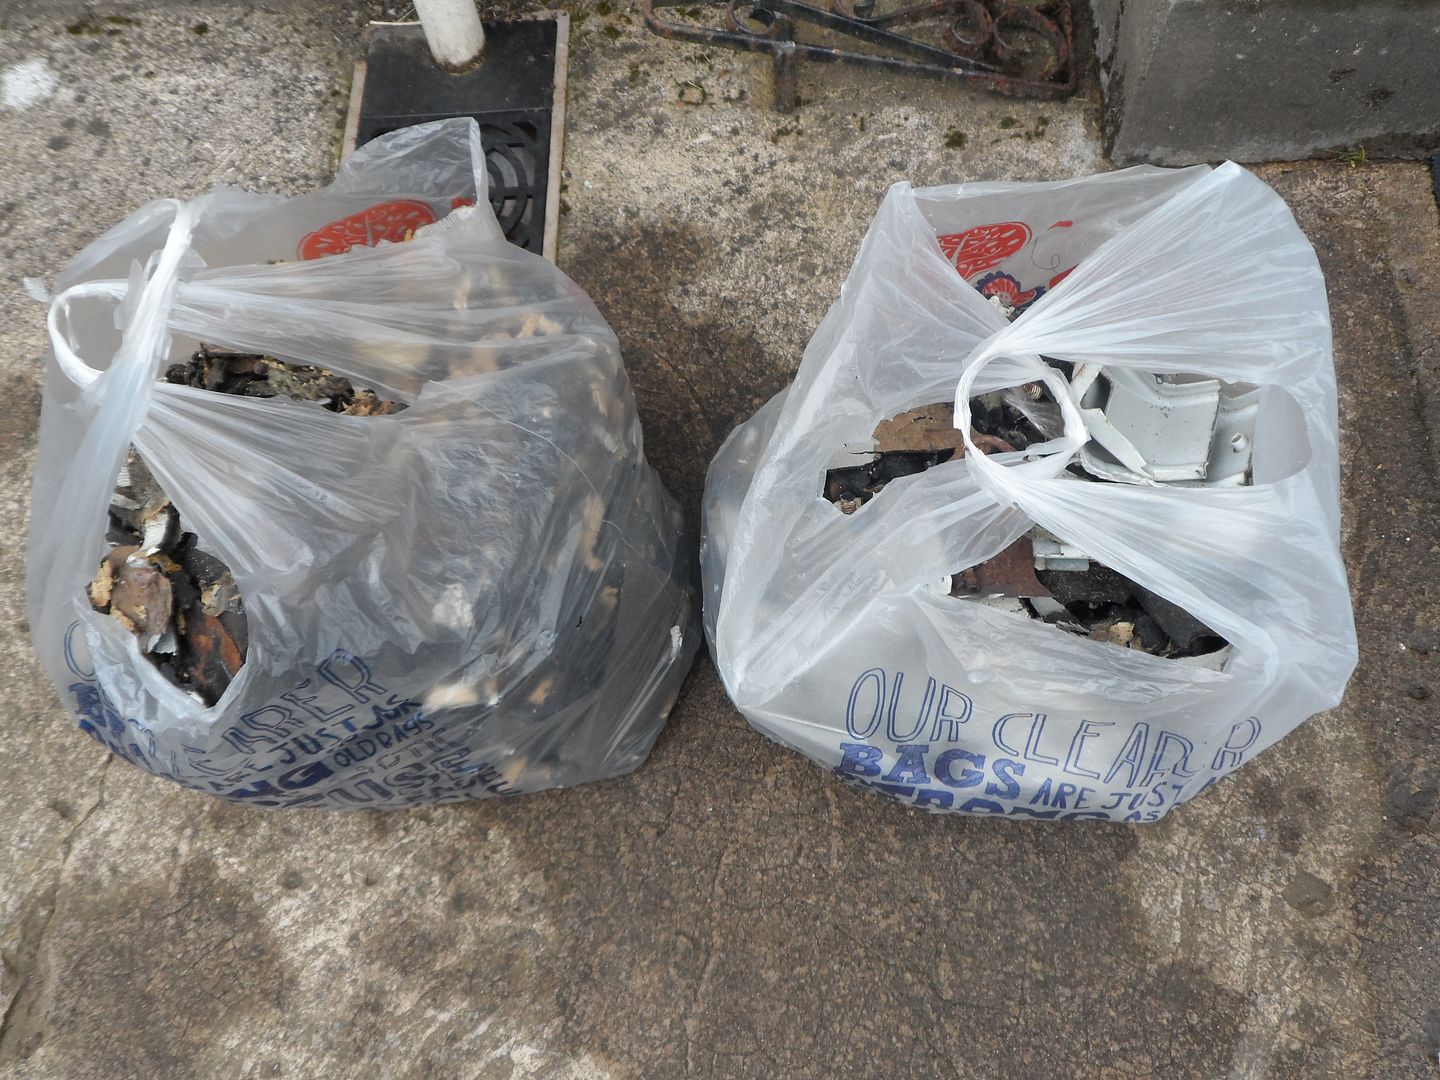
2 full bags of underseal!
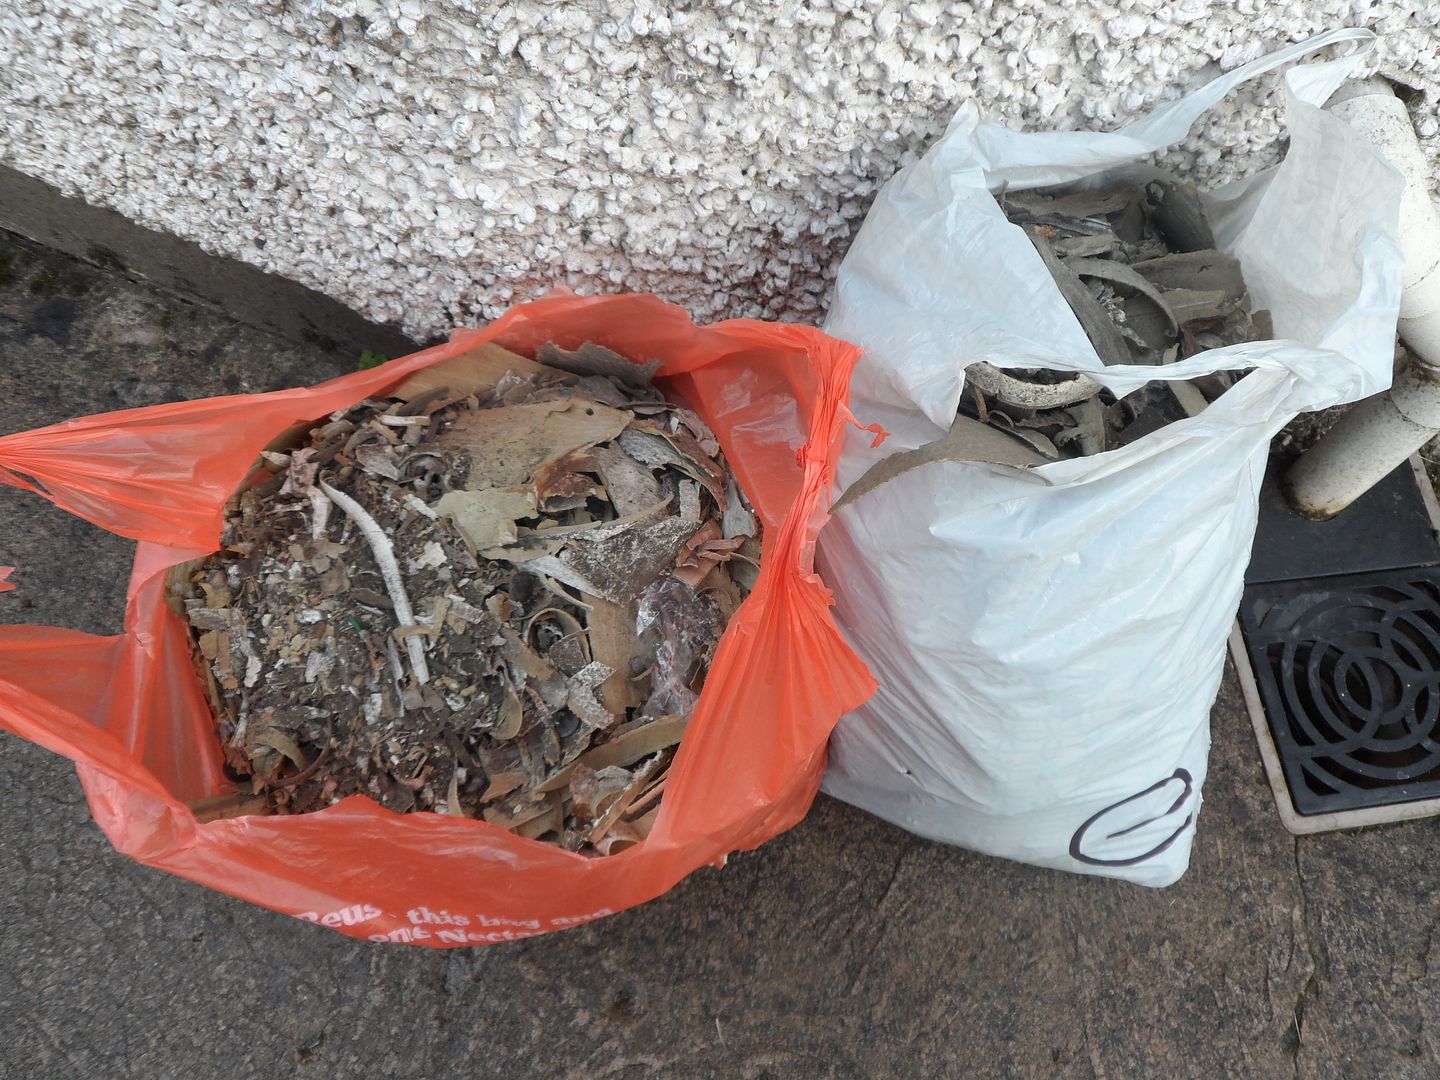
Next I moved onto the inside and managed to get another 10kg from the sound deadening. Ontop of that I started removing all the brackets and metal work. Lots more to get chopped out but want it on the jig first.
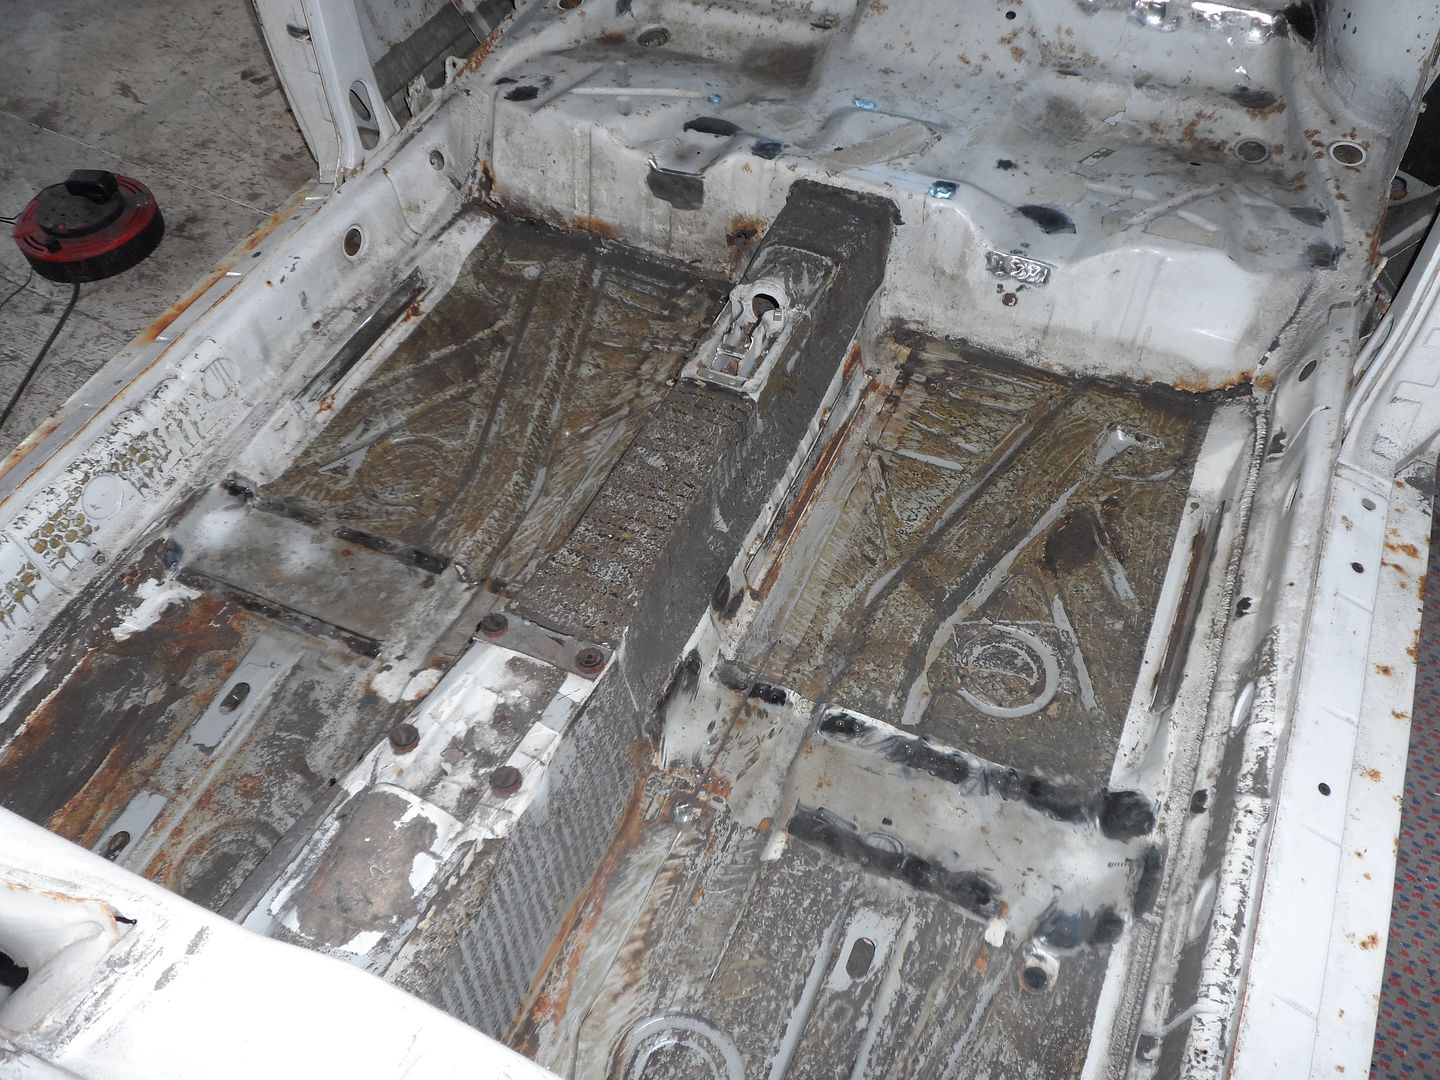
Another 2 full bags!
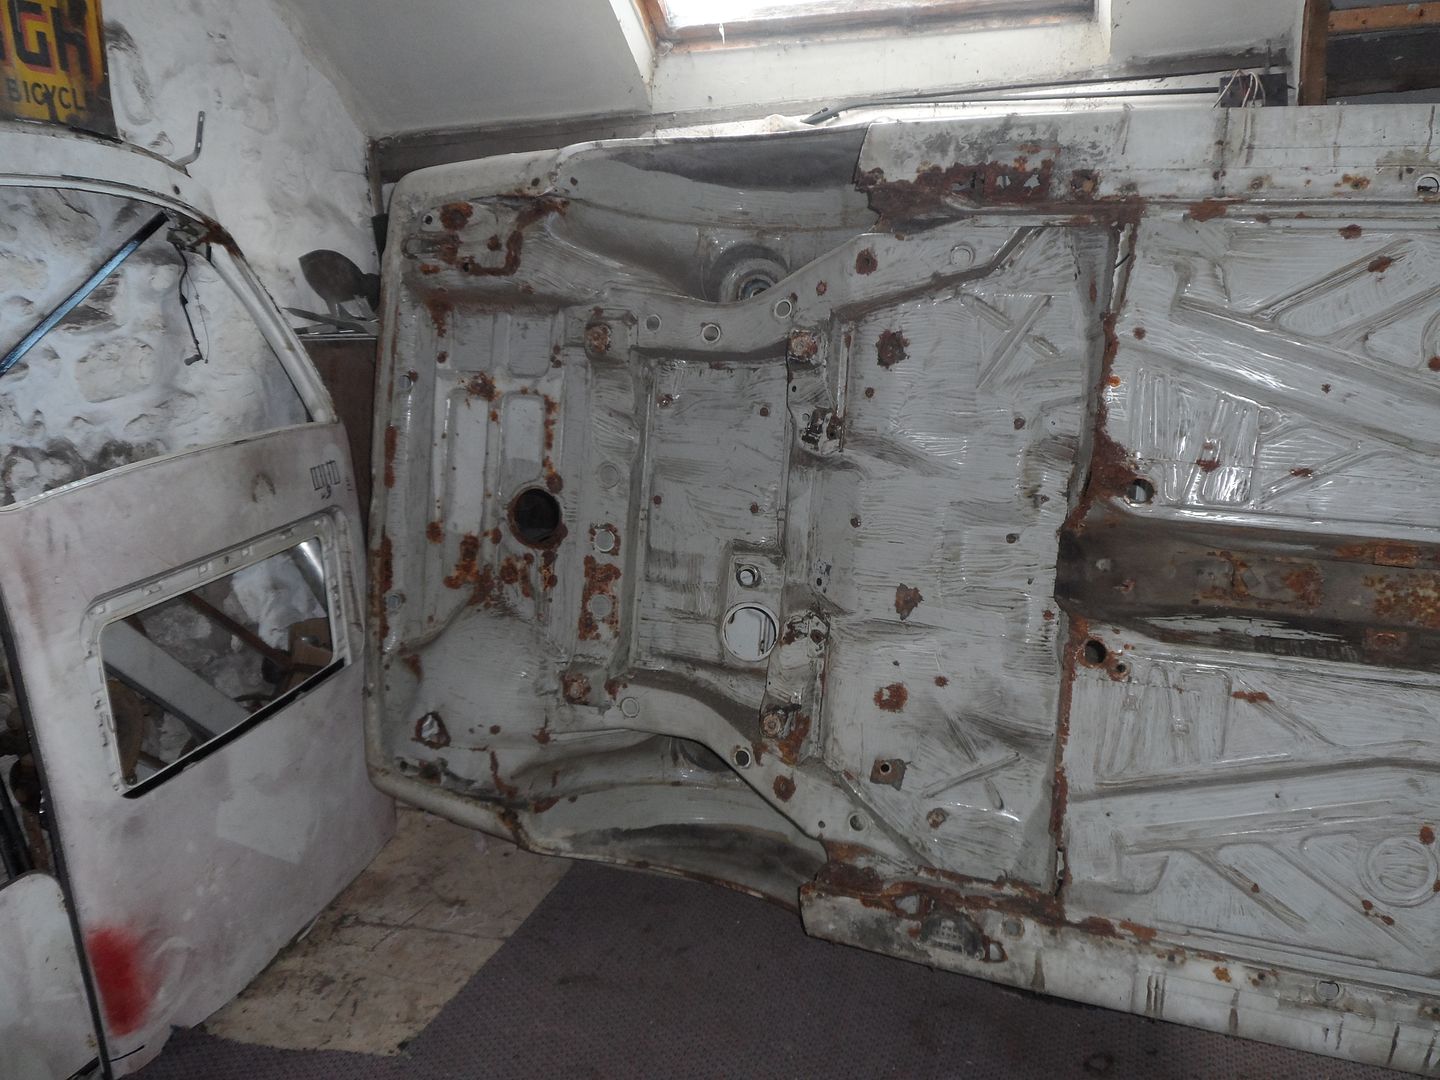
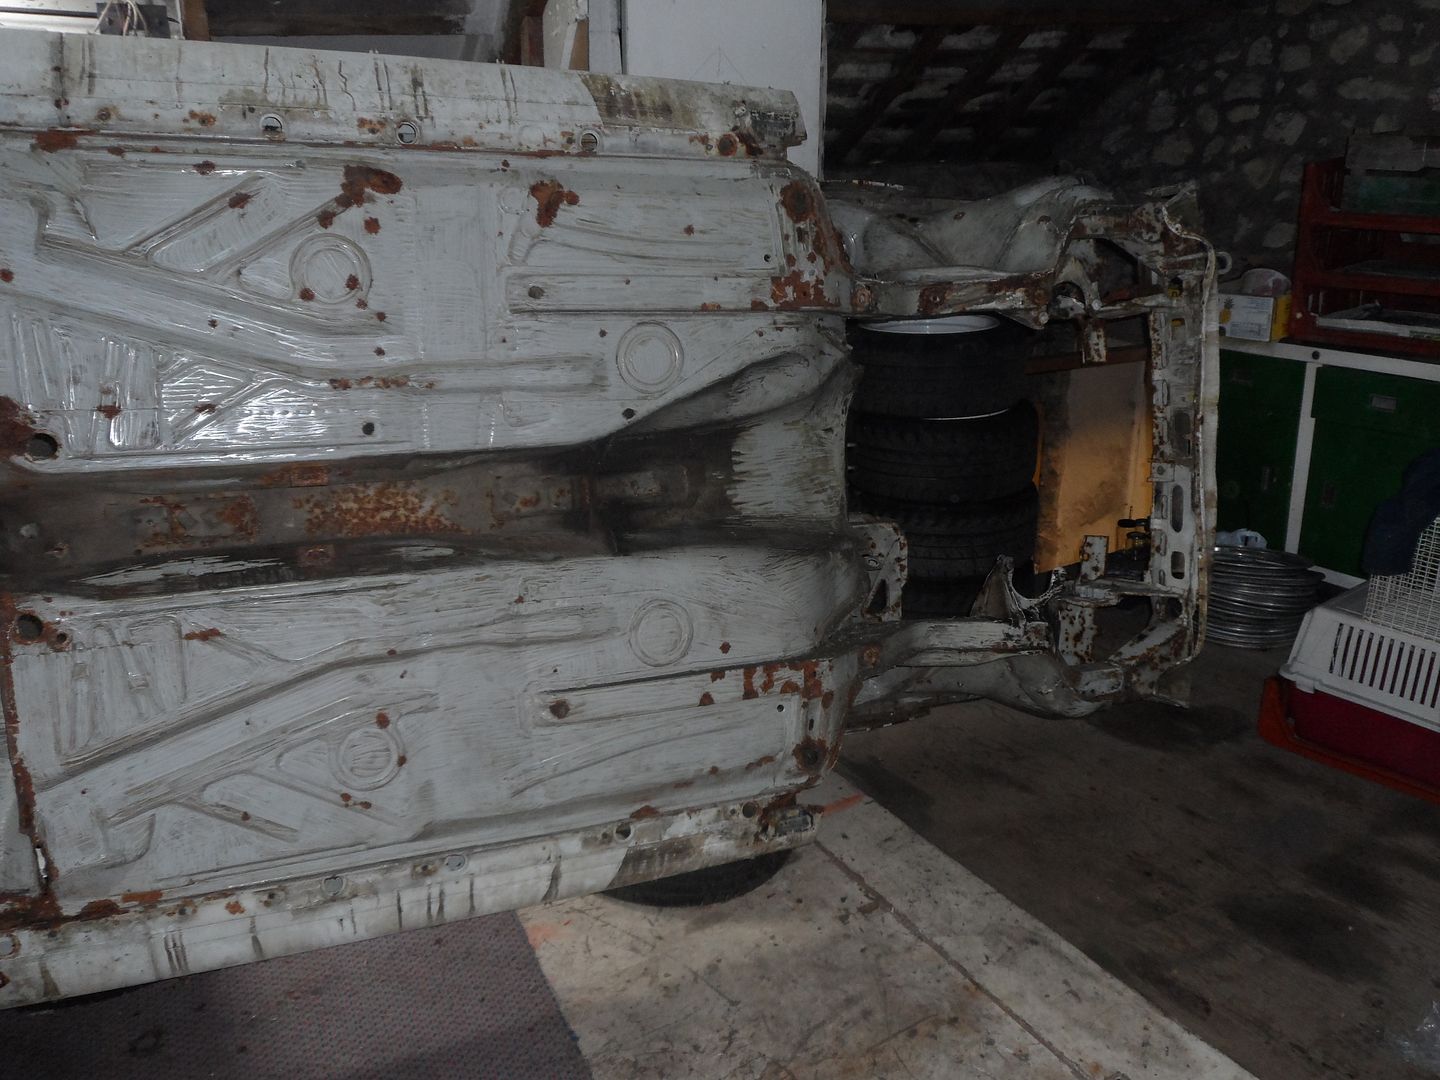
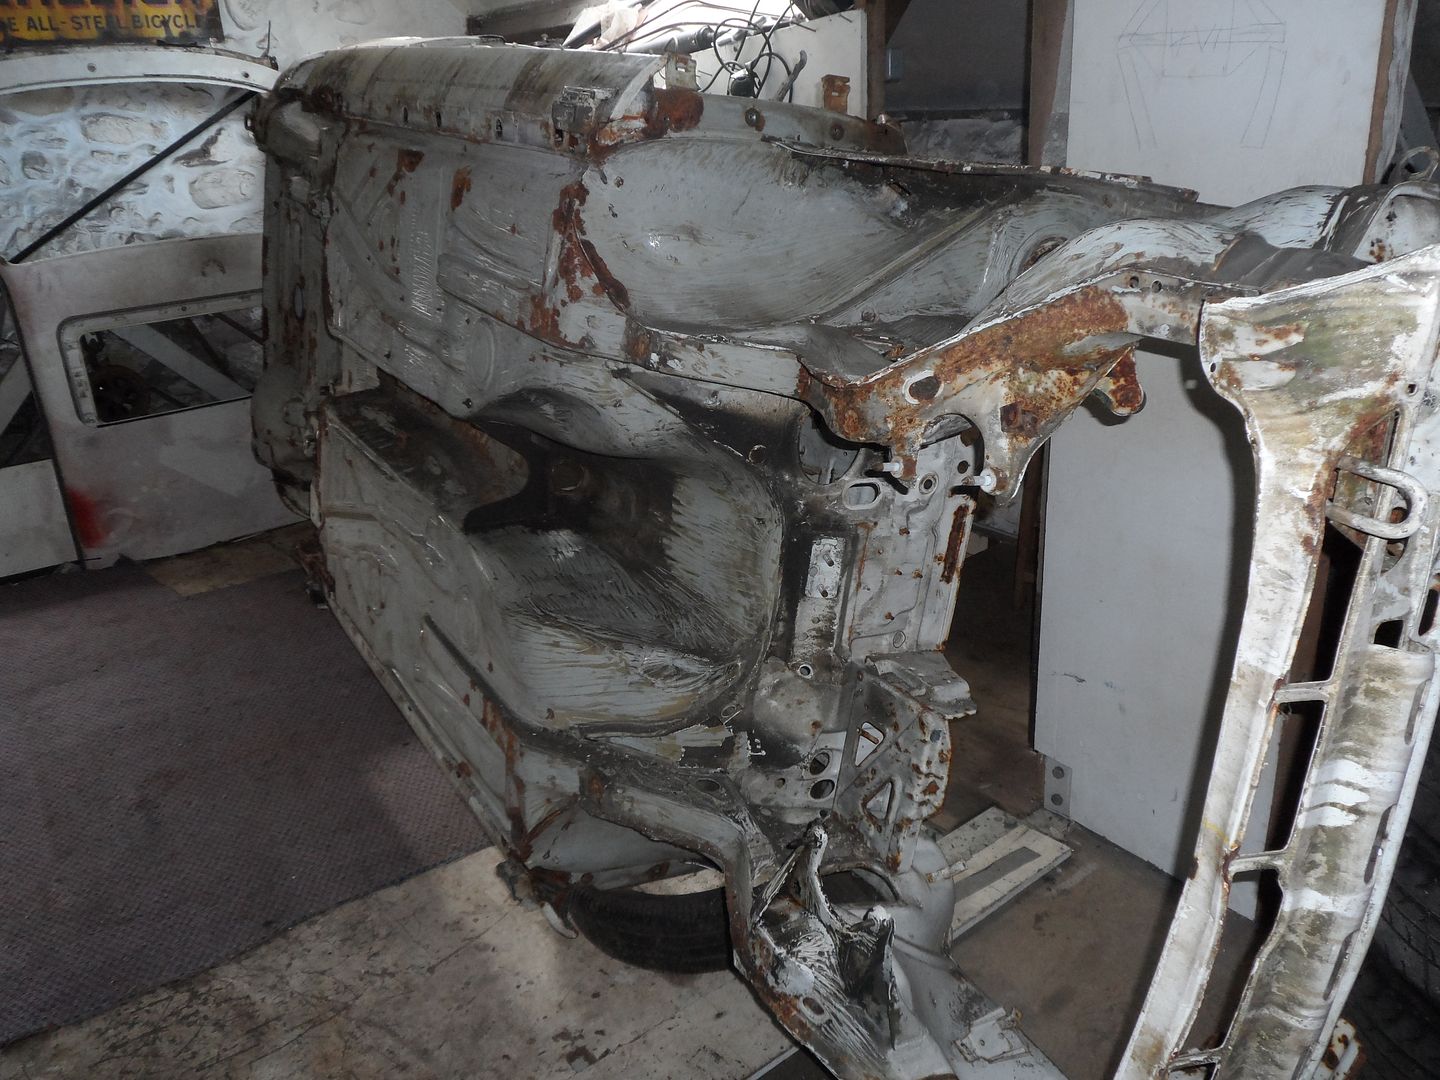
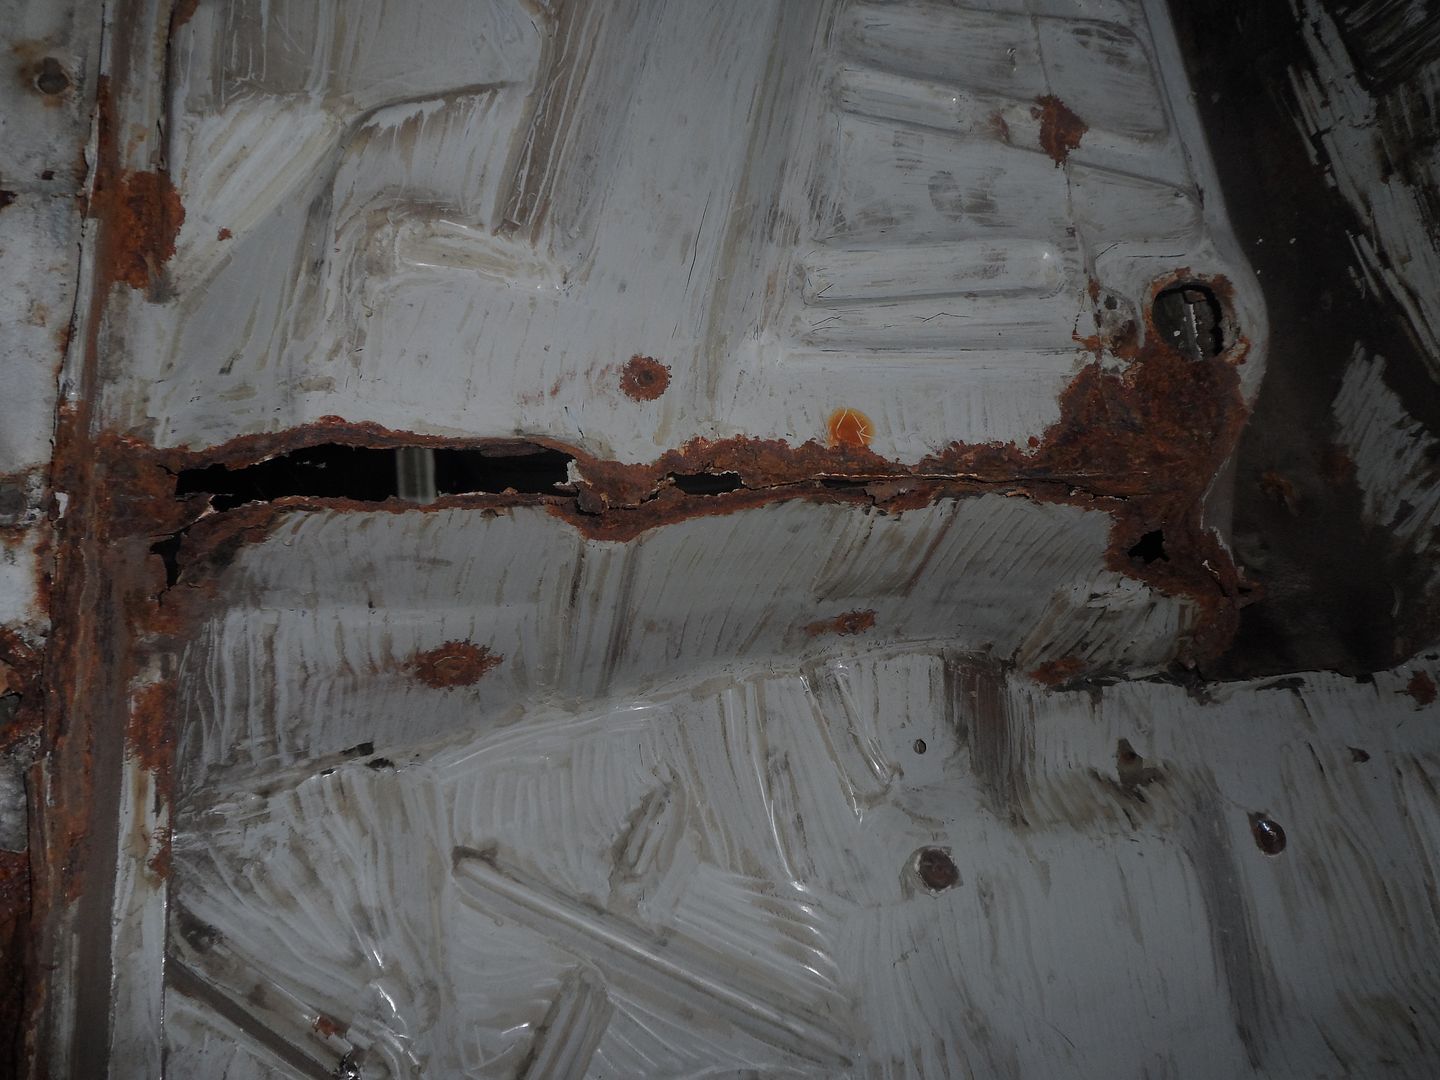
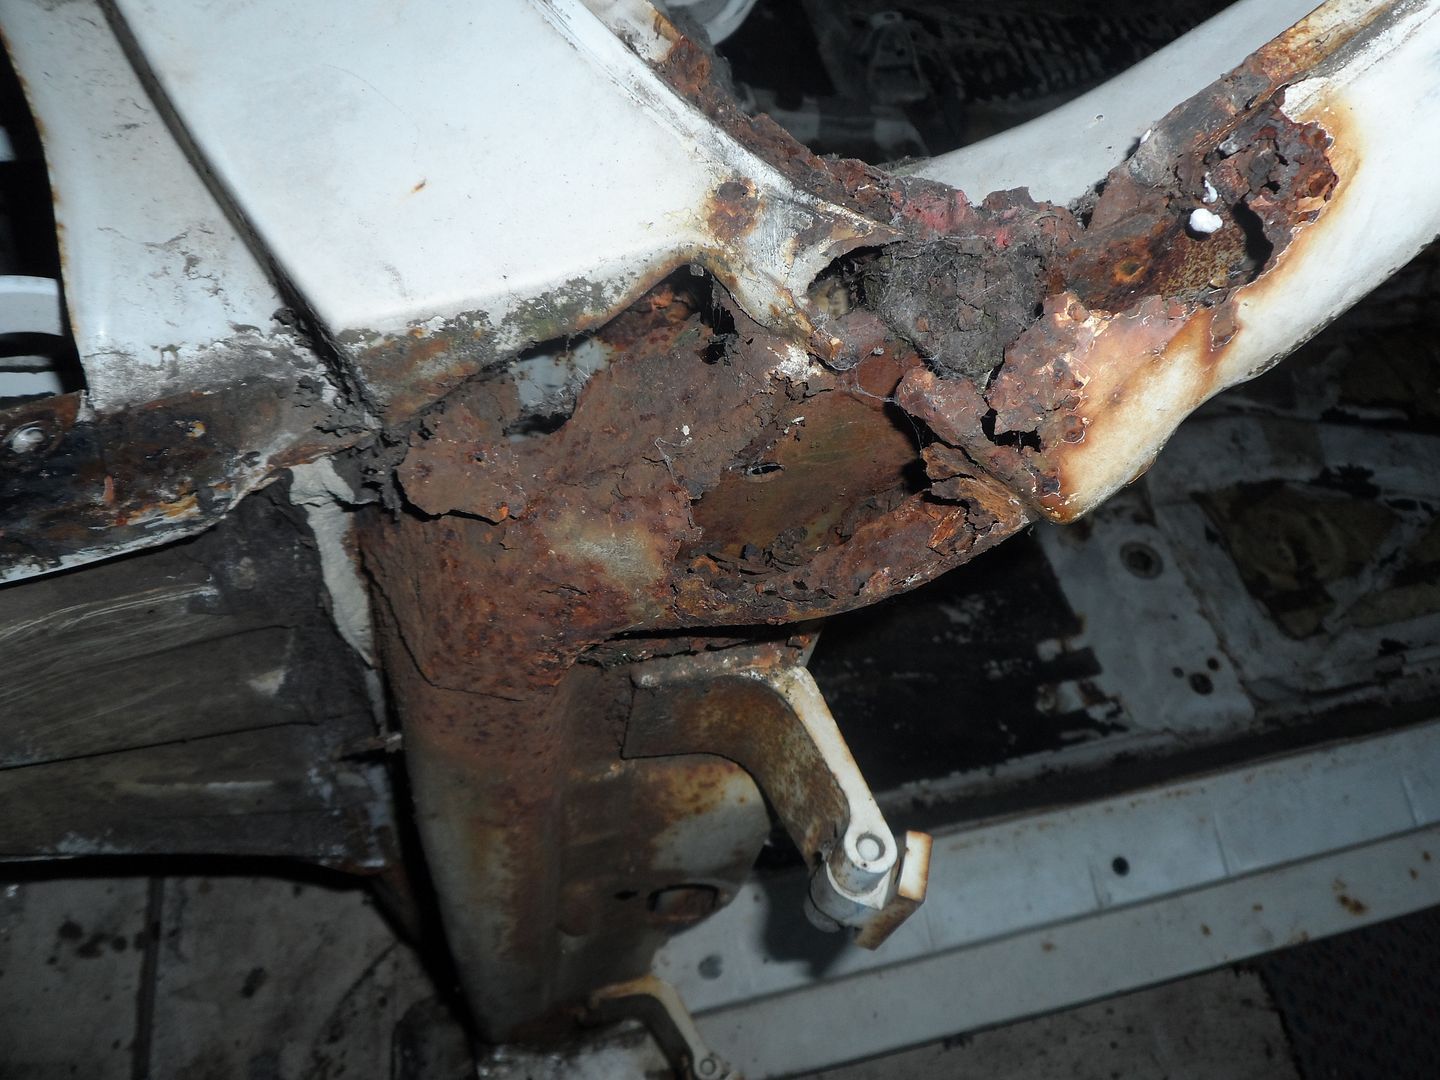
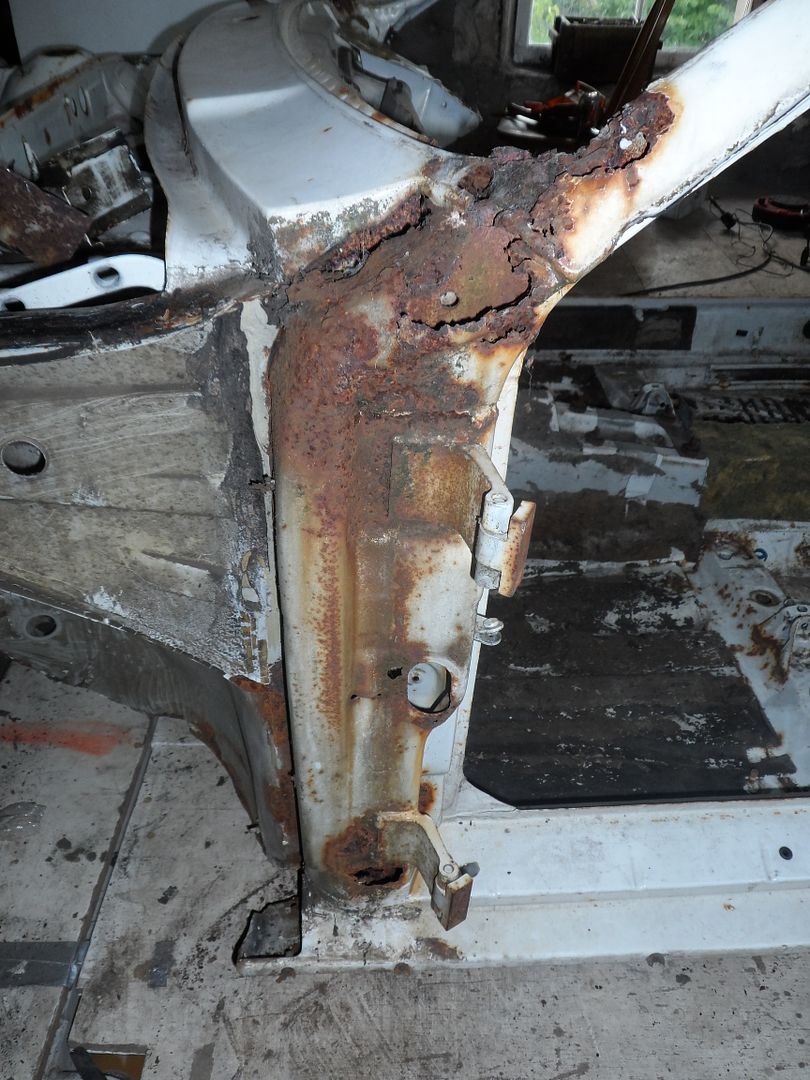
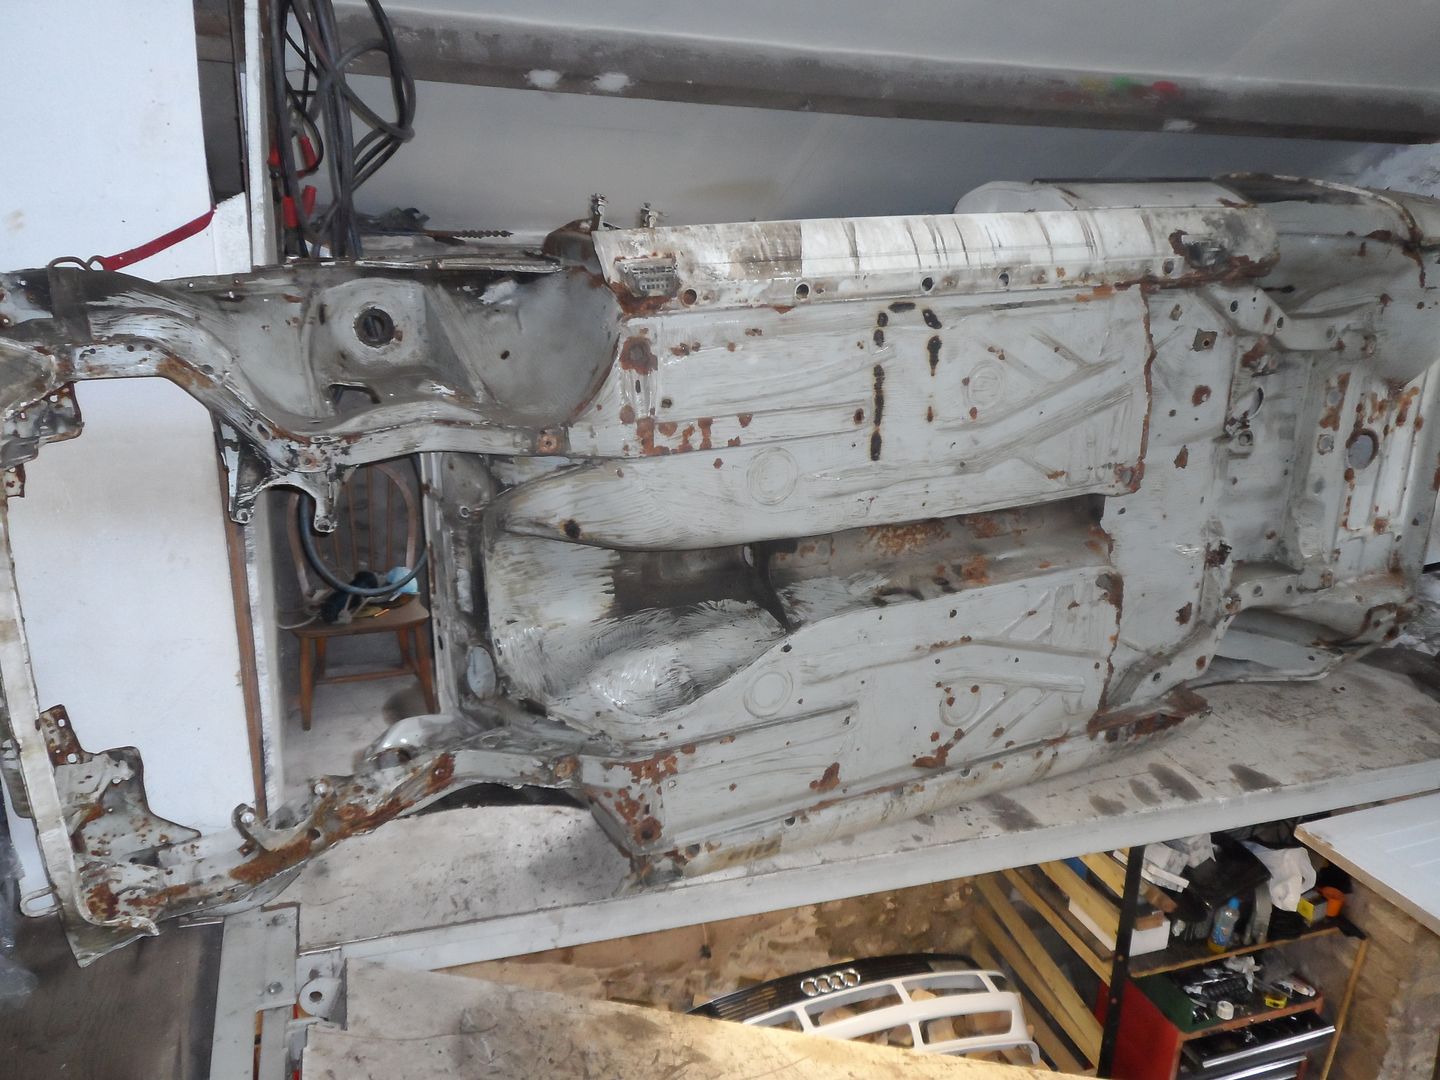
Got a nasty bit of rust to sort on the A pillars. Apart from that the shell is solid. The floor area where its rusty will get chopped out when its shortened.
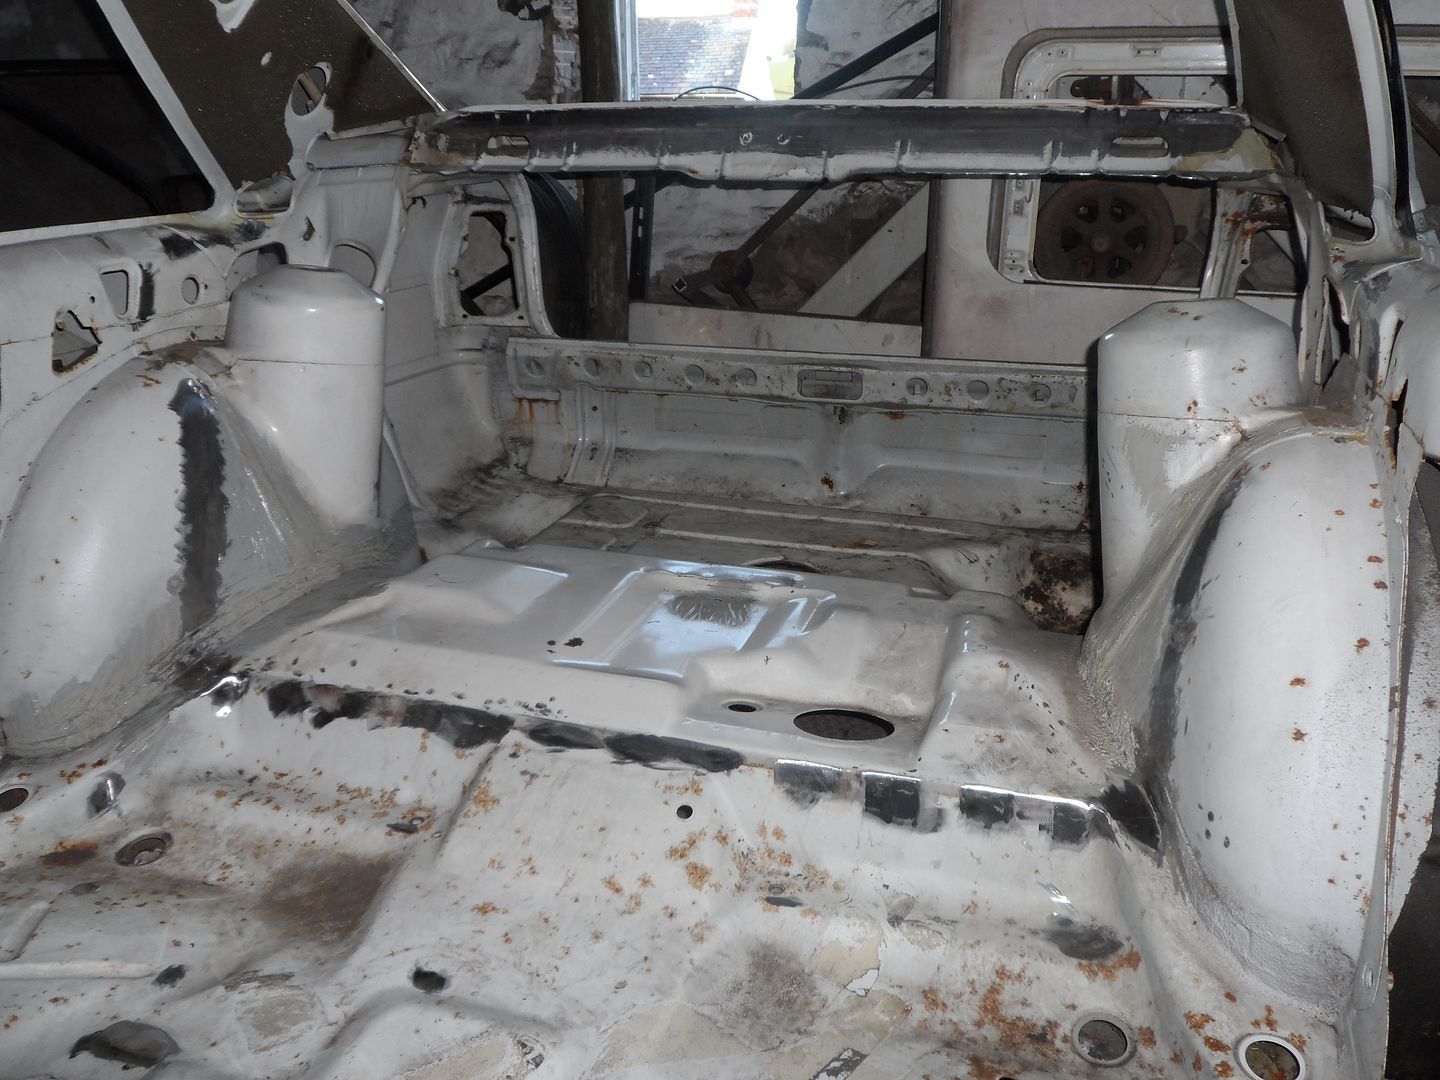
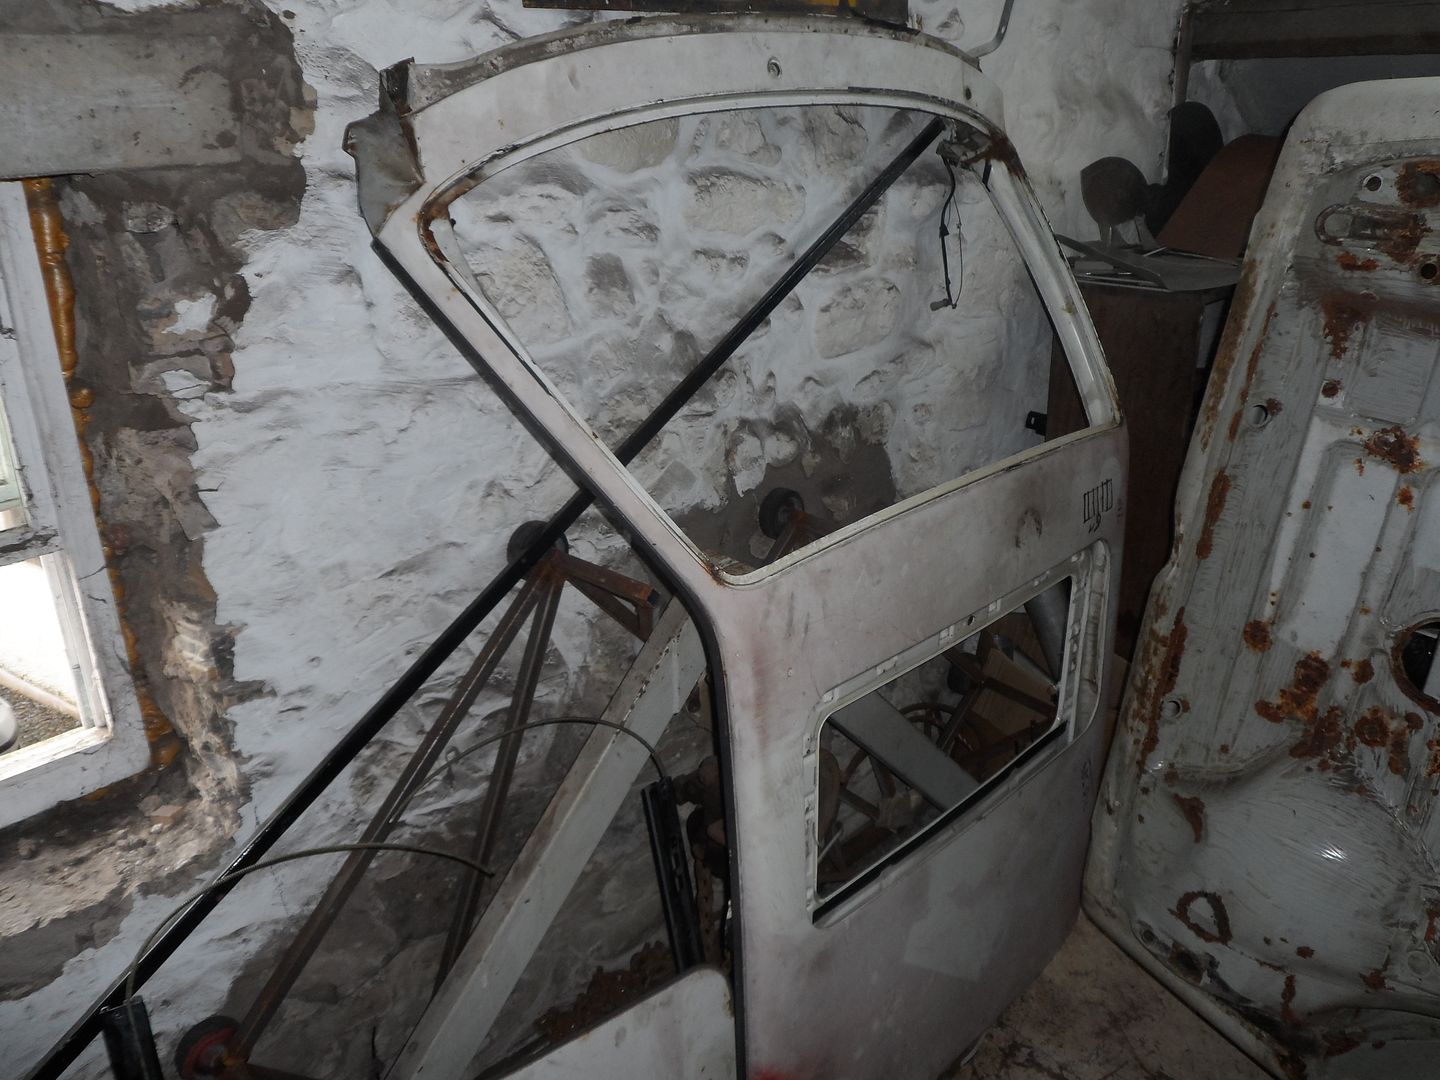
I have managed to get myself a roof from an Audi 90. 4 door obviously but I am going to use some composite B pillars to sort that. I also got the doors off the 90 to make sure the new roof goes on right.
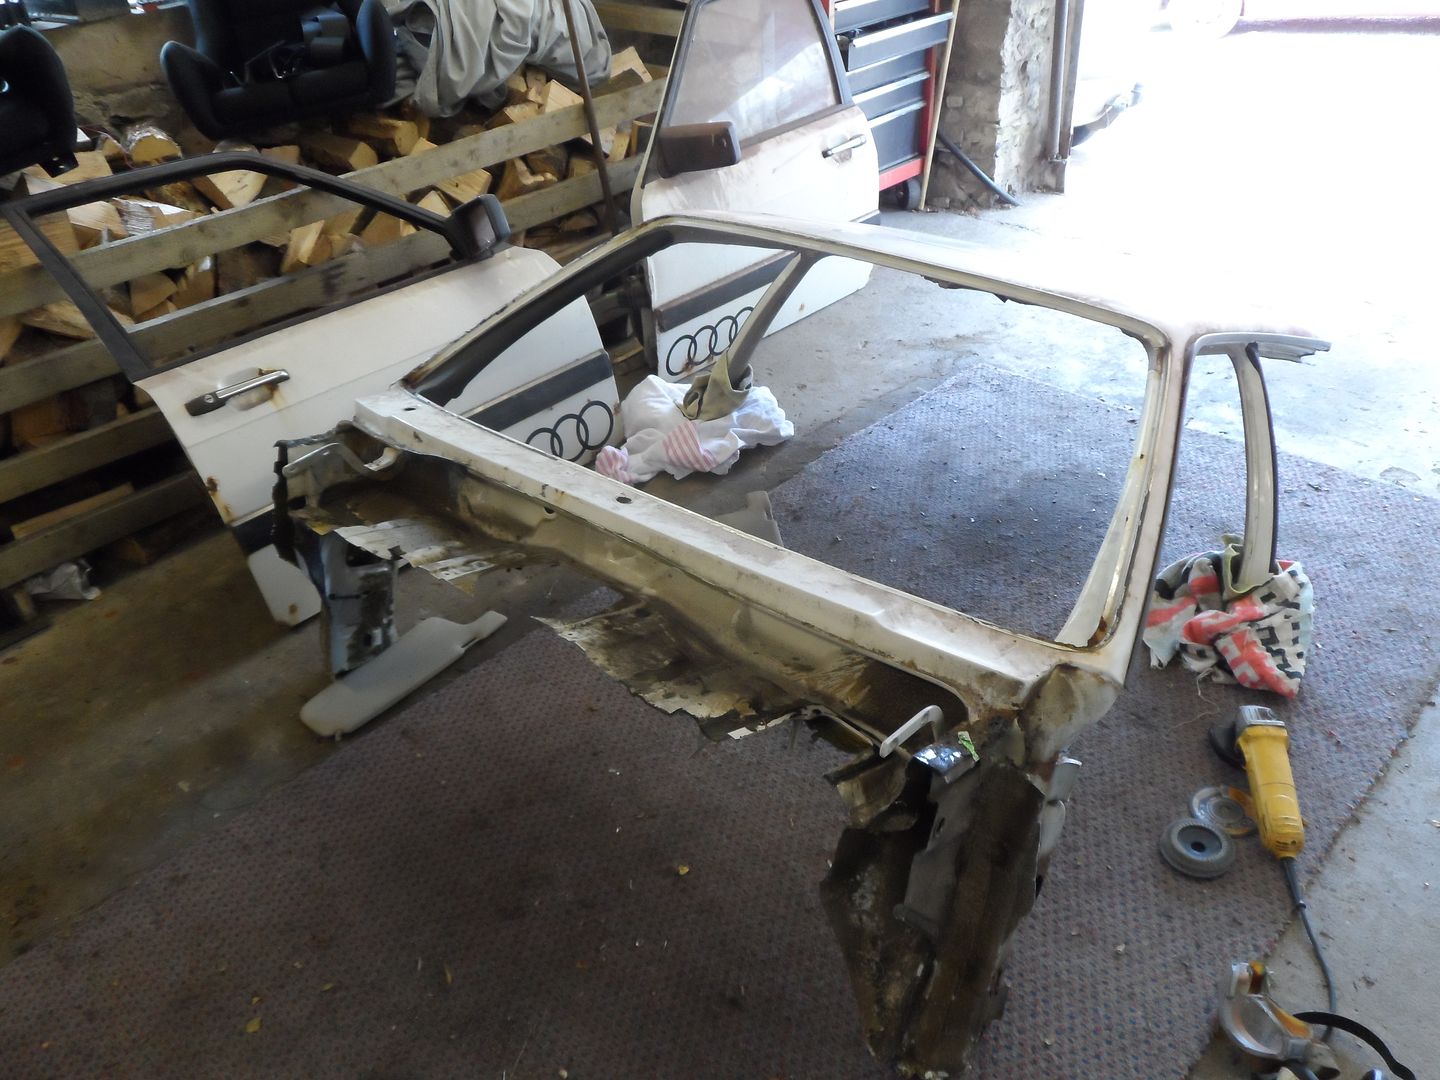
Chopped the roof right down will use the new roof to repair the tops of the current A pillars.
Next job is to get the chassis jig made up so it can all be held square for being chopped to bits. Should be getting on with that this week.Comment
-
Thats quite a project you've got on your hands. Gonna be quite of welding and fab work to keep you busy over the winter Greg
Greg
S2Forum.com Administrator & Webmaster
'93 Coupe with a few tweeks
Comment
-
Great progress Hamish. you have made a tidy job of removing the underseal, I too went for the wire brsuh on the angle grinder method, which amde a mess and was a PITA to get into the corners. Did you melt it off with a heat gun and scrpae it off with the chisel?
A-pillar looks like a bit of work but the roof section I guess will help take care of a fair chunk of it. Odd how the few sections are rusted through but most of it is solid as a rock. Rust is the devil.
Looking forward to seeing the chop mate
Panthero Coupé quattro 20vt
Indigo ABY coupé
Imola B6 S4 AvantComment
-
I used a chisel yeah a little bit of heat gun but you dont need much. Just got to go for it and be prepared to spend quite a good amount of time on it!
I suspect it was a very solid shell when it was taken off the road. The rust will have come from sitting as a stripped shell for 7 years outside. Back of the floor sections must have had water in them and the A pillar is the usual sunroof drain chucking loads of water into it.Comment
-
If there is a next time, I'll try that then. Must say I spent many many hours wire brushing it off anyway so anything can improve on that technique Panthero Coupé quattro 20vt
Indigo ABY coupé
Imola B6 S4 AvantComment
-
when i sold my 1.9 5S CD the guy was adiment the screen pillars were the same as a SQ and it was just gonna get chopped up
is the rake the same?
 1993 URS4 Avant Emerald Green 350+bhp
1991 Ford Sierra Sapphire 4x4 in Magenta
BoooOOOSSSSSTTTT BANG BANG CHIRP CHIRP
Comment
-
Looking good so far. I hate underseal and sound deadening. Im really looking forward to seeing the car on a jig getting chopped. I sometimes rather look at the build pics than the finished car.Comment
-
Please make good pictures of how are you going to manage the roof and B-pillars from the 4-door sedan.Go Holset or Go RS4Comment
-
I will of course take lots of pictures and put them up at the time. It perhaps might not be an ideal way of doing it if your running without a cage as the cage in this shell will be integral.
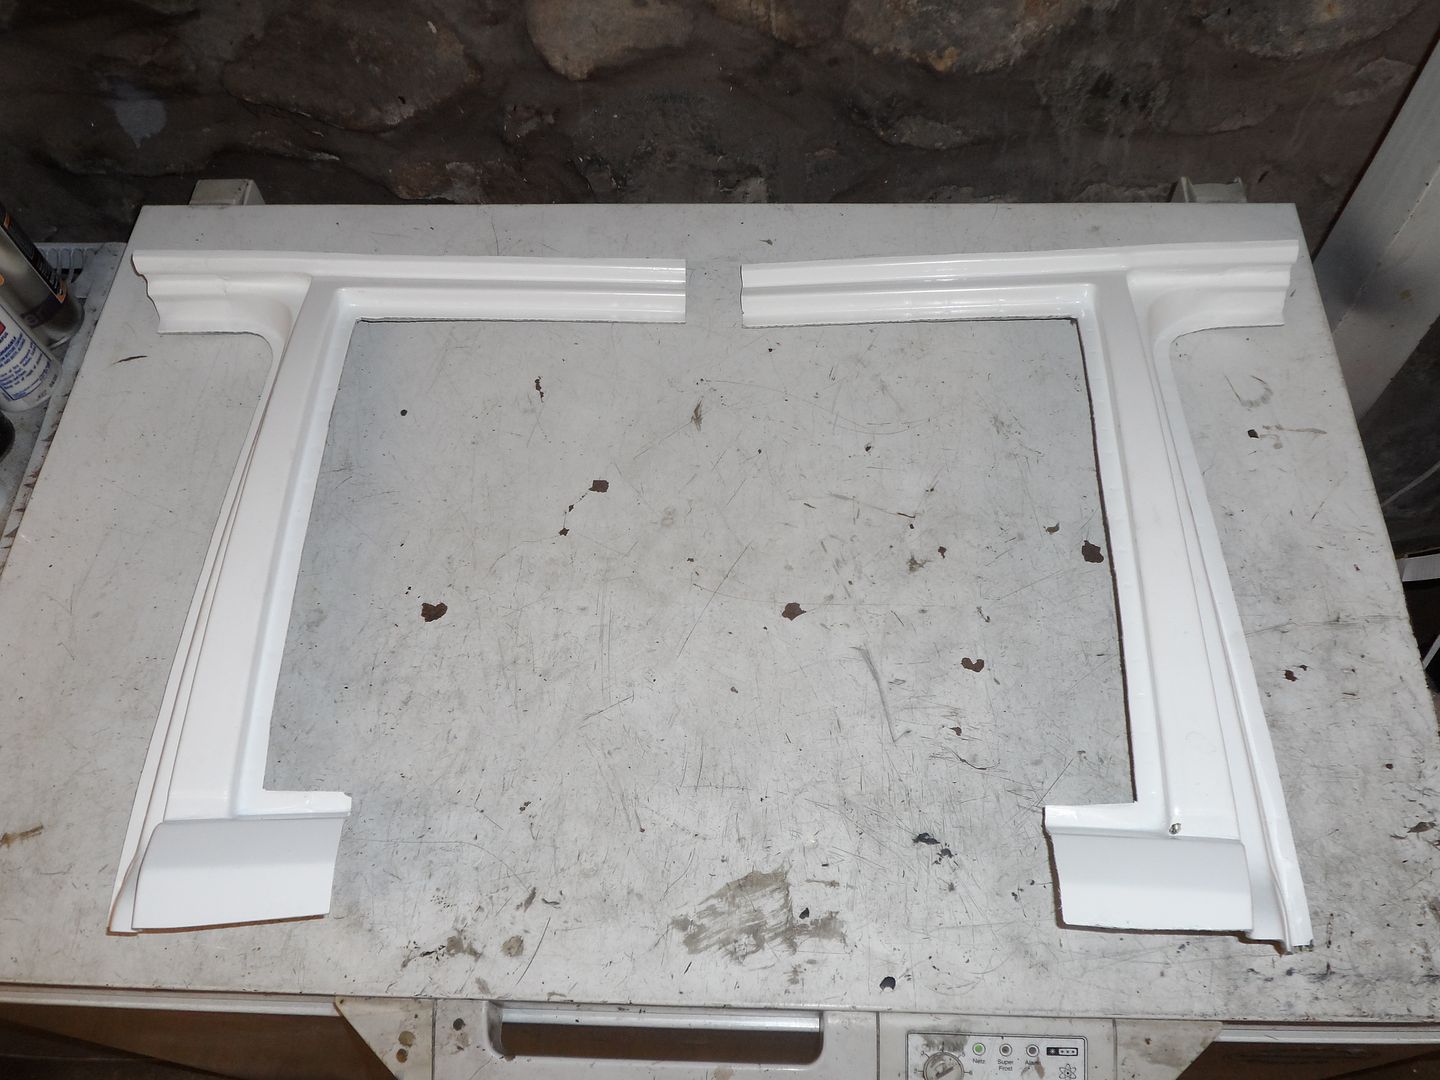
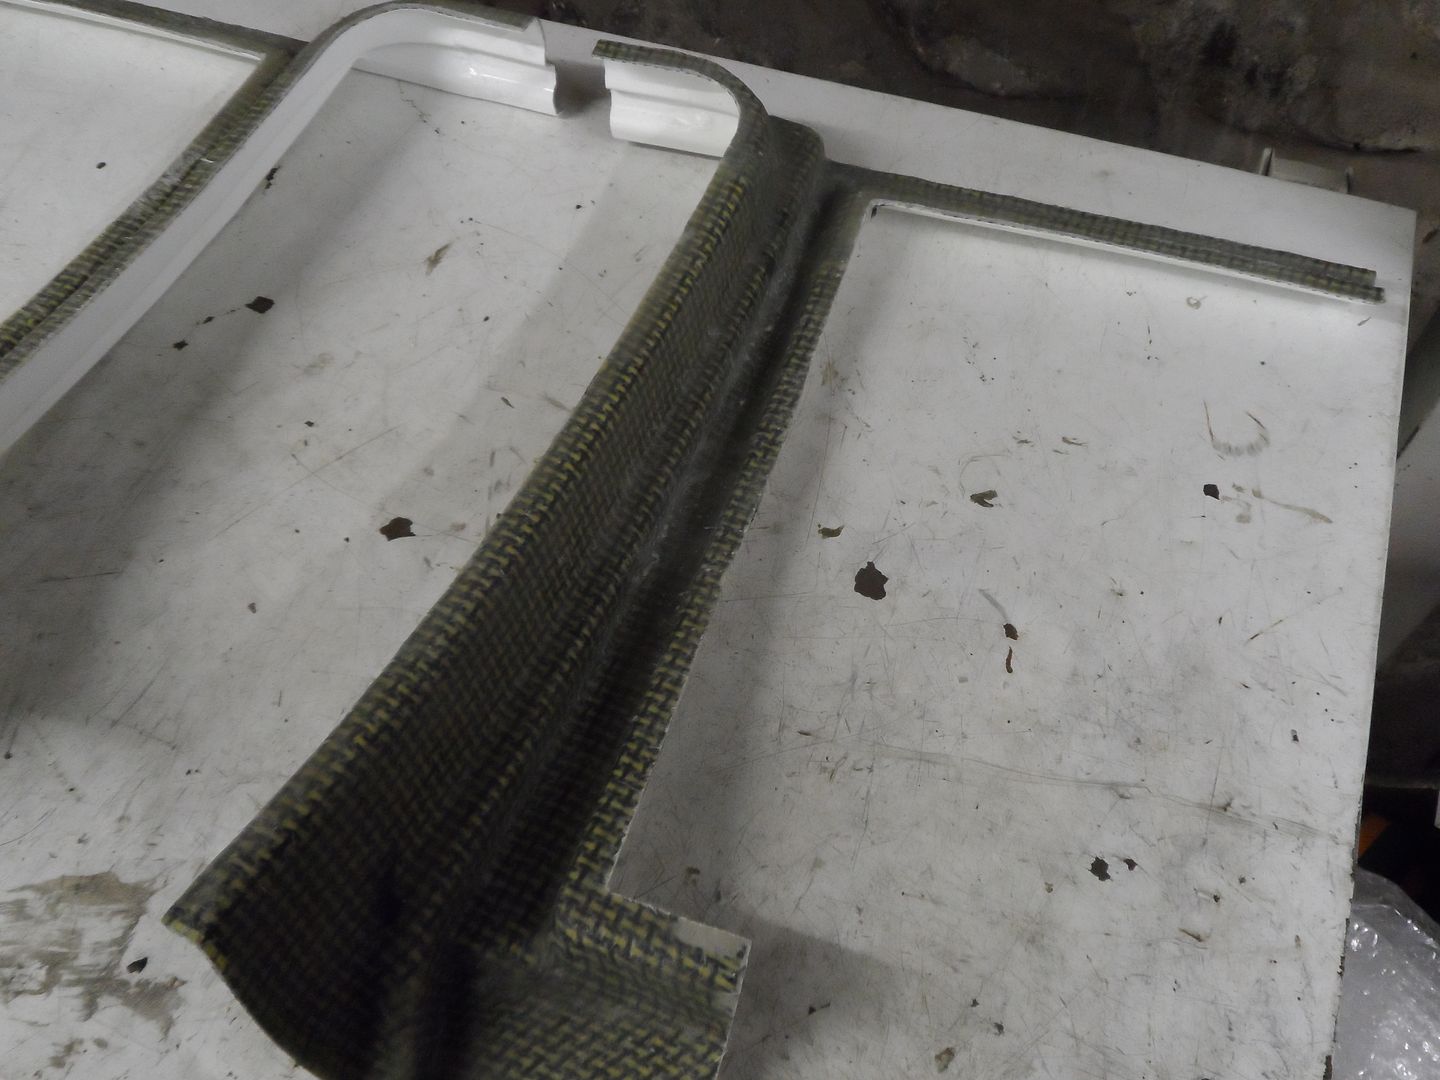
I have had a nice delivery from Andy Krinks of some carbon/ kevlar B pillars which is the first part of the puzzle for the body work. Roof is next on the list then the cage can begin!
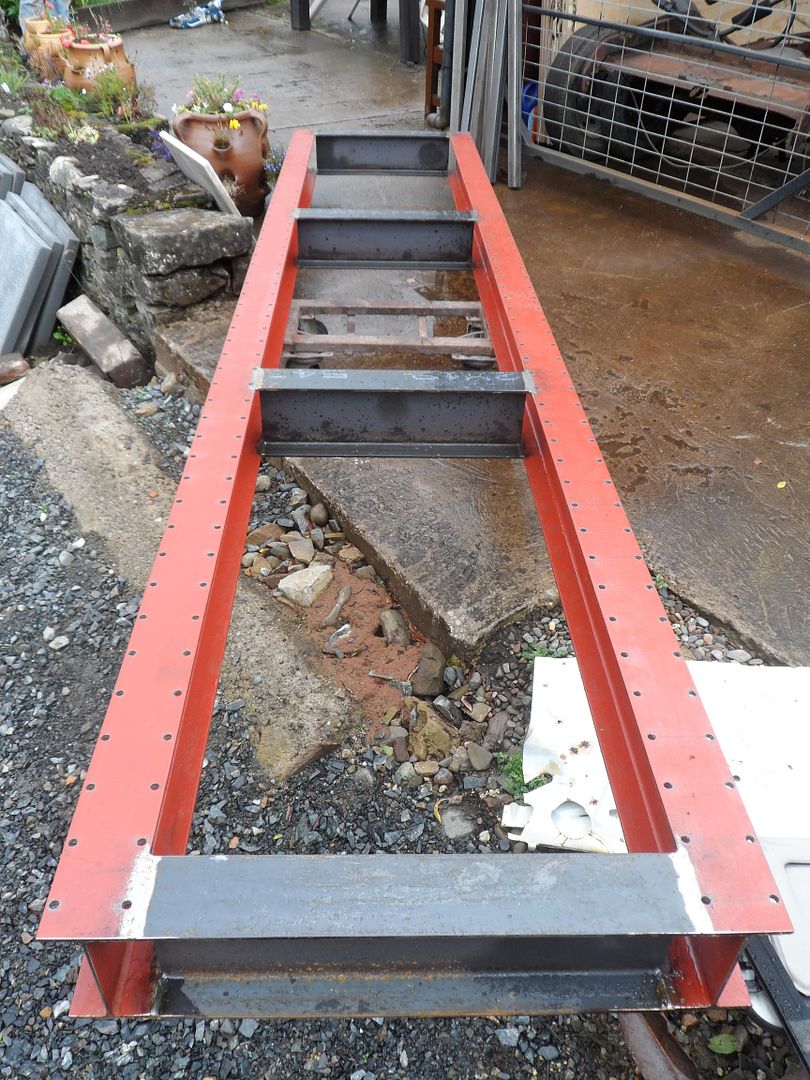
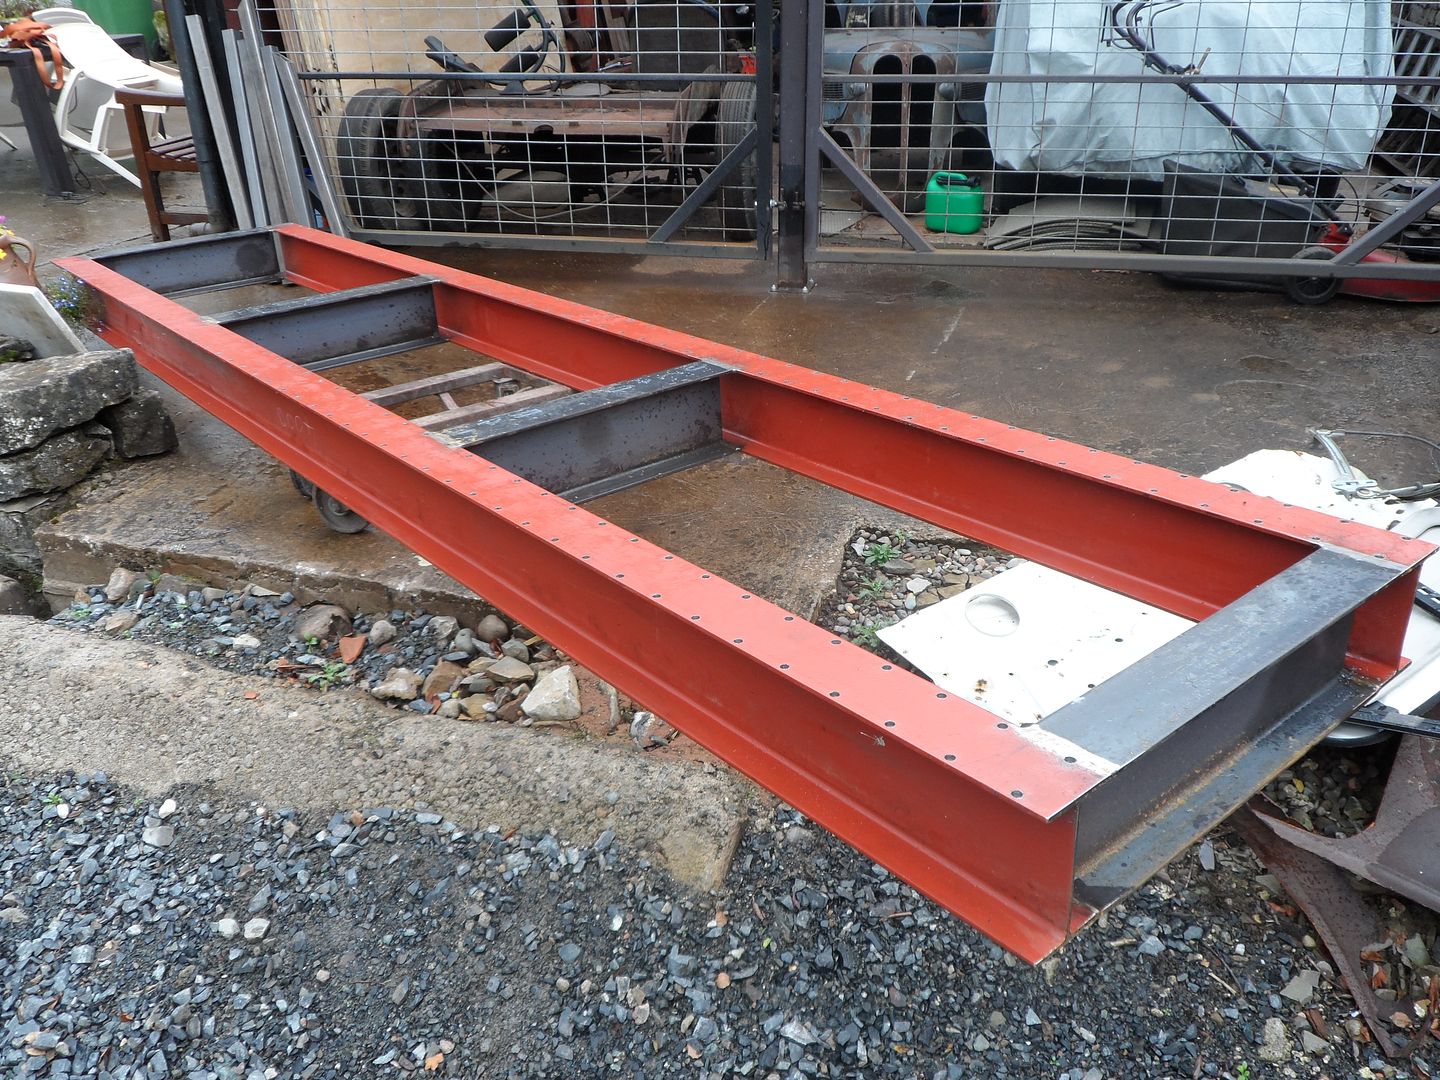
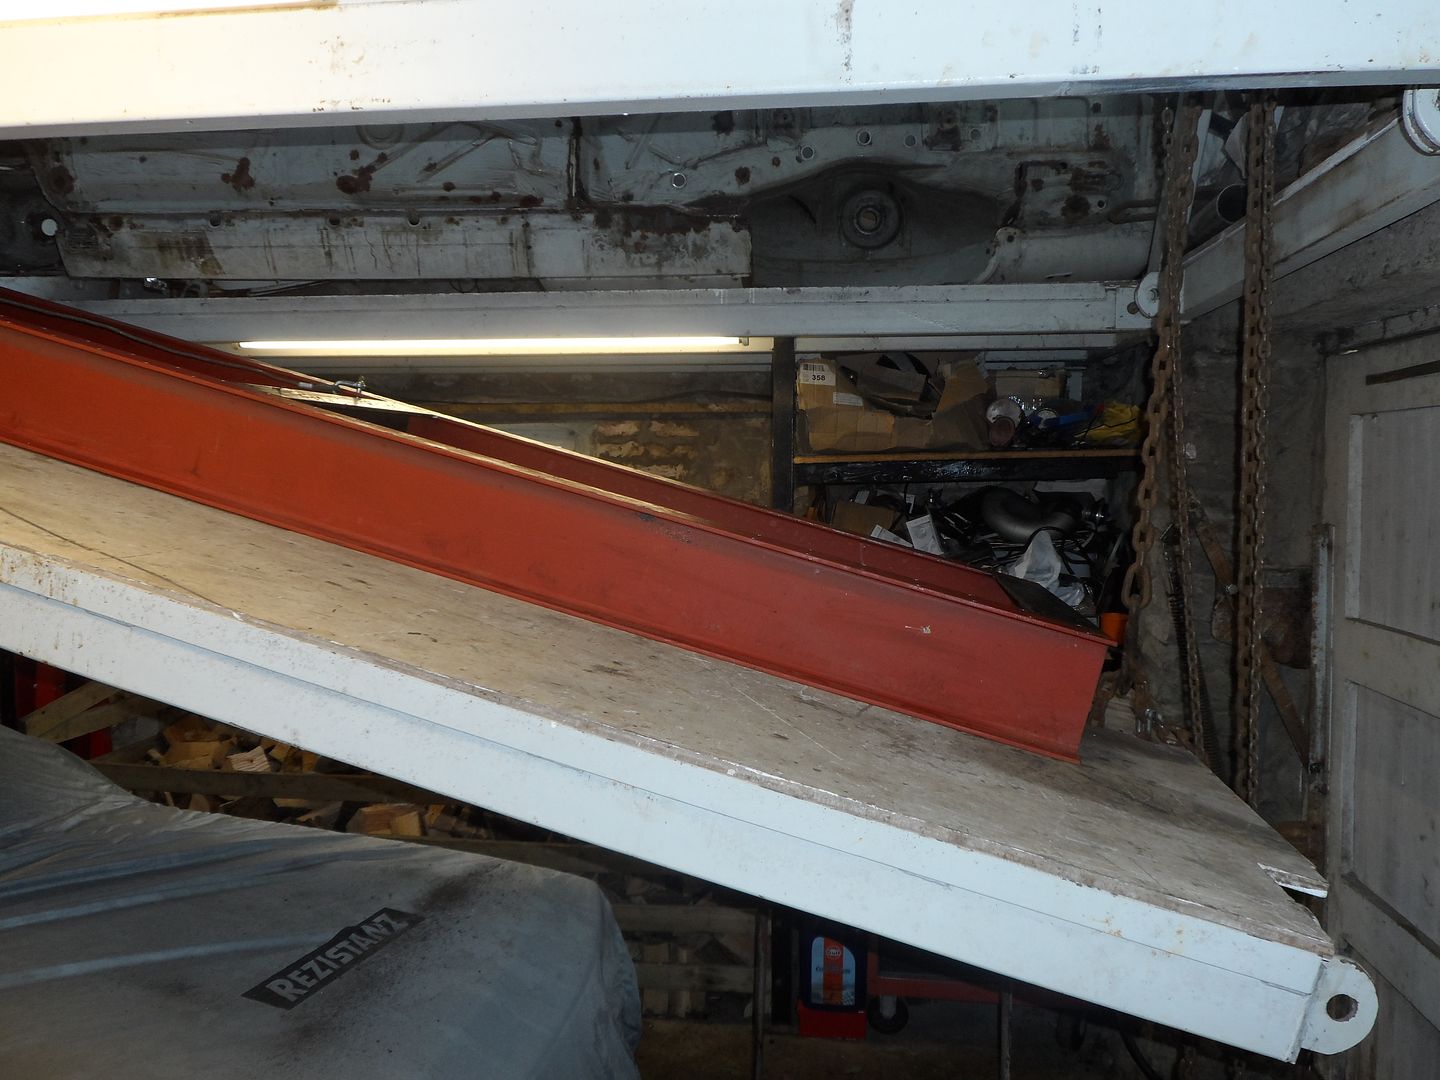
Next part of the puzzle which has held things up has been the chassis jig. I had worked out I wanted 80mm hole spacings on the jig as that means going forwards 4 holes gives the magic 320mm to shorten it. That meant using an I beam with at least a 100mm top plate. I ended up with 178 x 102 beam, 19kg per meter which was the lightest with a 102 top plate. Went with 4 meter lengths so its long enough to bolt to all the vital points. The width is set by the subframe mounting points. 196 holes drilled in total down its length so anything can be added including cross beams to increase the width for getting into the strut tops etc.
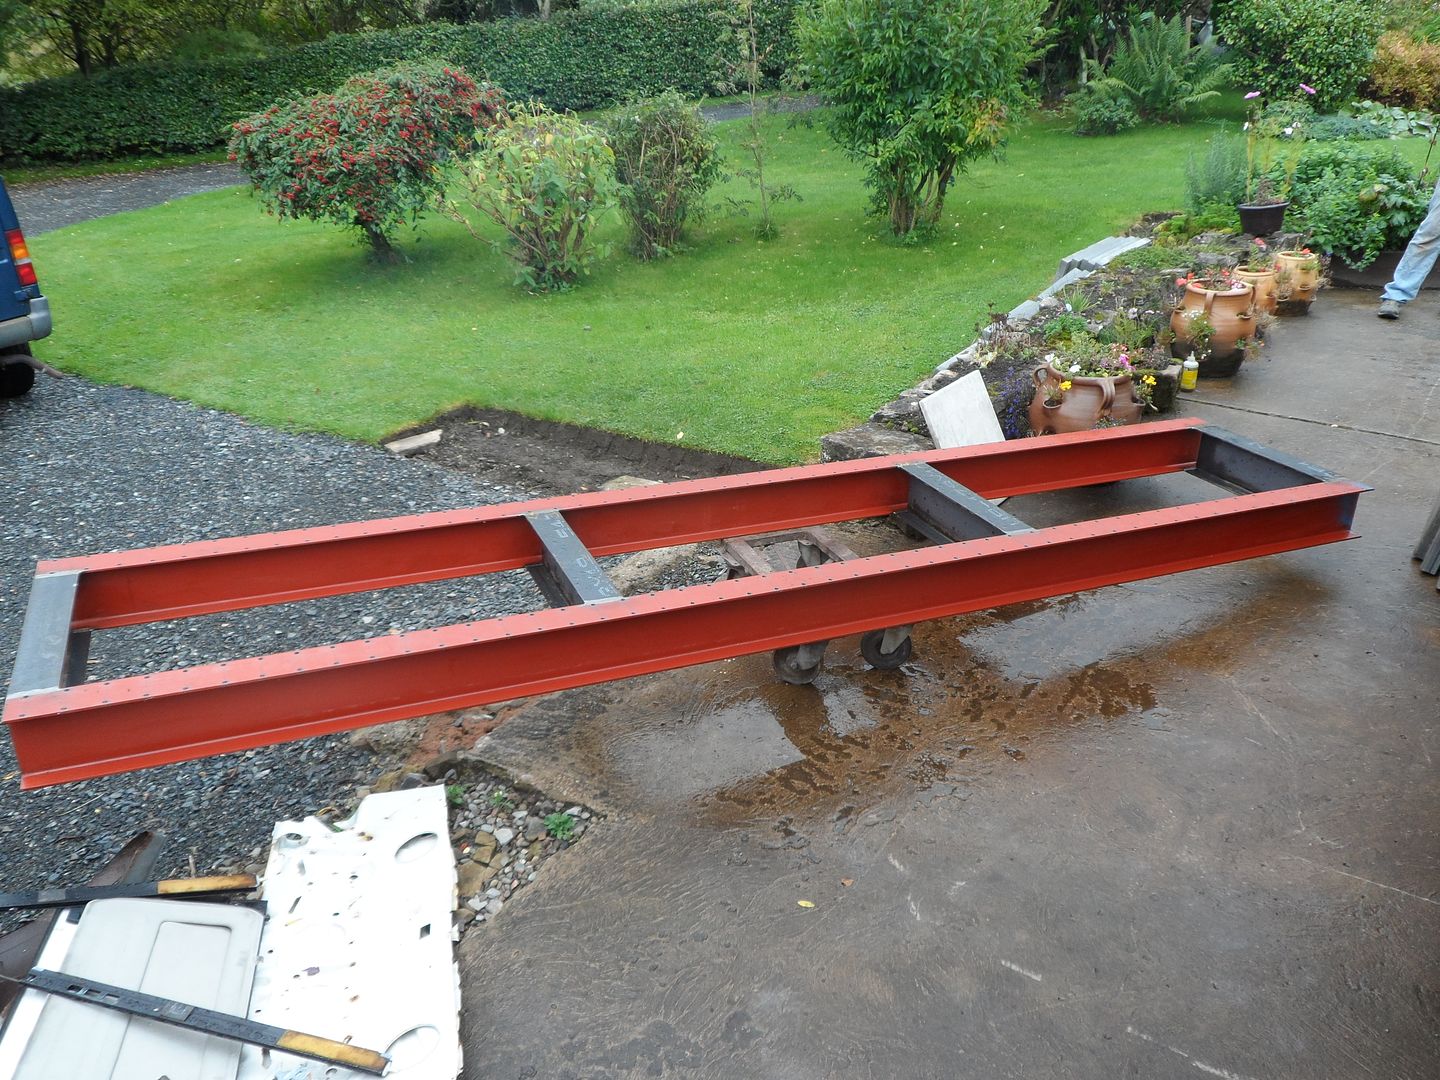
So once that was done it was time to get it up on the loft with the shell. Big thanks to my mate Jamie who came down to help out as I couldn't have done it by myself!
First job was to get the shell over on its side out of the way to drop the floor down.
Loaded the jig into the back of the van and drove it around to the garage as its bloody heavy!
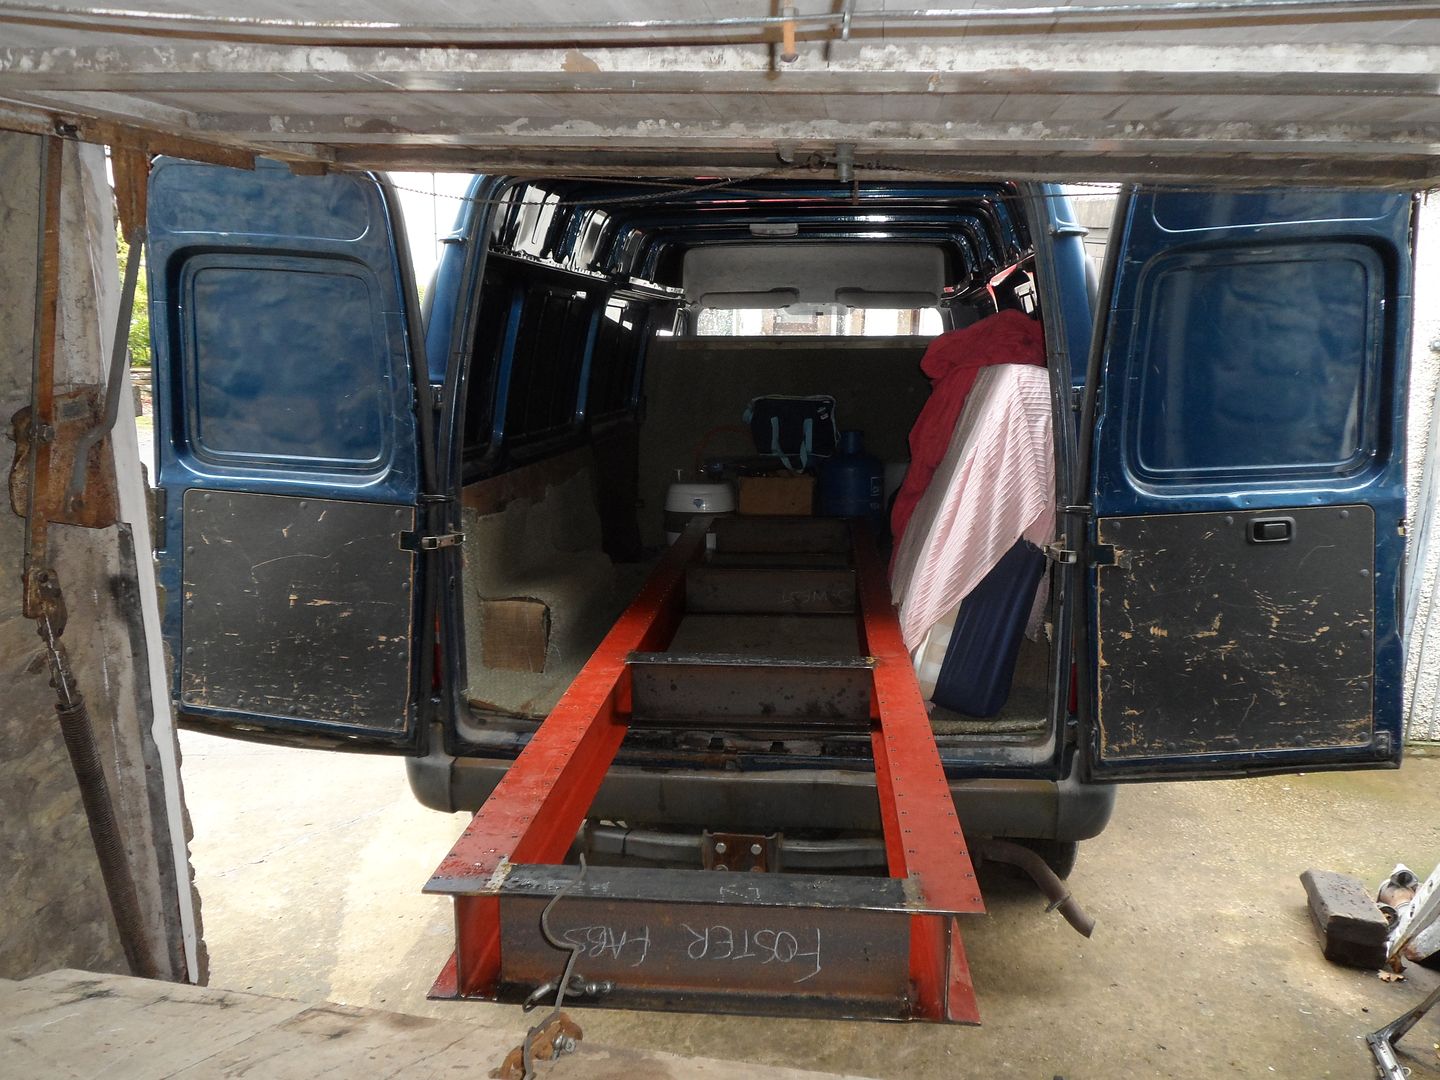
Jig pushed up the ramp with 6 sheets of 3/4" ply to go down on the floor. Wanting to spread the weight of the jig/ shell and seal up the floor so no debris gets onto the car below.
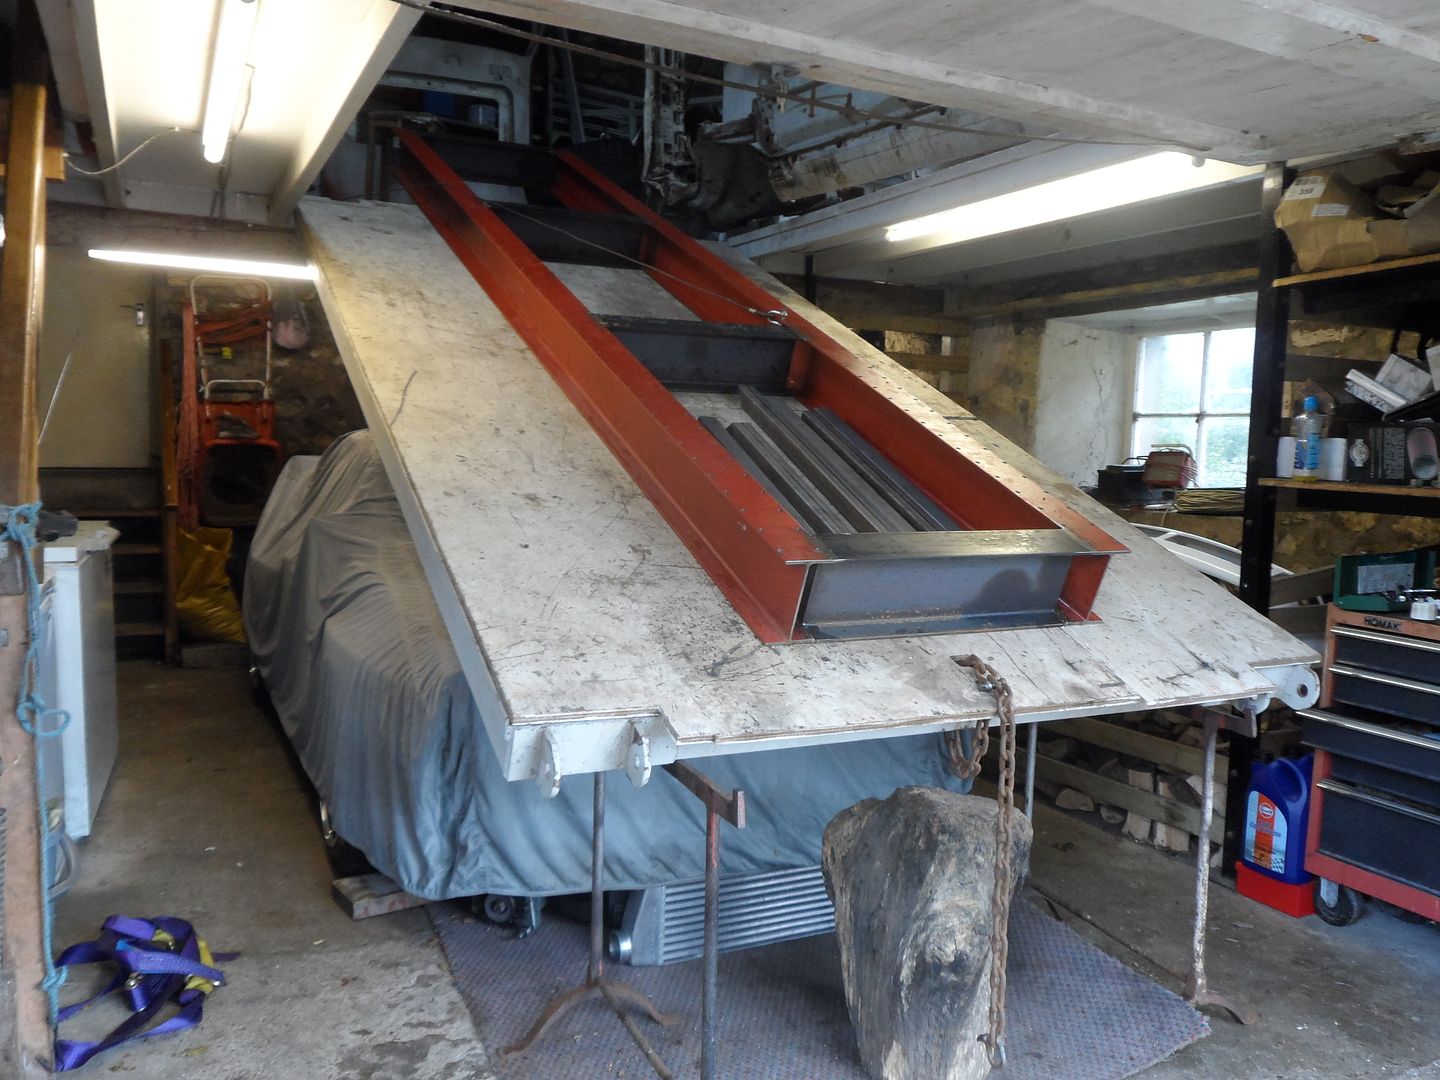
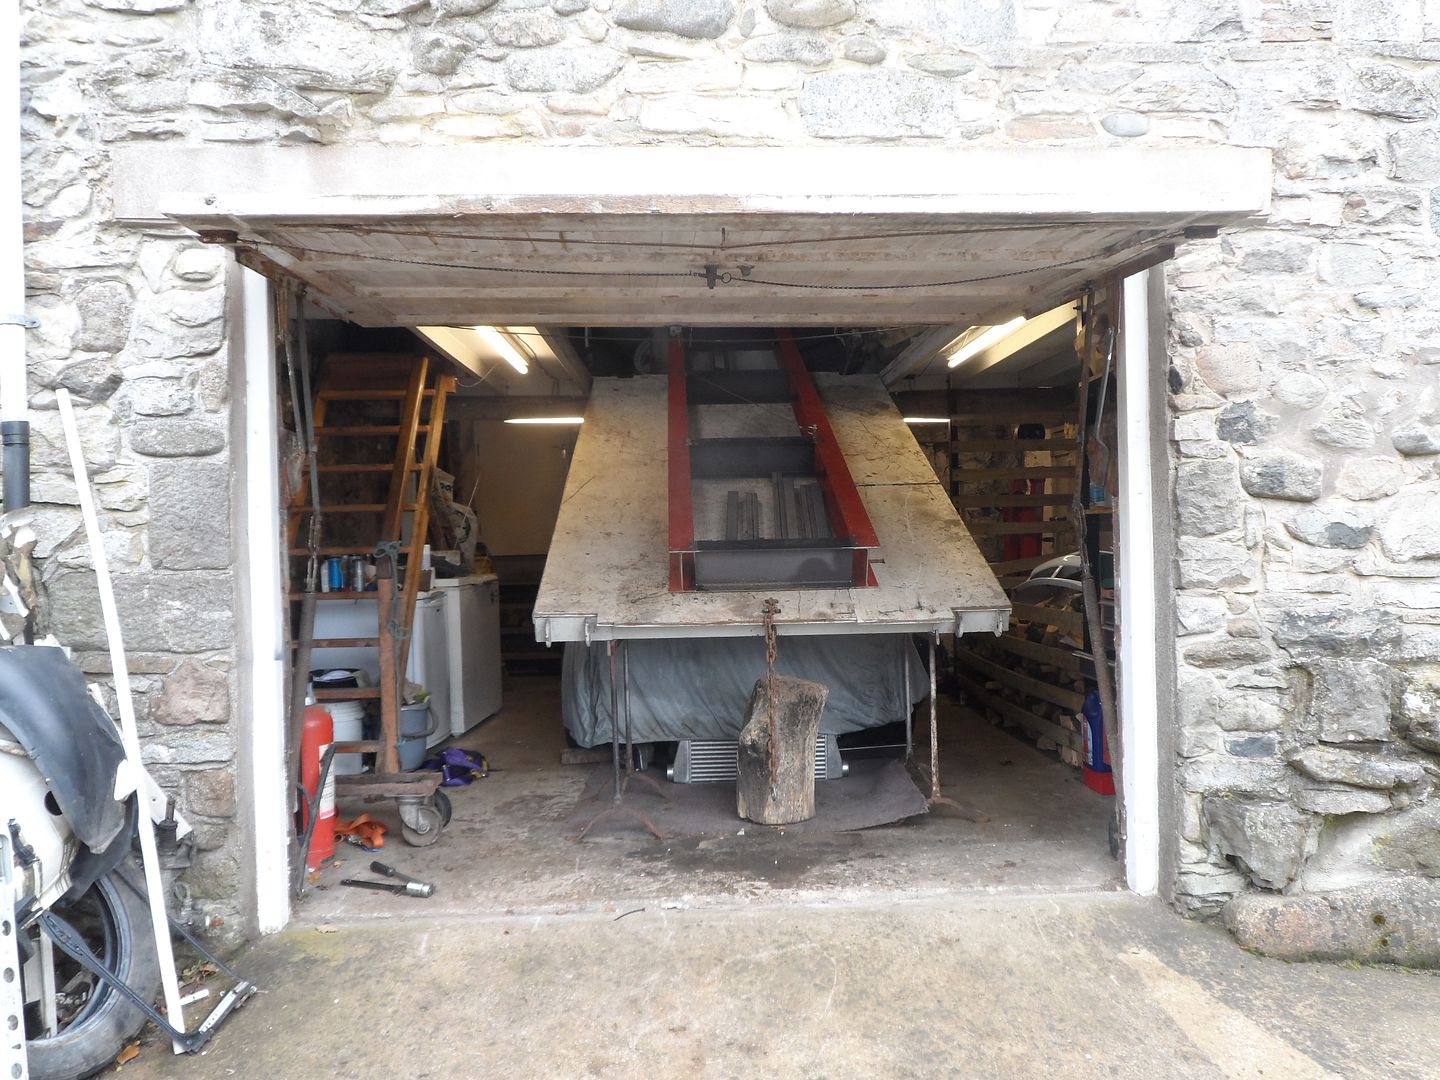
Boards down to seal it up for what could be quite some time!
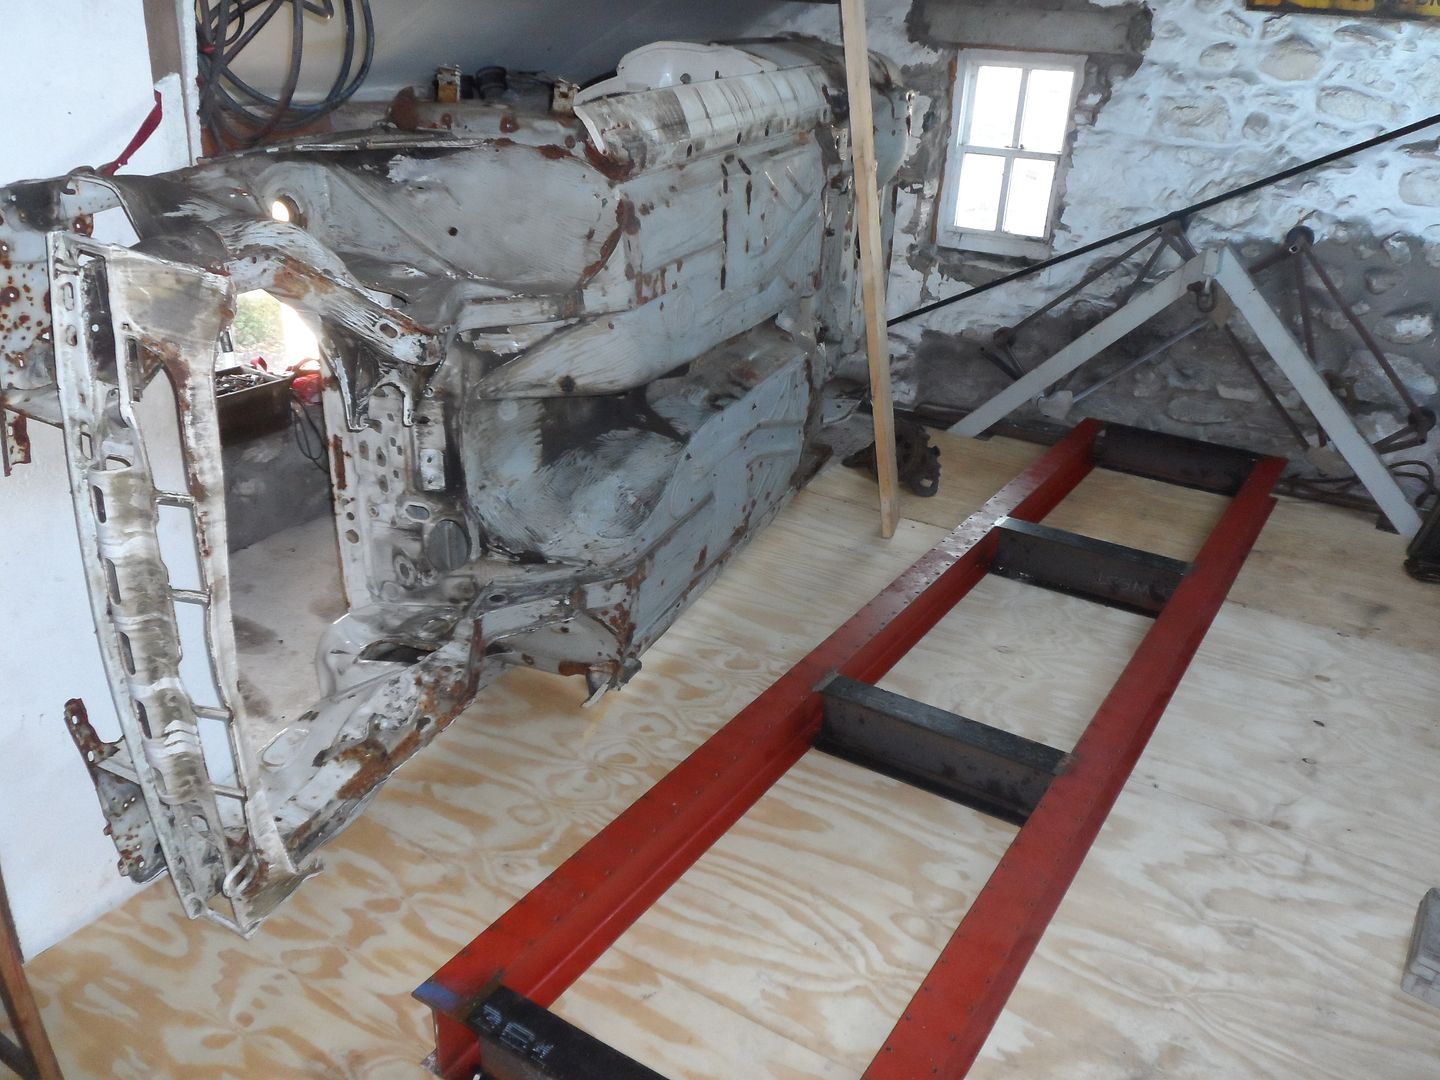
Tomorrows task is to make the pillars to bolt to the subframe mounts and then the cutting and shortening can begin!Comment


Comment