You can change the style the forum displays by selecting your preferred style at the bottom left of the site.
We have made an enhancement so that old threads should now link from search results to the correct thread. This is not yet in place for single post links
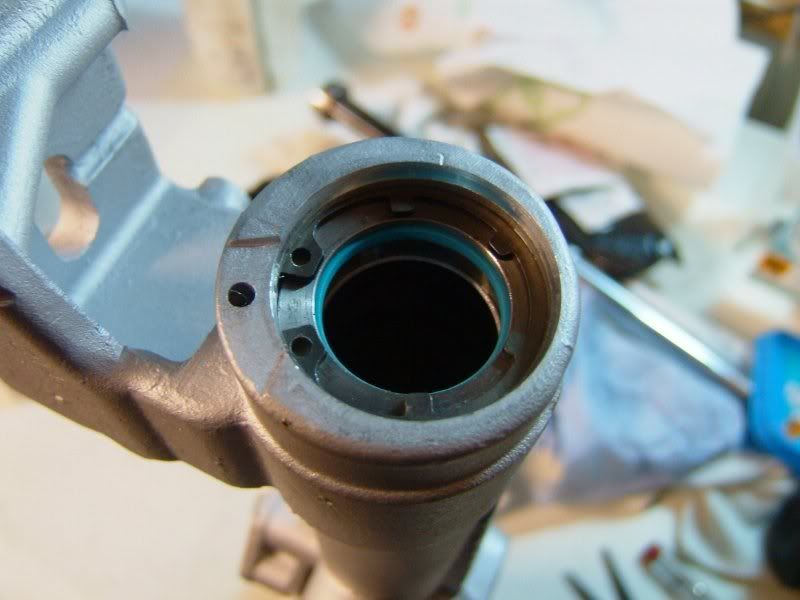
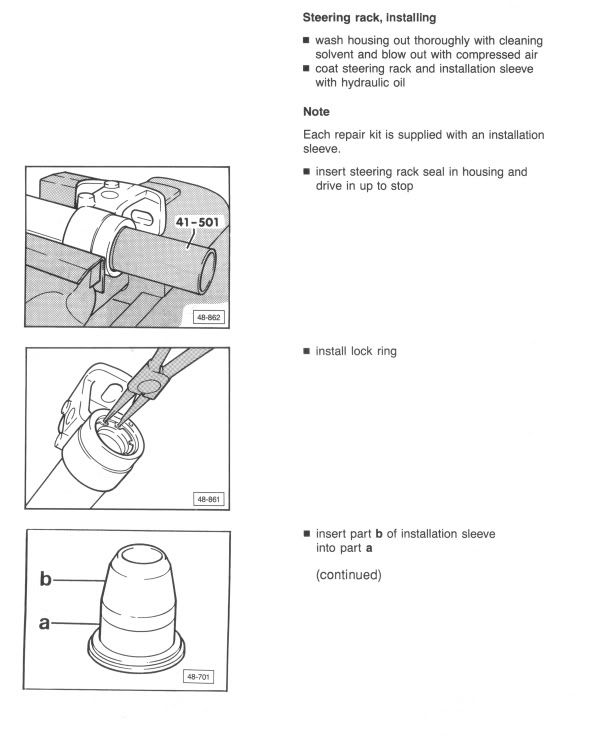
As I suspected 'N' and 'P' are sleaves for re-fitting the seal in the end of the rack.
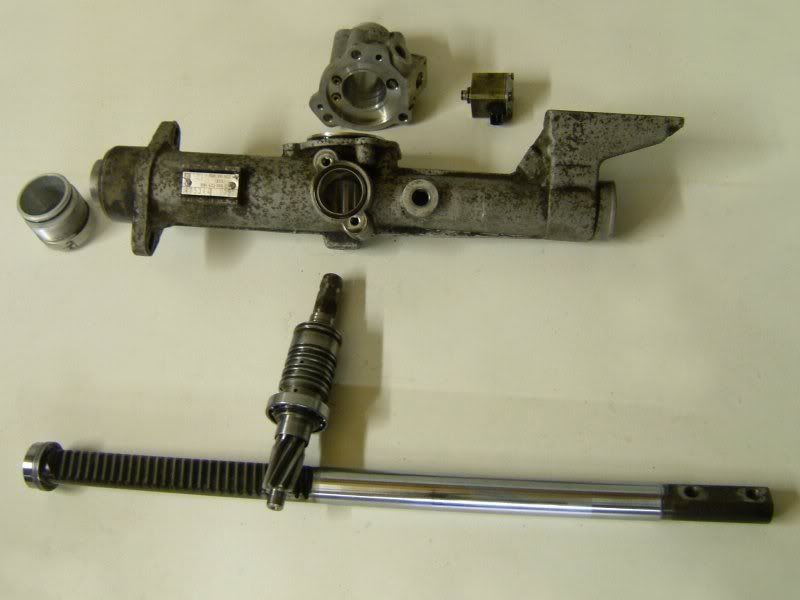
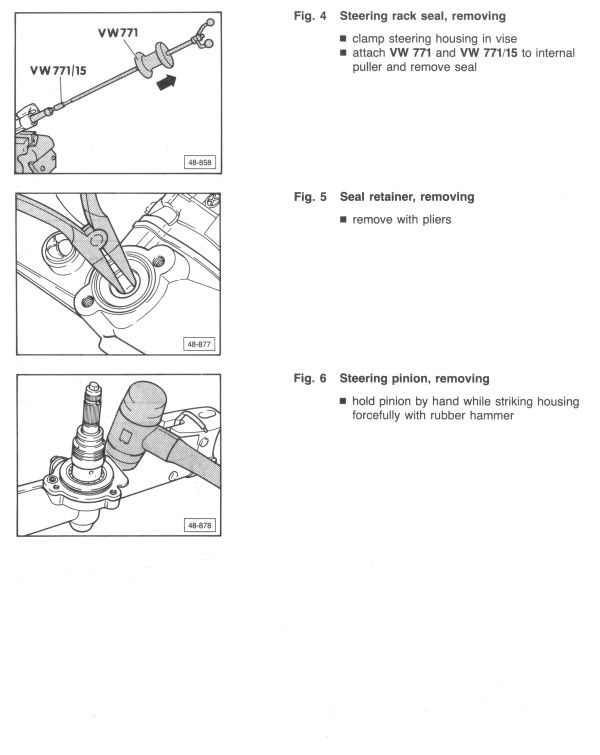
Thanks to Pirvu Eugen for his reassurance on pulling the pinion out. It was as simple as holding the steering spindle in a vice and tapping the rack body away from it.
So here the steering rack is, completely dismantled showing the rack and pinion.
Now I just have to make sure it is completely clean and reassemble it.
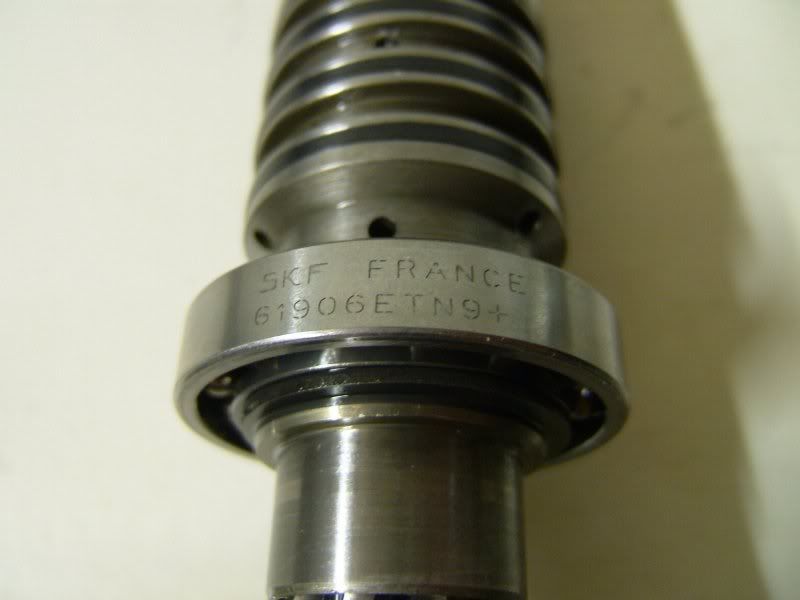
I reassembled the steering rack last night with no problems.
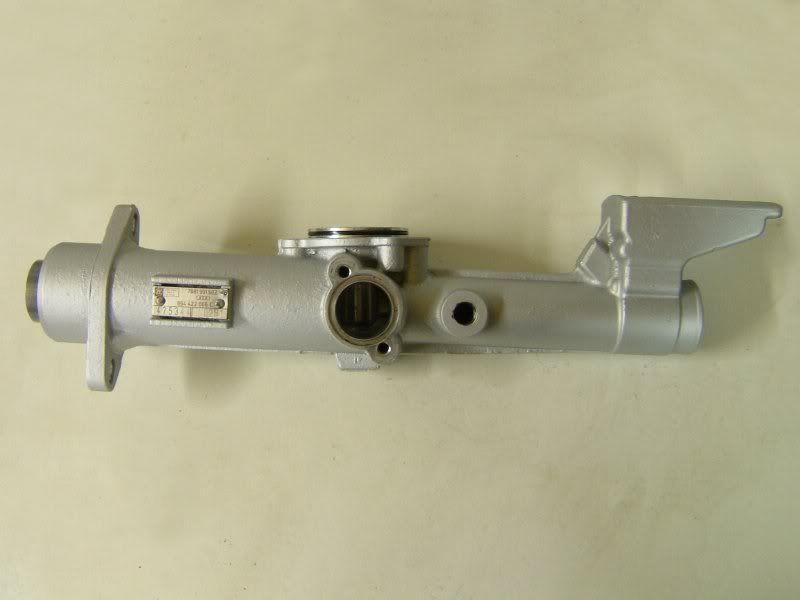
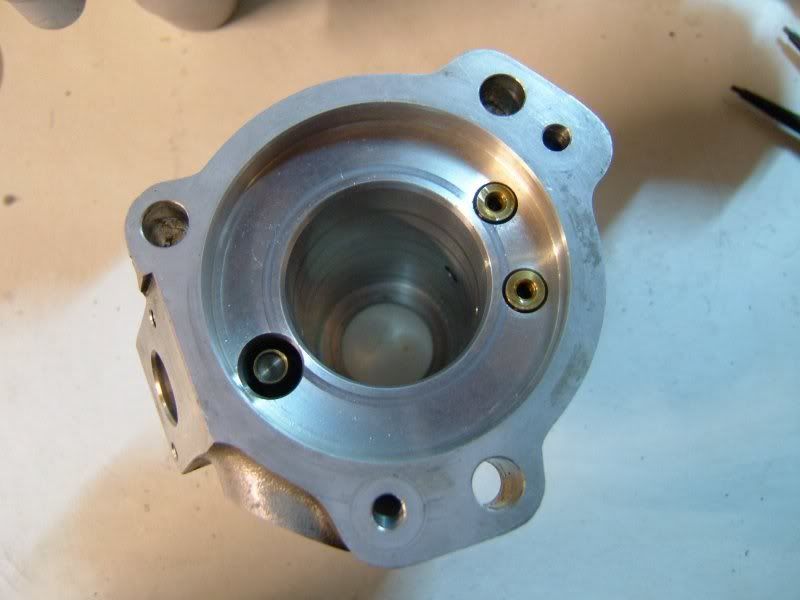
Here is the bare housing after I cleaned it up and gave it a coat of paint….
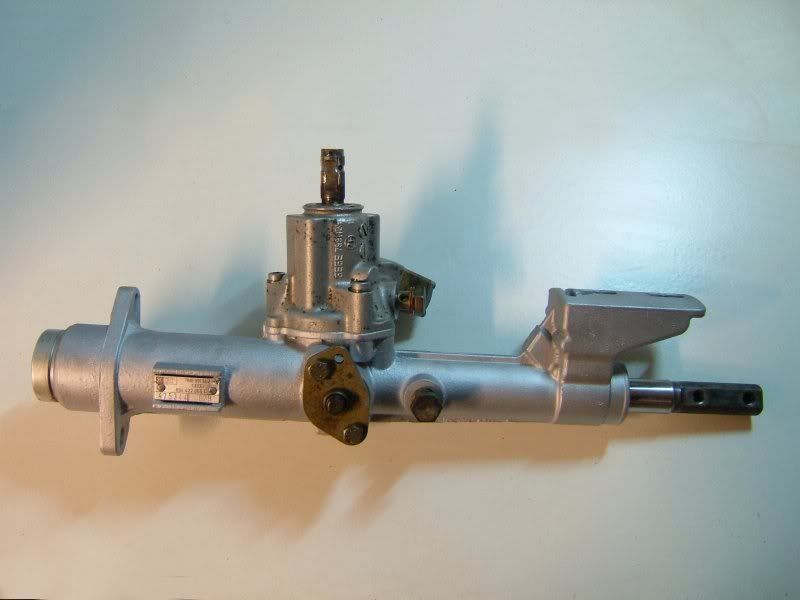
…and here it is back in one piece.
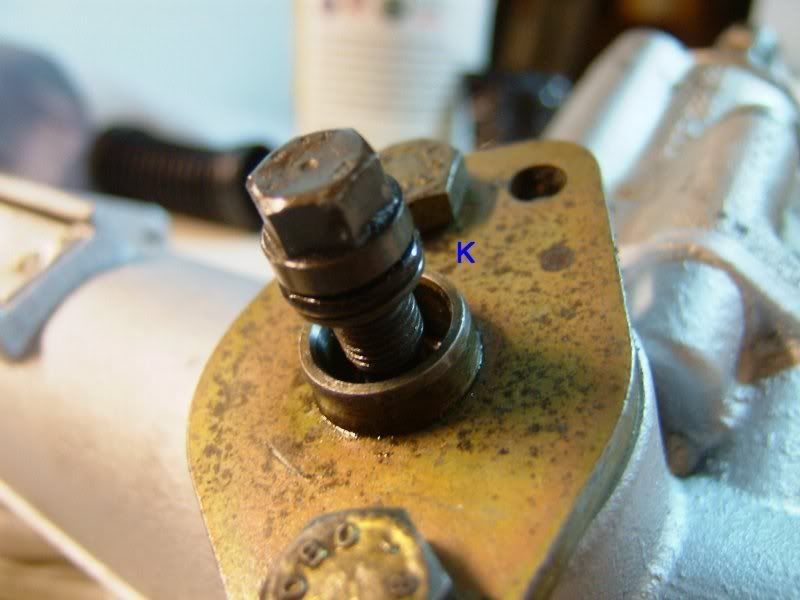
I realised in my previous posts I didn’t show where o-ring ‘K’ went. That goes under the preload adjustment bolt.
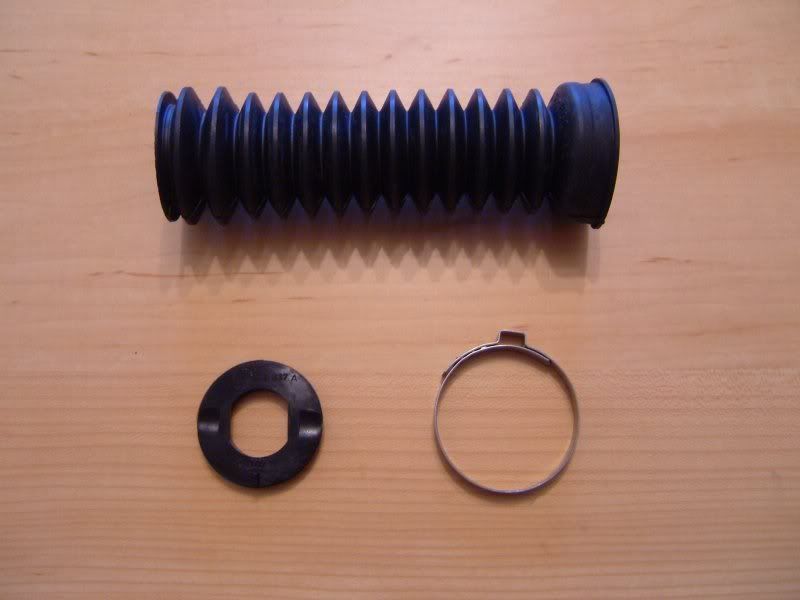
Now I just need to order a new boot and retainer for the end of the rack to complete the overhaul.
Part numbers for those are:
861 419 845 A - Hose clip.
811 419 831 B – Boot.
893 422 837 A - Retaining ring.
Overall I found the job pretty easy once I knew what pulls out where and how. The bulk of the time seemed to be taken up by thoroughly cleaning all the parts and tools used before the reassembly.
Tools used:
6 mm allen key – for pinion housing.
10 and 13mm spanners – for preload adjuster.
17mm Hex key. – for rack end cap.
Suitable drifts * – for removing/replacing seals.
Mallet – for removing pinion.
Internal circlip pliers – for rack end seal.
T10 and T15 Torx bits. – for Servotronic controller.
A needle – for hooking out o-rings.
A vice is useful too, but not essential.
I also had a bottle of G002000 handy, to coat all the internal parts, seal and o-rings before refitting.
– * The back of a 24mm socket and an extension bar worked well. I also used a long brass bar for gently teasing out the rack end seal ‘M’.
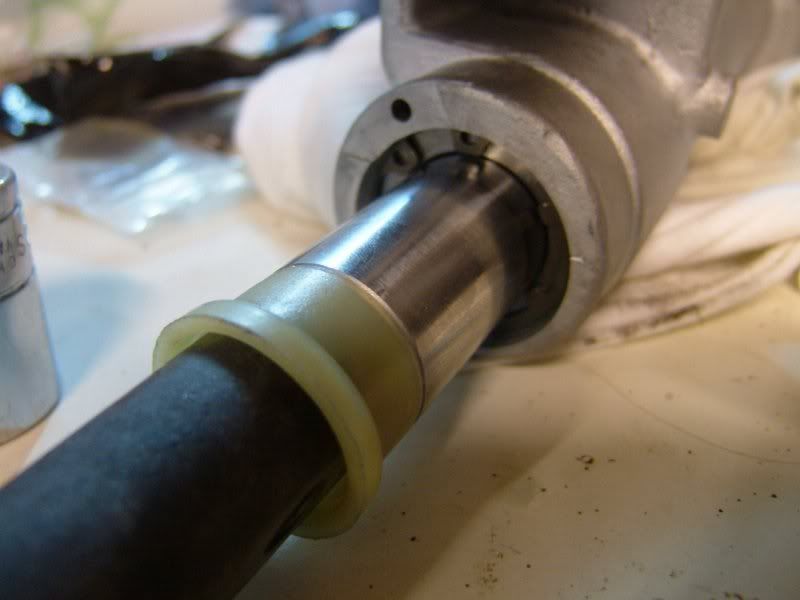
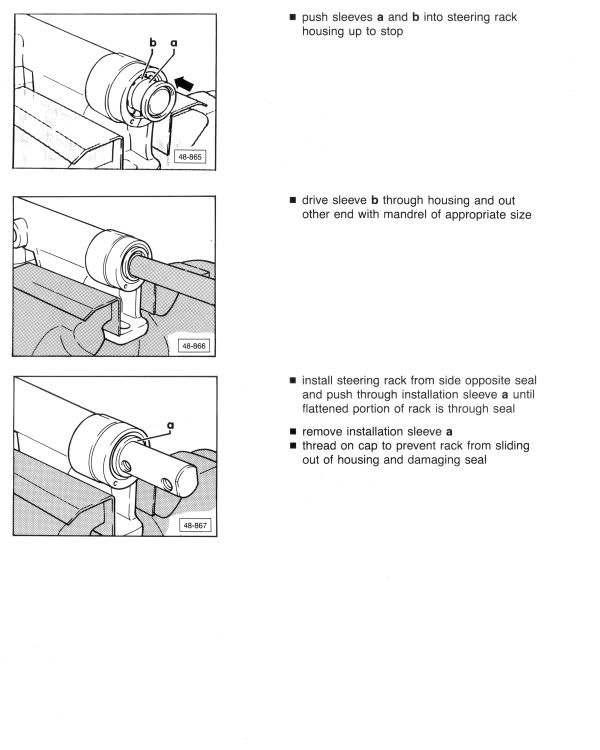
The most nerve-wracking part was pushing the rack rod out through the end seal. You use the plastic fitting sleeves, parts N and P for that, but it still took a bit of a push to get the rack through.
Here are some more pictures in case it helps:
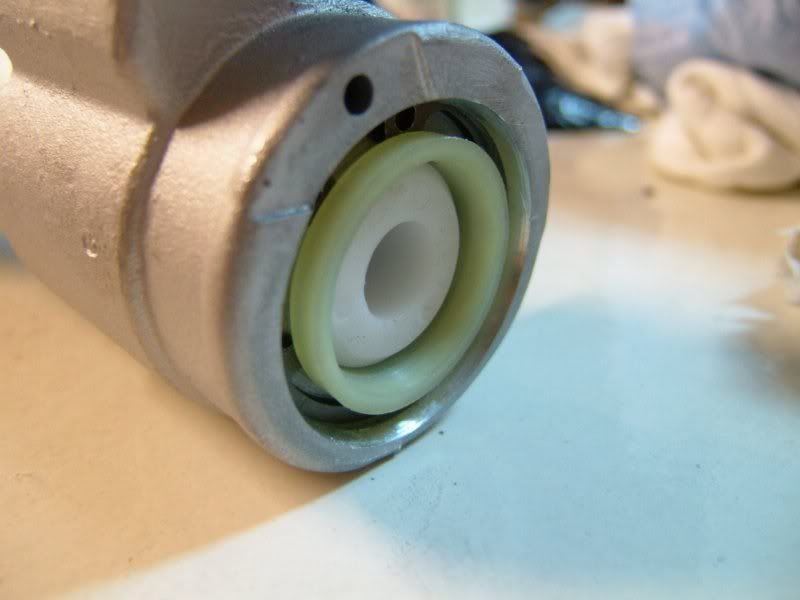
New end seal pushed in and circlip installed.
Fitting sleeve is then placed inside.
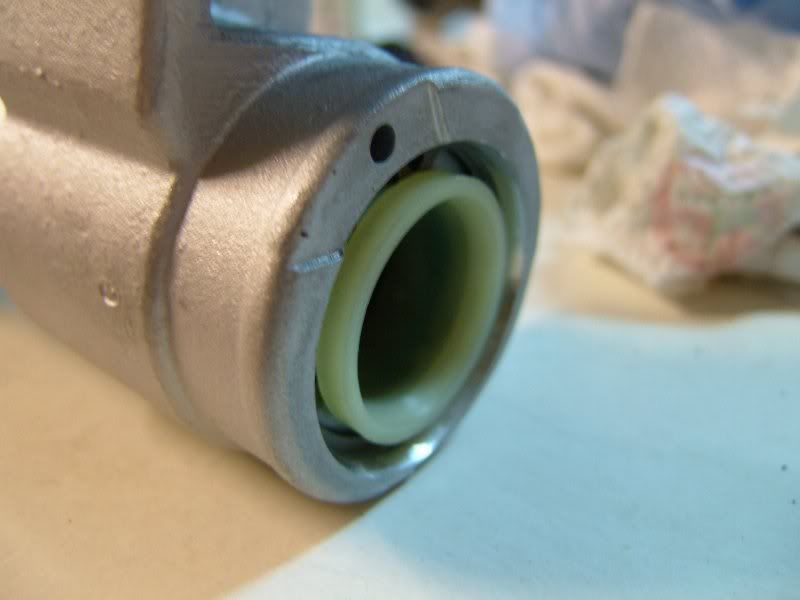
Part N is then dropped out the other end of the steering rack housing, leaving part P behind.
Steering rack rod is then carefully threaded through the fitting sleeve, then pushed through the seal.
The pinion spindle seal is pushed out from the top.
Then pushed back in through the bottom.
The rest is plain sailing really, just replacing all the o-rings.
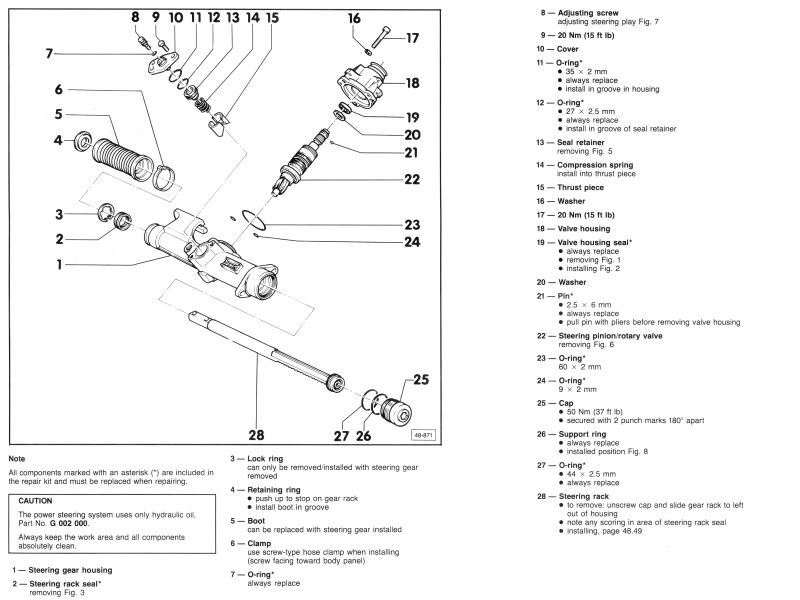
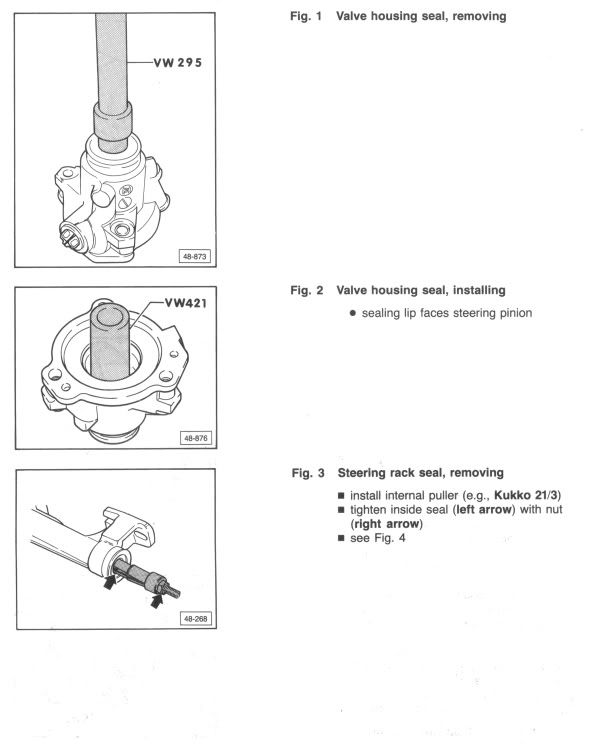
I also scanned these diagrams that may be useful in the future. They are for a Coupé quattro from chassis 8B MA002645 onwards, non Servotronic but the same idea.
That's an excellent write up Stu with some really detailed pics to go with it. I be coming back to this when I get the chance to give my rack an overhaul.
Definitely a worthy contender for being made a sticky.
Got to echo Bo and Nuvo's comments, this is exactly what we need on here. Had i seen all this whilst I was doing mine, I might have attempted to do it myself
Would be great to create basically an online Haynes style manual for the S2 made up of nicely detailed and photographed how to guides like this
Then there would be no excuse for the A2 guys to win the technical award next year
Excellent write up! Has anybody tried sourcing these parts recently? My rack is weeping (think i will be when i have to take it out!), so it could do with a overhaul i think.
We process personal data about users of our site, through the use of cookies and other technologies, to deliver our services, personalize advertising, and to analyze site activity. We may share certain information about our users with our advertising and analytics partners. For additional details, refer to our Privacy Policy.
By clicking "I AGREE" below, you agree to our Privacy Policy and our personal data processing and cookie practices as described therein. You also acknowledge that this forum may be hosted outside your country and you consent to the collection, storage, and processing of your data in the country where this forum is hosted.


 Tweet
Tweet

 It was as simple as holding the steering spindle in a vice and tapping the rack body away from it.


 Has anybody tried sourcing these parts recently? My rack is weeping (think i will be when i have to take it out!
 ), so it could do with a overhaul i think.


Comment