-
depends on what line you use I'd say. they aren't always that great if exposed to the conditions permanently -
So having read this start to finish I now feel happy to do my lines this weekend if I can find the line... One quick question though, can flexi line be used at the join to the old pipes at the bulk head instead of wade connectors? As you say they aren't under loads of pressure and it will be the same as the connections at the end from the fuel filter.Leave a comment:
-
Hmm I'll have to see ideally I'd like to replace the one that got crushed on my car in the engine bay but has a wade fix
One for me to work out at a later dateLeave a comment:
-
How far are you doing? The run along the bottom of the car is straightforward, a little bit of fiddling with heatshields, but doable in an afternoon on a driveway with axle stands.
Doing up behind the rack is a complete PITA, need the rack out to do it properly. I did it with everything in situ, but it is not pretty or routed properly. (however it doesnt leak which is what I was going for at the time)Leave a comment:
-
How hard is it o do the lines? Mine are crusty but at some point I want to replace themLeave a comment:
-
URS4 (or any) Fuel lines tip
Hi,
Here is what I did with the fuel lines of my urS4. They were rusted and started leaking when I moved them a few millimeters.


So if you see your fuel lines in this state just change them and don't suppose they will still last for a while.
I was thinking about the cupronikel lines solution and then I had the possibility to get stock lines for free from a younger S4. There was nearly no rust on them and the paint was still present. I didn't want to have that rust issue coming again so I tried this solution : Heat shrink sleeves. Those are 24mm diameter and shrink to 6mm when heated which is fine for our 8mm lines. Furthermore the final thickness is 1mm.
Here is what it looks like when fitted. I must say I was sceptic at first but very surprised of the way they completely fit the shape of the line when heated.

They are wide enough to fit them all along the curves of the lines so we can have this finish when done

Yes the final lines are 2mm wider so they won't fit in the stock rubber and you'll have to cut them in the way illustrated above (this is a pain in the a** to do) and fit them with the slits facing downward.
i wanted the connecting nuts to be protected as well so I precut a piece of sleeve and put them on the line before fixing the line. Then after fixing the lines and ONLY AFTER checking for any fuel leaks I heated those pieces around the nut assembly. I cannot stress enough that you need to check carefully for any trace of fuel around the heated area as the air blown by the heatgun is at 530°C.
And voila


Just so you can see the thickness of this new "skin"

The rubber is really hard to cut once heated so no fear for the future anymore.
hope it helps!
Cheers
Note : If you want to do this mod, you'll need two boxes of the product presented above or any others that has the same dimension. So a roll of 5meters is not enough to do the lines in one piece.Last edited by hugokx; 2 June 2012, 09:41.Leave a comment:
-
you need something like these.... http://www.ebay.co.uk/itm/6-AN6-STRA...#ht_913wt_1037
earls sell them as well. very easy to fit too
One thing to note...you have to take the fuel rail out to fit the braided lines as you cant get a spanner on them!Leave a comment:
-
-
-
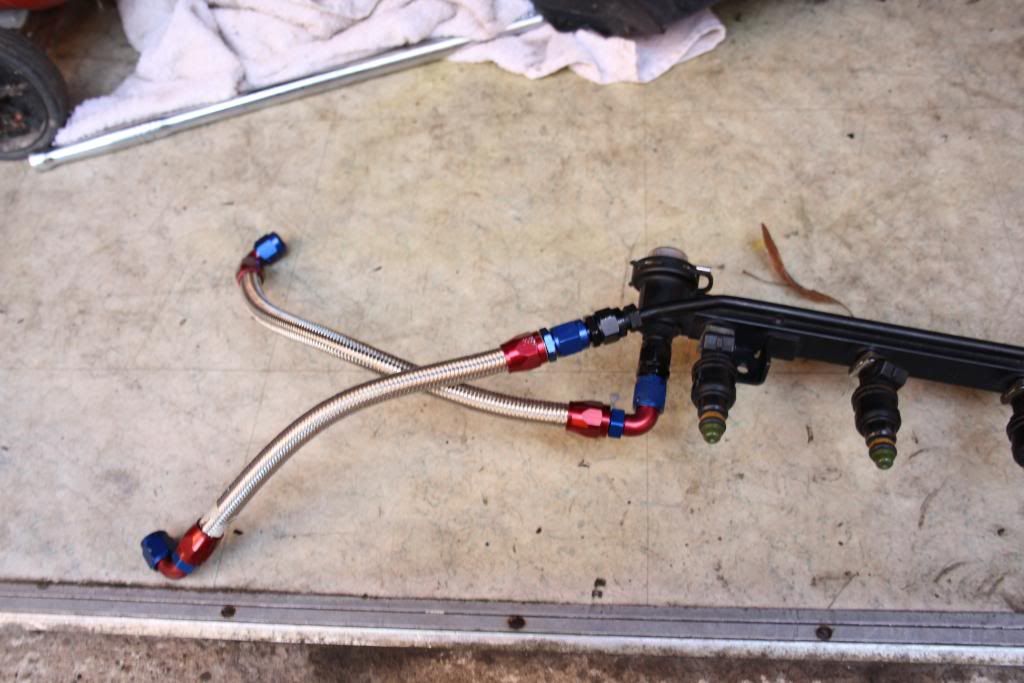
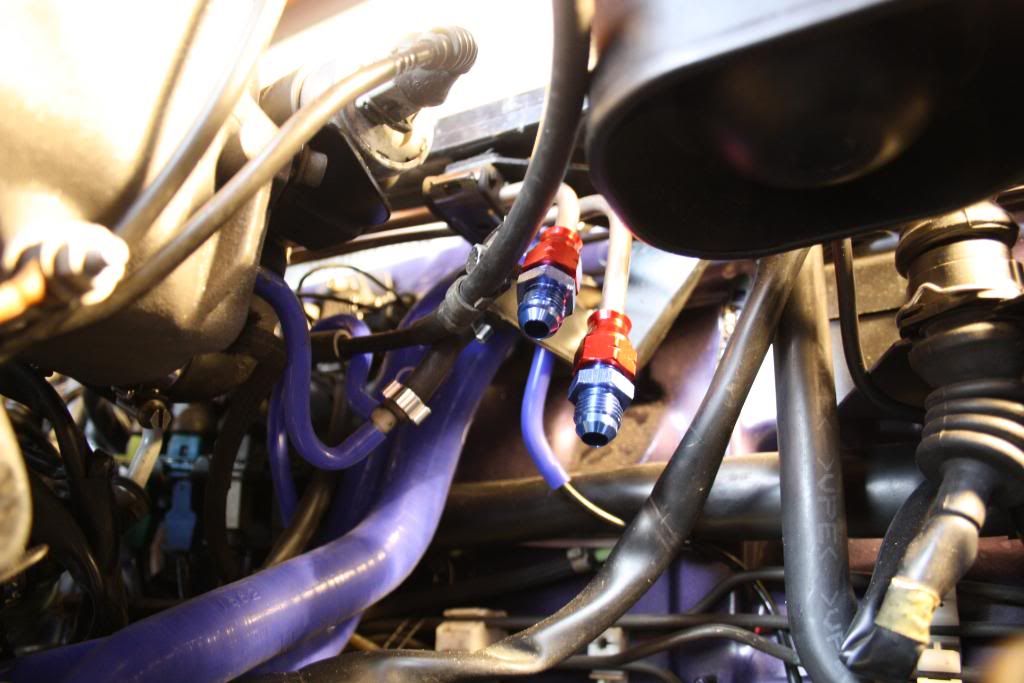
If like me you've replaced the whole fuel lines including the engine bay, you'll have difficulty getting the correct flair to fit the oem rubber lines on the end to connect to the fuel rail. I've gone and finished them off with braided lines....
Braided Lines.... here's what you need for the engine bay.
3 x 90degrees AN-6 connector
1 x straight AN-6 connector
2 x M14 bosch adaptors
1m AN-6 braided hose.
2 x an-6 tube nut (or other hard line adaptor)
1st hose - fuel rail return or feed...cant remember which way it flows...
230mm length of braided hose
1 x straight connector - with M14 bosch adaptor on the end
1 x 90degree connector
2nd hose - to the bottom of the fuel reg
240mm length of braided hose
2 x 90degree connector
one end with M14 bosch adaptor
put the hard line adaptor on the end of your hard lines (no need for flares with the ones i used, they use a crush olive inside) and then connect them up...proper job! shame you cant see them much to be honest.
I'll get some pictures up later on over the weekend, i've forgotton my card reader, doh!Leave a comment:
-
If that ebay link is for clarik engineering, I would recommend them. Got mine from there and it came very quick!
Sent from my HTC Desire using TapatalkLeave a comment:



Leave a comment: