You can change the style the forum displays by selecting your preferred style at the bottom left of the site.
We have made an enhancement so that old threads should now link from search results to the correct thread. This is not yet in place for single post links
Freshly retrimmed interior with this fabric looks great, but it does fade out over the time. Depnding on the weather its about the year when it turns to violet and then gray. This doesnt affect headliner but this year will be third time I'm retrimming interior because of fading.
Genuine alcantara leather does not fade, but it costs near 100eur per square meter.
To be fair, the old interior was beyond horrendous, sticking to the kids cloths and proving the most unpalatable stain making snot. So whatever else, the orange cr@p has gone . If it fades out, I’ll at least know it’s a job I can deal with given a pandemic... And they apparently are here to stay...
PS - the rest of the interior is also faded out at 50 shades of something, so it’ll probably just patina in...
85 WR Urquattro, 85 20vT International liveried RallyRep
93 MTMS2 Avant
That sounds like a bargain, although to be honest my door cards are fine.
The roof lining is another matter though and needs doing, including all the pillar trims
Isn’t yours a standard B2 lining then Chris? They’re almost indestructible.
Been busy again....
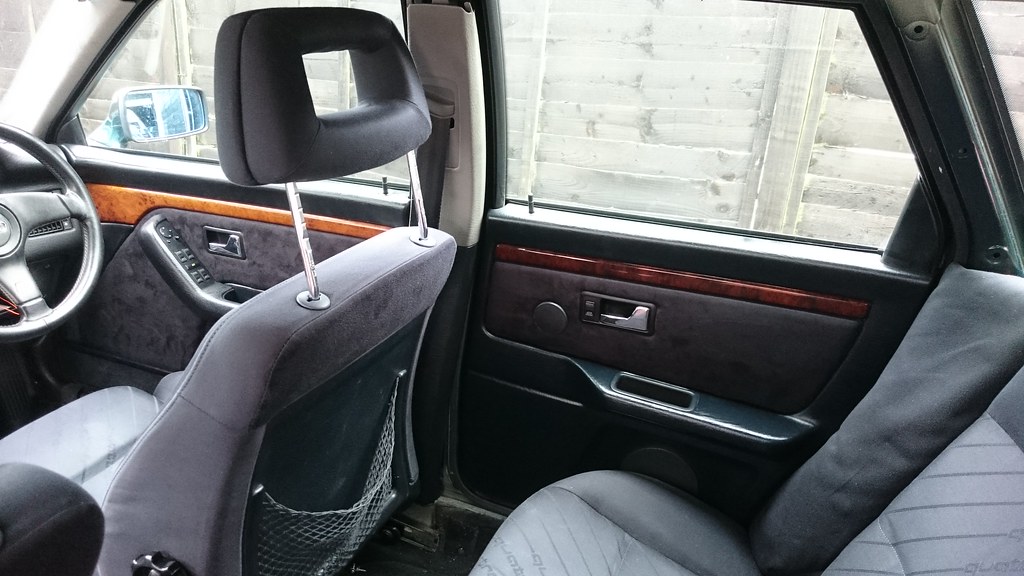
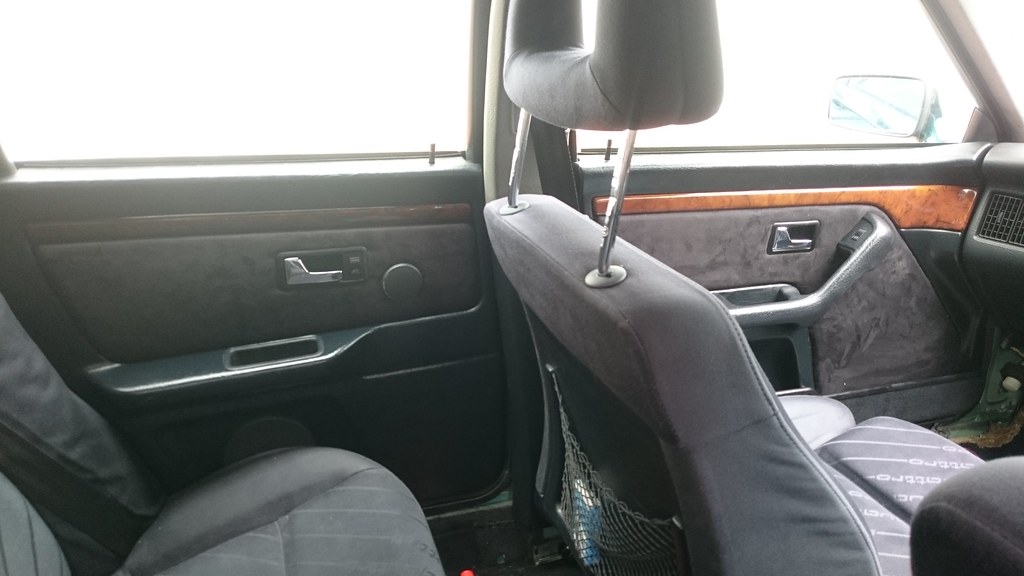
I saw the weather forecast last night and decided to annoy the neighbours early and fit the door cards before the rain came.
Made a couple of schoolboy errors like getting half way through fitting the driver card (first one) only to realise the sound deadening foam pad was still in the garage... Also managed to start panicking because the passenger side electric window didn’t work from the drivers side. Took to the wiring schematic only to work out it needs the passenger side switch to also be in circuit, not on the footwell carpet... doh...
I settled down with the brain in gear after that...
Anyway, all fitted. Obviously, the interior is still in pieces awaiting the headliner refit... But that’s another day, rain set in now.
85 WR Urquattro, 85 20vT International liveried RallyRep
93 MTMS2 Avant
That looks great, I already have the old material stripped off my door cards, but was unsure about how to get the edges looking neat, how did you manage that?
sigpic
1991 Audi S2 3B - 2.5 Stroker engine
1997 A6 2.5TDi quattro avant - C4
1976 RD250E / 350LC cafe racer
That looks great, I already have the old material stripped off my door cards, but was unsure about how to get the edges looking neat, how did you manage that?
ooo, there’s a question.... when you strip the old material off, including the ‘orrible foam, in the ‘trench’ of the trim boundary there’s a fine cut line from where the factory ’oversized’ the fabric slightly and then ran a knife around to trim. This is why the failing original material is ‘threading’ into ribbons. The problem with re-trimming with modern material is that the cut will be different as OEM was foam bonded to the flat surface then the thinner Audi material overlaid, which tucks into the trench. Modern material carries 3mm backing foam.
Also, the spray foam glue doesn’t get to the bottom of the trench easily either.
Ballsed it up several times until I worked out the best bet is to oversize the material and then cut at 45-deg versus the factory 90-deg and make sure it’s glued deep into the trench... You’ll need something that’ll force the material to the bottom of the trench and make sure it’s material from the ‘spare’ side, not stretching the door card material.
Once the glue is on it is a race to get it seated, the flat surface is quick and bonds hard quick but the trench requires some finesse, get a tool that’ll push the material right down and remember, stretch from the spare material not the card fabric... I certainly didn’t get it right straight out of the box... The first card being less ideal than the last.
Also, I found it better to leave the material glued and forced down into the trench until dry before cutting....
These are only personal notes, not a “how to” but it’s a learning curve that most folk here would easily rise to.
85 WR Urquattro, 85 20vT International liveried RallyRep
93 MTMS2 Avant
Magnum ice cream stick works as a tool to encourage the material into the recess. Other brands are available
Lol.... I bet that’ll do the trick spot on.... Mrs S had a funky tool like a dentist would have but with a small ball on the end. Spot on it turns out.... Mind, might have been more satisfying to have just had an ice cream....
85 WR Urquattro, 85 20vT International liveried RallyRep
93 MTMS2 Avant
ooo, there’s a question.... when you strip the old material off, including the ‘orrible foam, in the ‘trench’ of the trim boundary there’s a fine cut line from where the factory ’oversized’ the fabric slightly and then ran a knife around to trim. This is why the failing original material is ‘threading’ into ribbons. The problem with re-trimming with modern material is that the cut will be different as OEM was foam bonded to the flat surface then the thinner Audi material overlaid, which tucks into the trench. Modern material carries 3mm backing foam.
Also, the spray foam glue doesn’t get to the bottom of the trench easily either.
Ballsed it up several times until I worked out the best bet is to oversize the material and then cut at 45-deg versus the factory 90-deg and make sure it’s glued deep into the trench... You’ll need something that’ll force the material to the bottom of the trench and make sure it’s material from the ‘spare’ side, not stretching the door card material.
Once the glue is on it is a race to get it seated, the flat surface is quick and bonds hard quick but the trench requires some finesse, get a tool that’ll push the material right down and remember, stretch from the spare material not the card fabric... I certainly didn’t get it right straight out of the box... The first card being less ideal than the last.
Also, I found it better to leave the material glued and forced down into the trench until dry before cutting....
These are only personal notes, not a “how to” but it’s a learning curve that most folk here would easily rise to.
These were the same issues I had then got hacked off with so cheated, bought some leather piping and glued it down into the gap to secure the material.
These were the same issues I had then got hacked off with so cheated, bought some leather piping and glued it down into the gap to secure the material.
You couldn’t make it up, that’s exactly the same conversation we’ve had here, and you’re spot on, ultimately, that’s the answer...
85 WR Urquattro, 85 20vT International liveried RallyRep
93 MTMS2 Avant
Been watching this with interest, good job will be keen to see the headliner, mine has been...stapled at the back for years and its held up well with no sag but it is overdue some tlc and the door cards have gone the same way.
Been watching this with interest, good job will be keen to see the headliner, mine has been...stapled at the back for years and its held up well with no sag but it is overdue some tlc and the door cards have gone the same way.
The headliner is sadly postponed until I get time from work and the wind drops, as it’s an outdoors activity on a calm day.... Either that or epoxy glue the gladioli together with Faux suede....(that’s a sentence never written before)...
85 WR Urquattro, 85 20vT International liveried RallyRep
93 MTMS2 Avant
We process personal data about users of our site, through the use of cookies and other technologies, to deliver our services, personalize advertising, and to analyze site activity. We may share certain information about our users with our advertising and analytics partners. For additional details, refer to our Privacy Policy.
By clicking "I AGREE" below, you agree to our Privacy Policy and our personal data processing and cookie practices as described therein. You also acknowledge that this forum may be hosted outside your country and you consent to the collection, storage, and processing of your data in the country where this forum is hosted.

 Tweet
Tweet


 Also managed to start panicking because the passenger side electric window didn’t work from the drivers side. Took to the wiring schematic only to work out it needs the passenger side switch to also be in circuit, not on the footwell carpet... doh...


Comment