You can change the style the forum displays by selecting your preferred style at the bottom left of the site.
We have made an enhancement so that old threads should now link from search results to the correct thread. This is not yet in place for single post links
Love the door striker brackets, excellent attention to detail as usual Hamish
What are you plans for the shell once the fabrication work is complete? Are you going to get it blasted again or dipped?
Panthero Coupé quattro 20vt
Indigo ABY coupé
Imola B6 S4 Avant
Door bars turned up last week so they have been notched and fitted. The lowers are bent at 30 degrees and the uppers at 50 to make them lower at the centre making them easier to climb over. Lowered a little over the other car as they are slightly too high in it for my elbow. With those in place it enabled the bars from the hoop to the turrets to go into place. I needed these points as the rear diff pick ups will come down from this location. I have left the bars just pushed into place so they can be lifted out for better access inside.
Very happy with how the cage/ spaceframe is looking. The next job is to remove the rear floor and fit up the new raised section into place.
Had some more time on the car this weekend. The rear floor area had to go due to wanting to run the rear diff higher to level out the drive shaft angles. The new floor is 60mm higher than the old one which gives plenty of scope to get the shafts level even when running the car very low.
The old floor chopped out left quite a hole!
Bit of a mess around with a spare diff to see if any of the front floor would need to go but its going to work fine as it is.
So with the old floor out of the way I had a new floor folded up. This is supported on posts from the jig so I know its gone in flat and true.
The new floor in place just tacked in for now:
The vertical section will have a return lip welded on to continue the inner arch line:
The floor goes that far back at the same height so the rear anti roll bar car fit in without any cutting like had to happen on the other car. Delighted with how it has gone in and its removed a lot of rust from the rear end. The next job on the list is to make up a jig for the diff mounting points and extend the cage down to the floor to pick these up.
are you using thinner steel? why add weight if it isn't structural and are you adding swaged ribs to the flat sections to increase rigidity?
Just curious
Its 1mm steel so probably about the same as the original shell. I want to retain a steel floor because its not an all out space frame build where I would have used alloy or carbon panels. I wont be adding any ribs the floor will be strengthened buy the tubing being welded through it.
Quickly looking thru this thread - just amazing... It surely will be one of the forum's classic threads of reference for years to come. Equally impressed by the speed at which the project is progressing... I seem to only find time once a quarter to look at the bleeding forum these days - never mind do any actual project work... and I would never have the skills to take on this kind of fabrication. Brilliant !
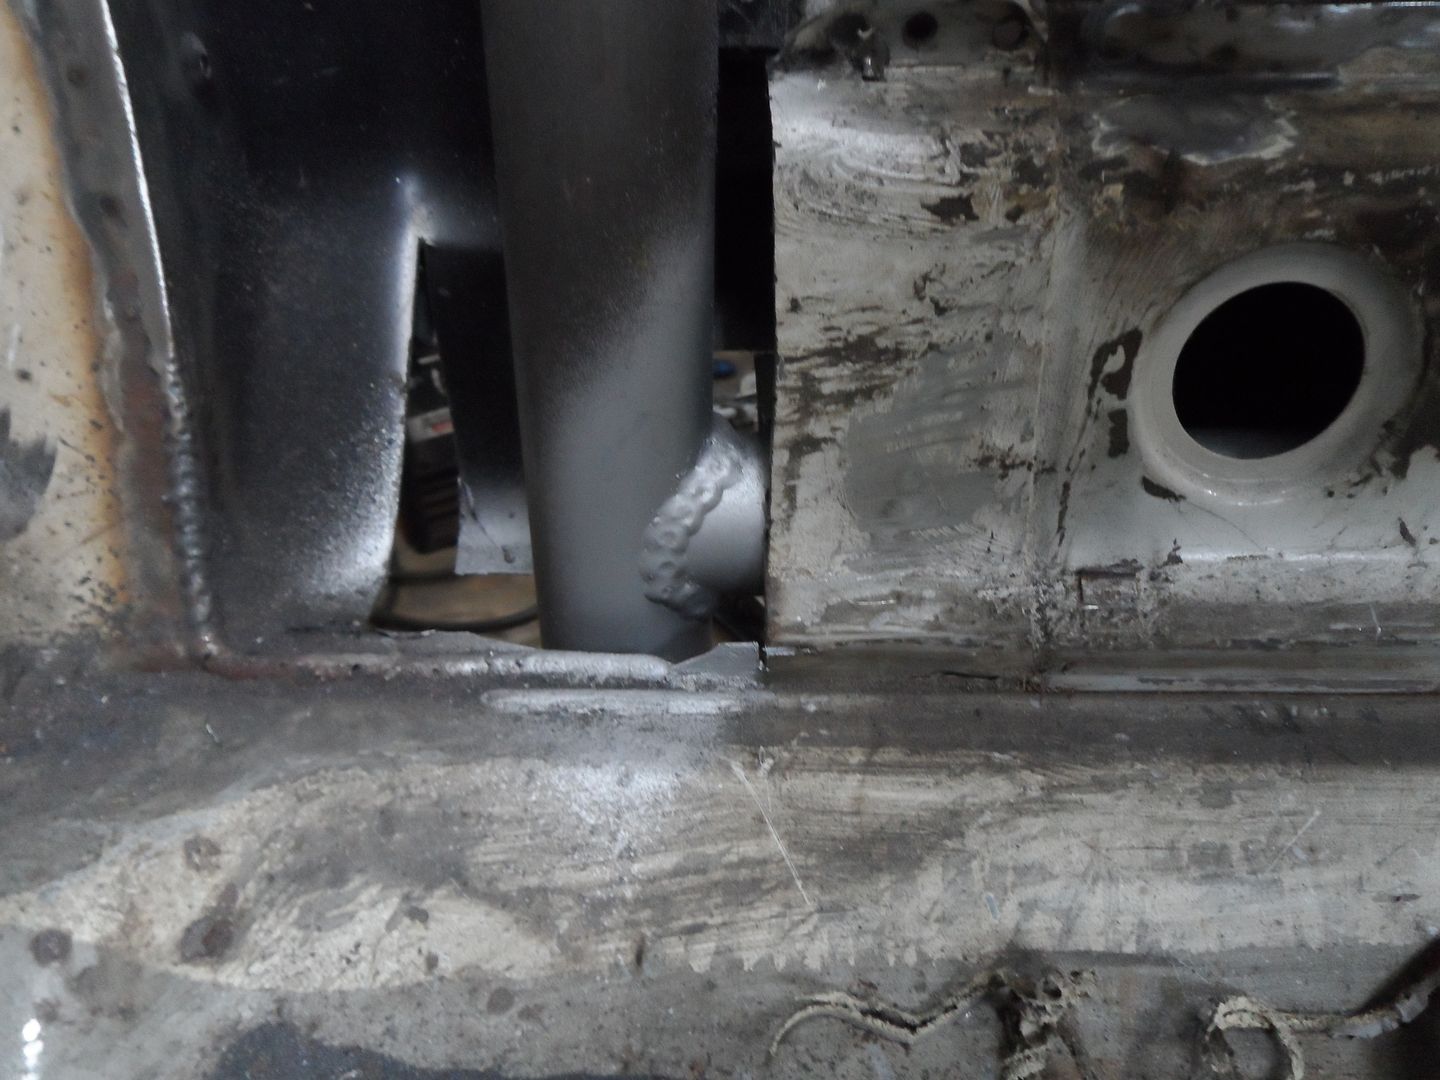
Been cracking on with the work on the rear diff pick ups. First job was to machine up some bosses. Decided to go up from the factory M10 bolts to use M12 x 1.5 fine pitch for a little more strength. Drilled out so there will be a male piece to slot inside so its not relying totally on the bolt like a factory sub frame. Machined to be a sweat fit into the tubing then they got tig'd in place.
Next job was to get the welder out again and weld some more metal to the jig to position the 4 diff pick ups centrally across the car and spaced to where I wanted the diff inline with the arch tubs. There is some play left with the diff brackets so I can fine tune that later on.
Then it was time to tie the 4 bosses into the cage, so more cutting and notching!
So that's the rear diff pick ups more or less done. Debating joining the front bosses into the rear ones to stop any fore and aft movement in the rear section. 2 outer bosses left to go in at the rear to take the anti roll bar. That will see the rear section finished off and I will move onto the the bigger gearbox tunnel.
We process personal data about users of our site, through the use of cookies and other technologies, to deliver our services, personalize advertising, and to analyze site activity. We may share certain information about our users with our advertising and analytics partners. For additional details, refer to our Privacy Policy.
By clicking "I AGREE" below, you agree to our Privacy Policy and our personal data processing and cookie practices as described therein. You also acknowledge that this forum may be hosted outside your country and you consent to the collection, storage, and processing of your data in the country where this forum is hosted.

 Tweet
Tweet


Comment