You can change the style the forum displays by selecting your preferred style at the bottom left of the site.
We have made an enhancement so that old threads should now link from search results to the correct thread. This is not yet in place for single post links
Thanks Error, no going back once its cut. Surprised the kit does not come precut to S2 spec. For reference i cut mine to 75mm seemed about right.
My guess is the hose "kit" starts as 160 mm so it will work for the AAN as well. Turns out your 75 mm guess was excellent since the factory suggests 73 mm for the S2/RS2 (different water manifold than the AAN).
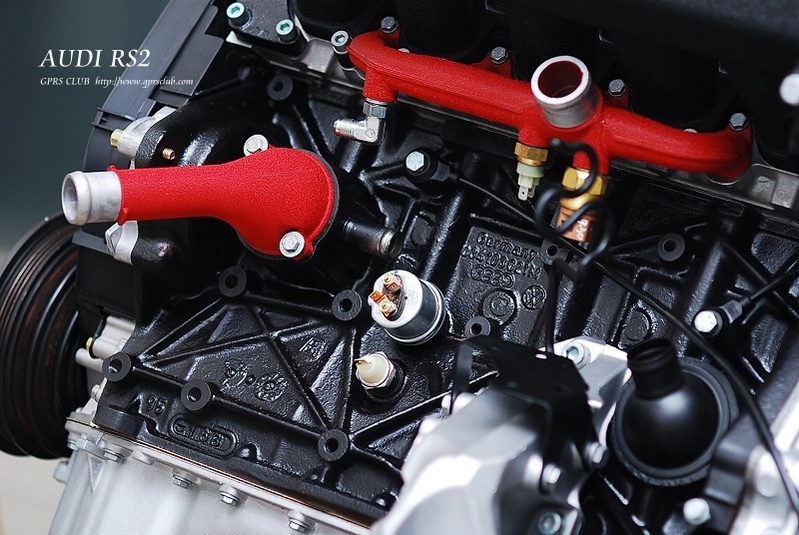
Looks like a non-stock fitting for this RS2 ADU (at the front end of the water manifold)
"NOTE: Because of the different design of the S2/RS2 (ABY/ADU) water manifold (because of the radiator at the side of the engine, not the front like the AAN), the rubber turbo coolant return hose, while it has the same PN, N 0202621, it is only 73 mm long, not 160 mm like the AAN.
Here is a view of an RS2 ADU water manifold showing the different location of the outlet to the radiator and the more frontal location of the connection to the turbo coolant return hose (in this example, an after market fitting has been installed).
Just ticked over 200000 miles this week... these cars were built to last
Glad the cars all fixed now and running well.My AAN has just turned over 200,000 and like you say built to last. As i said a while back your cars a beauty and in that scenery looks fabulous.
96 URS6 plus speck saloon
96 URS6 plus speck estate
94 2.6 80 Avant
99 2.8 final edition Cabriolet
Sensible move i think going with another original equipment Behr at £150.Thats good value! They are obviously good to last all these years. My 90 20v never had a problem with cracked/split plastic tank and it's 23 years old. Your car is one of my favorites on the forum.Enjoy the drives
96 URS6 plus speck saloon
96 URS6 plus speck estate
94 2.6 80 Avant
99 2.8 final edition Cabriolet
My oil pressure gauge bulb went dark a while ago, so i thought it was about time i changed it.
Jas11n made a very good guide a while back on this topic. Typically i couldn't find it this morning while searching.
However i cracked on anyway...
Easy enough job to do just take your time there are a couple of hidden screws. I won't repeat what Jas11n wrote, but here are a few bits that i found a bit tricky.
Easist way to remove diff lock switch is with a knife or scraper:
Took me a minute to figure out how these come off:
...the answer pull hard they just clip in. They only go in one way as well so you can't go wrong putting the switch back together.
Next up the aux gauge bulbs themselves. I've circled 2 of the 3. My fingures are still red getting these off. These need twisted anti-clockwise before they'll come out. The bulb itself then pulls out easy. Getting them back in is again very fiddly.
I should note i also changed the heater knob bulbs as well as they are the same bulb type and its worthwhile doing the lot when your in there.
great job, mike - now get the hoover out on that floor mat and the toothbrush into that diff lock switch!!!
Cheers, well chuffed things went to plan. Diff switch will be back out soon as at least 1 bulb is out. I don't think its as easy to fit new bulbs to this. More reading on the forum to be done.
We process personal data about users of our site, through the use of cookies and other technologies, to deliver our services, personalize advertising, and to analyze site activity. We may share certain information about our users with our advertising and analytics partners. For additional details, refer to our Privacy Policy.
By clicking "I AGREE" below, you agree to our Privacy Policy and our personal data processing and cookie practices as described therein. You also acknowledge that this forum may be hosted outside your country and you consent to the collection, storage, and processing of your data in the country where this forum is hosted.

 Tweet
Tweet


Comment