
 Tweet
Tweet
Nope dosent work for me. Splitters can look very well on RS2 bumpers, but dont work on S2 ones IMO.
-
91CQ20v - Gone to a new home
93UR-S4 - The Magic Carpet
94S2Bus - The Emerald Express -
Managed to find a few hours over the last couple of days to spend on the engine.
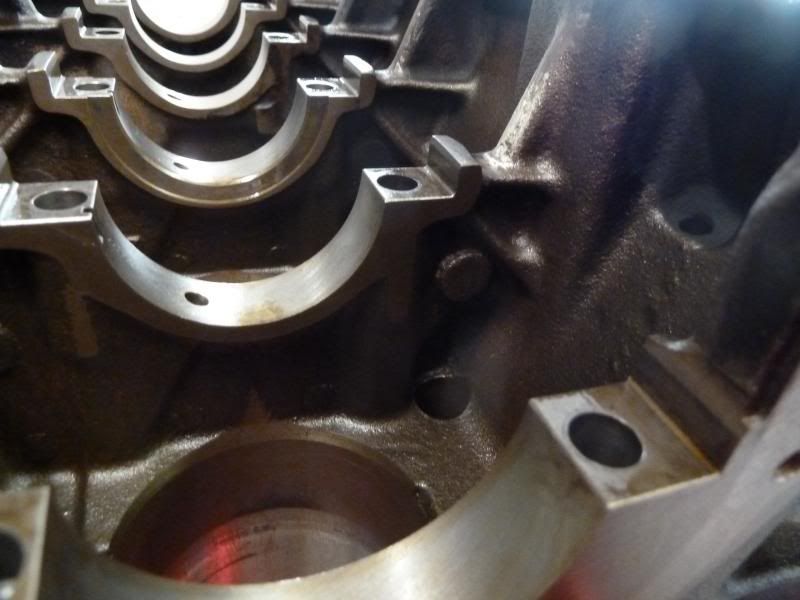
Since the block was stripped I have been busy de-burring and deflashing the block and main caps.
So the casting flash has been ground and filed off the main bearing webs:
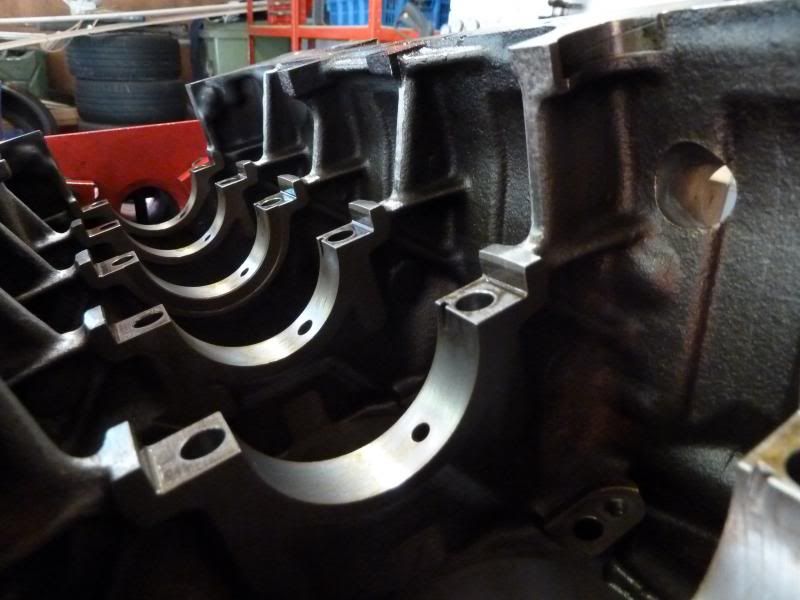
All of the part lines and machined edges have been needle-filed with a small chamfer to break the sharp edges.
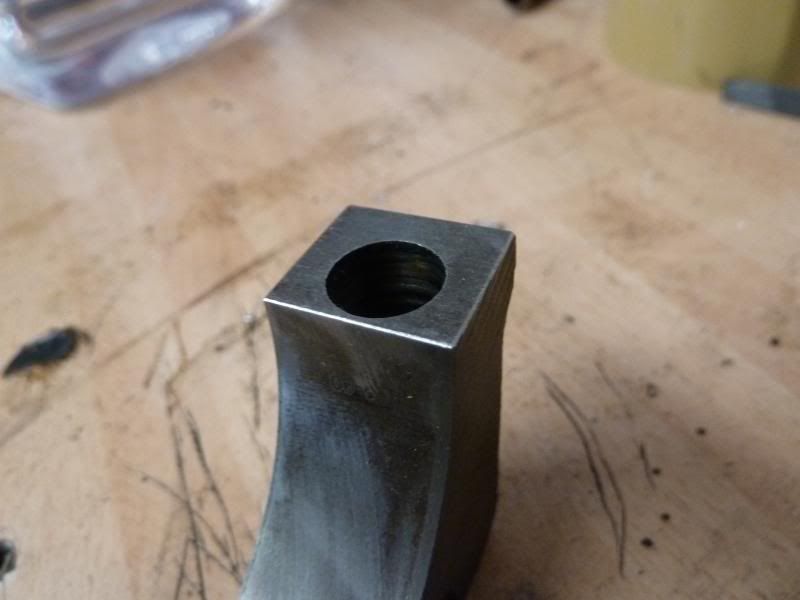
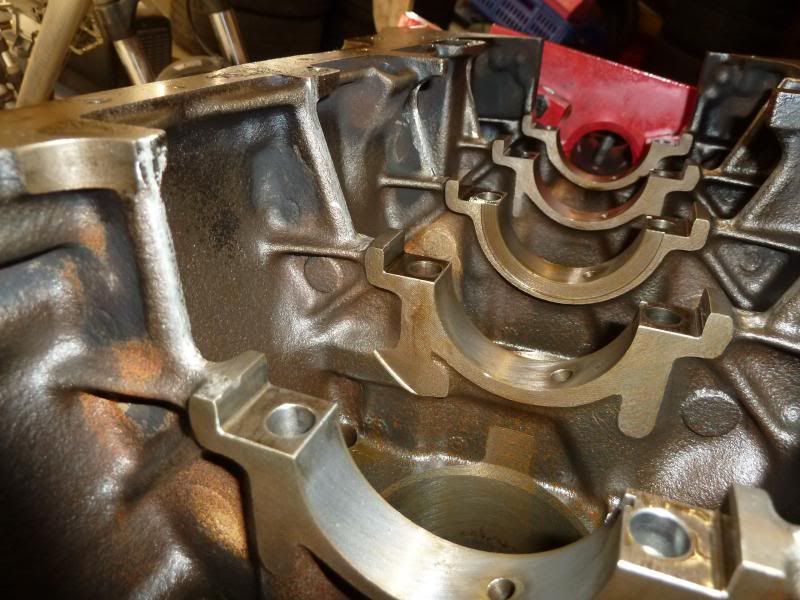
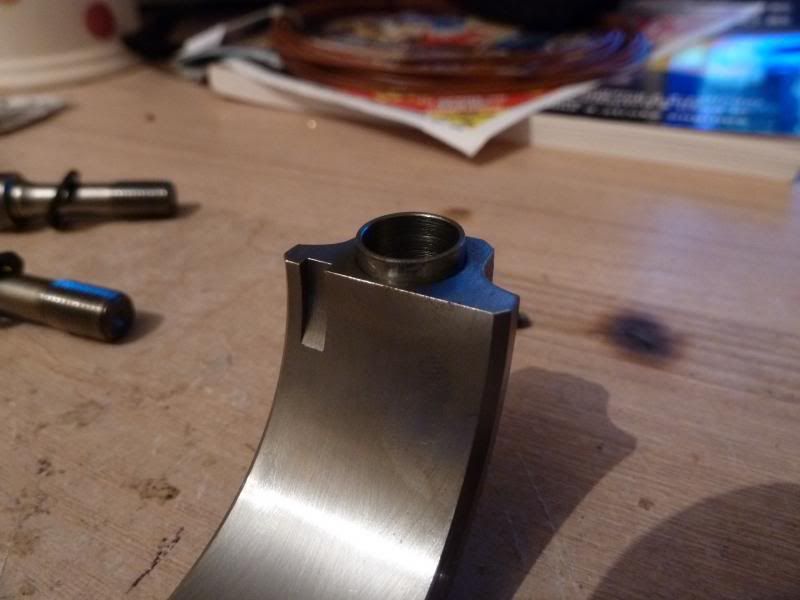
Here is No.1 cap before treatment, note the burred edges:
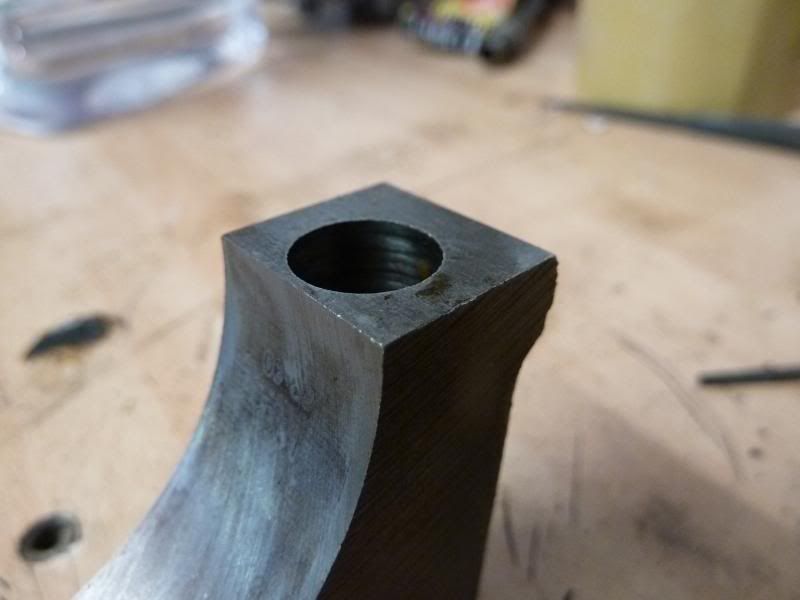
After 15 minutes careful work with a needle file - a nice smooth chamfer across the part line. This ensures that the caps have a perfectly square and flat seat on the register in the block. Also sharp edges are stress risers which can lead to cracks (luckily not really an issue on out bulletproof engines)
The same treatment to the main registers:
Then all the sharp edges on the block have been hand filed. This about finishes up the basic prep work on the bare block:
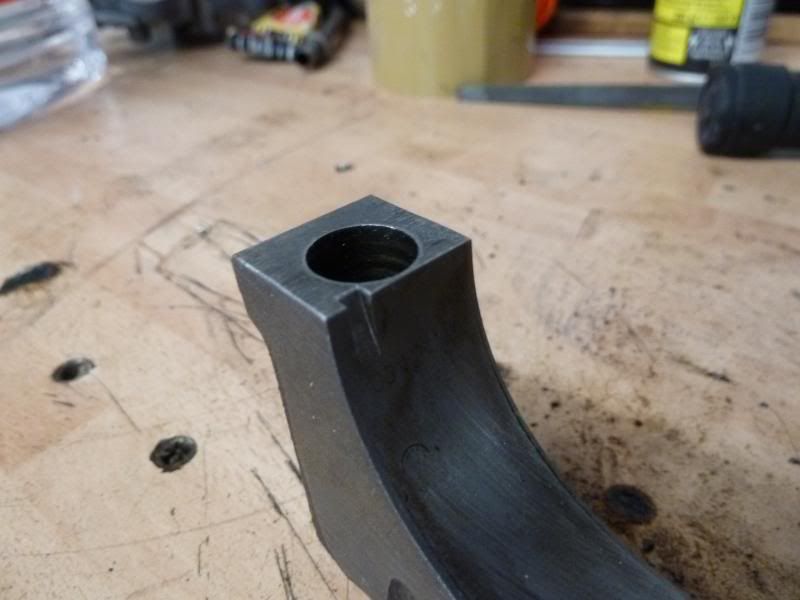
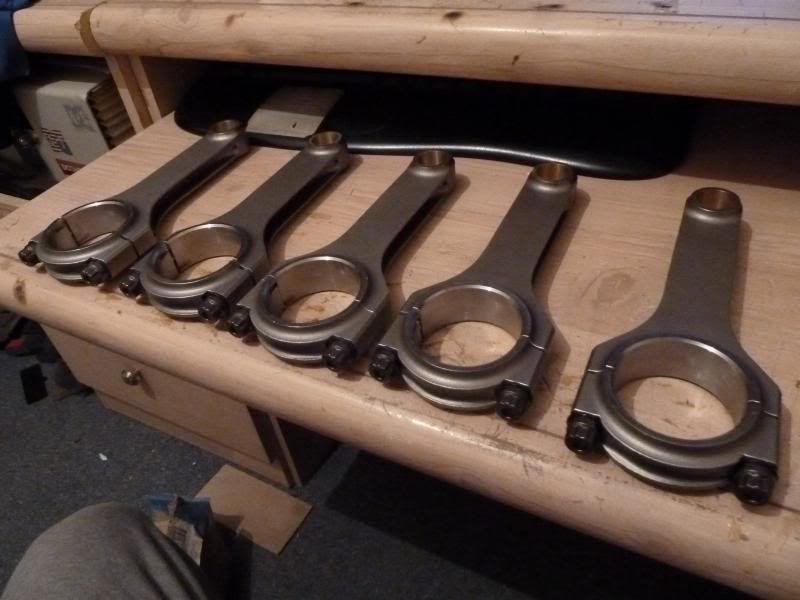
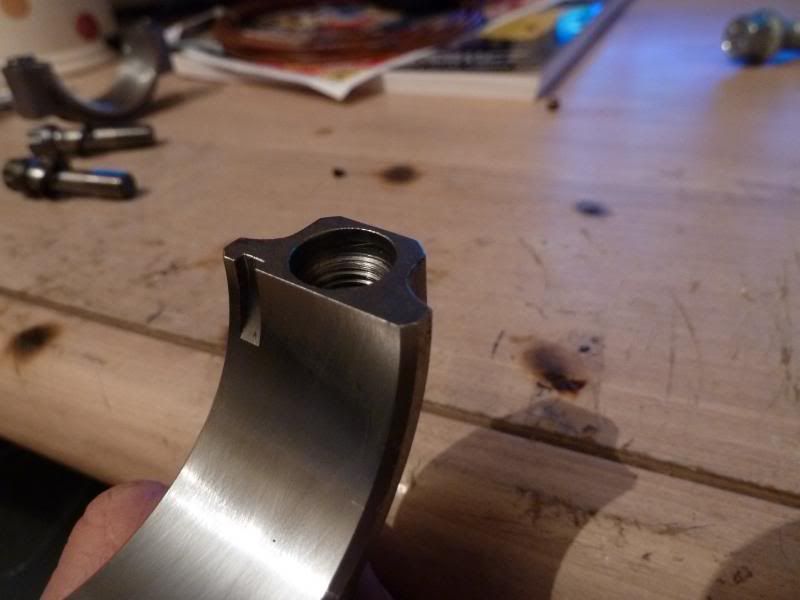
Then I dug out my rods which have been sitting about for a few years. They got the same detailing treatment, I ended up spending about an hour on each rod in the end. Again this is to ensure that the rods are assembled perfectly square and true.
That's it for now Panthero Coupé quattro 20vt
Indigo ABY coupé
Imola B6 S4 AvantComment
-
Nice attention to detail.
Also stops you cutting yourself when handling, they can be bloody sharp!Current-2004 Impreza PPP wagon
Sold-92 3B coupe-RS2+, 996s, konis, rear torsen, forged rods........
Sold ABY-stockComment
-
-
Looking good Alex. I'll attempt to do the next bottom end myself next time.ABY S2 stroker (work in progress)
B5 1.8T quattro
B4 2.3 (decommissioned)Comment
-
 OCDtastic.
The Perfectionist
OCDtastic.
The Perfectionist
sigpic
Audi Class Concours winner Stoner Park 2014, ADI Concours D'Elegance Class Winner 2008, Runner up 2014. Winner, S2Forum Show'n'Shine Billing 2006 & 2008.
Comment
-
-
You can fit the front wing trim sections off a late cab, they have no badges in and I think they're still available from audi??Originally posted by Error404 View PostBlack B3 1990 CQ 2.3E converted to ABY & 6spd. (301bhp) - Now Sold
03 Dolphin B6 S4 Avant LPG - New Daily Wagon
01 Silver D2 A8 3.7 quattro sport - SOLD
"Difficult is worth doing"Comment
-
Good info, cheers mate I didn't know that.
Panthero Coupé quattro 20vt
Indigo ABY coupé
Imola B6 S4 AvantComment
-
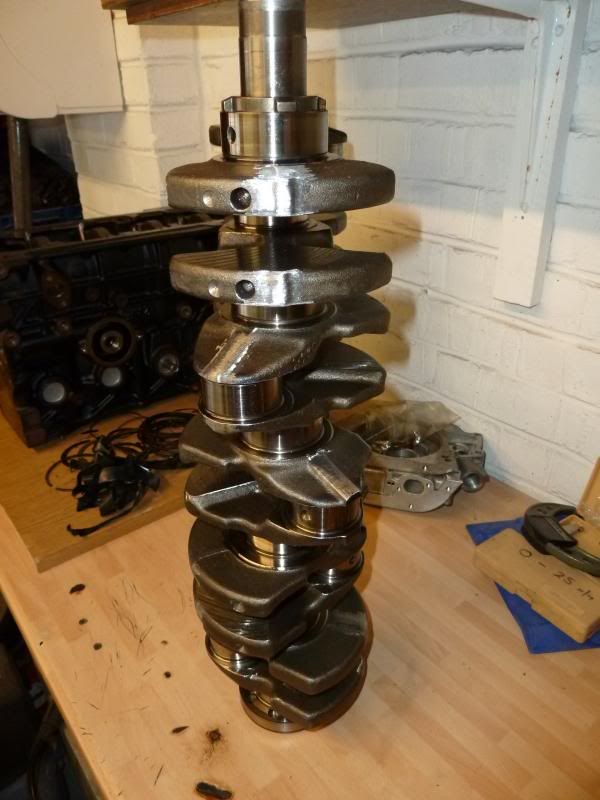
Time for some work on the crank. I had two to choose from, one from my 111k mile AAN and one out of my old 172k mile 7A engine.
I cleaned them both up and got the micrometers out to see which would be best to use.
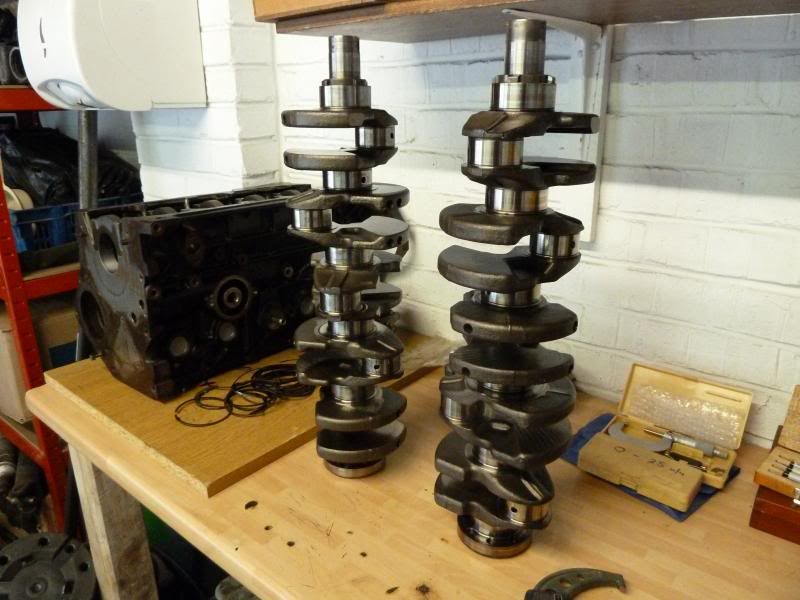
They both measured up well within factory spec. The AAN crank had more uneven wear across the journals; the first two in from the nose were approx 0.015mm down on the other 4, I wonder if that was anything to do with the different front belt setup on the AAN?
Still, even though it was only less than half a thou out, I will use the 7A crank which had less and more even wear across the journals - by switching the bearing shells around I will be able to match the oil clearances very closely across each journal.
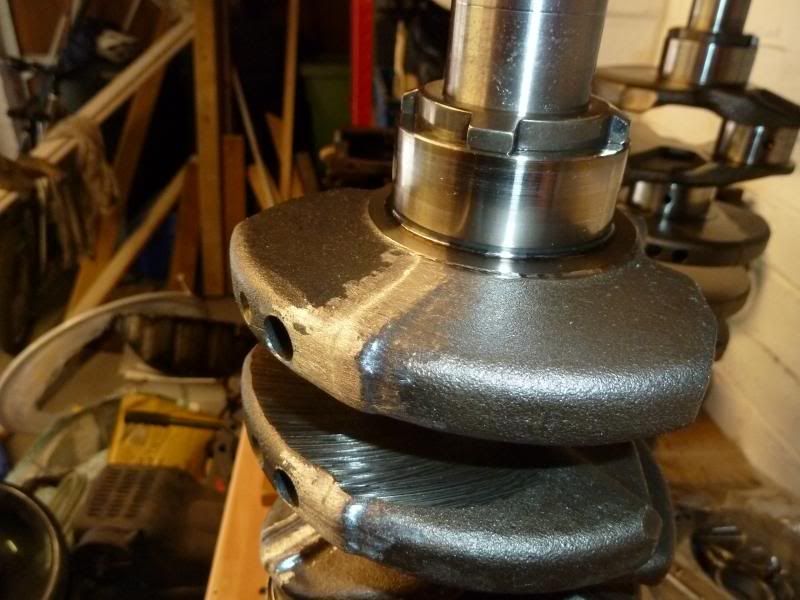
The I set to work with my needle files and die grinder to detail the crank. First off taping some old shells around the journals to protect them, especially since the crank only needs a micropolish to go again:
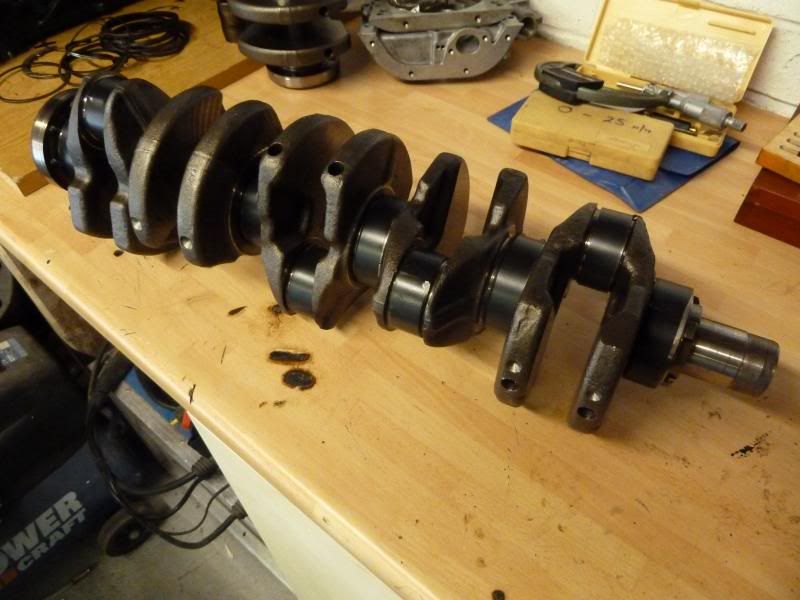
As with the block and roads, the casting / forging flash was smoothed back and any sharp edges were chamfered:
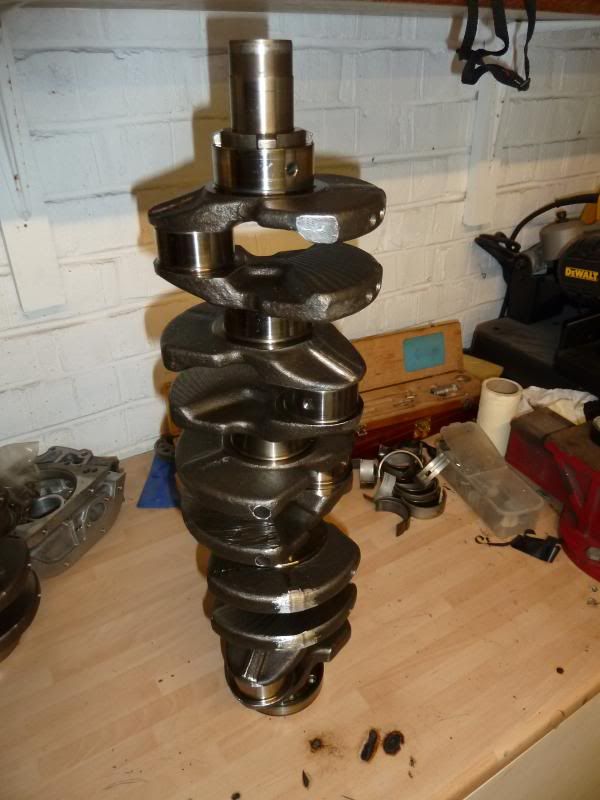
Then it was time for another clean and wipe over with some protective oil. That's the crank now ready for a micropolish and balancing
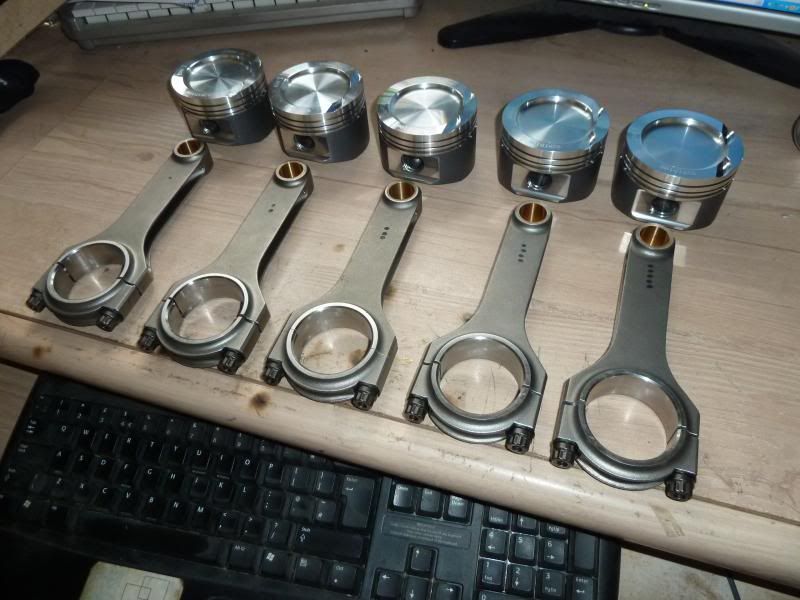
I got a nice package from Ze Germany too the other day
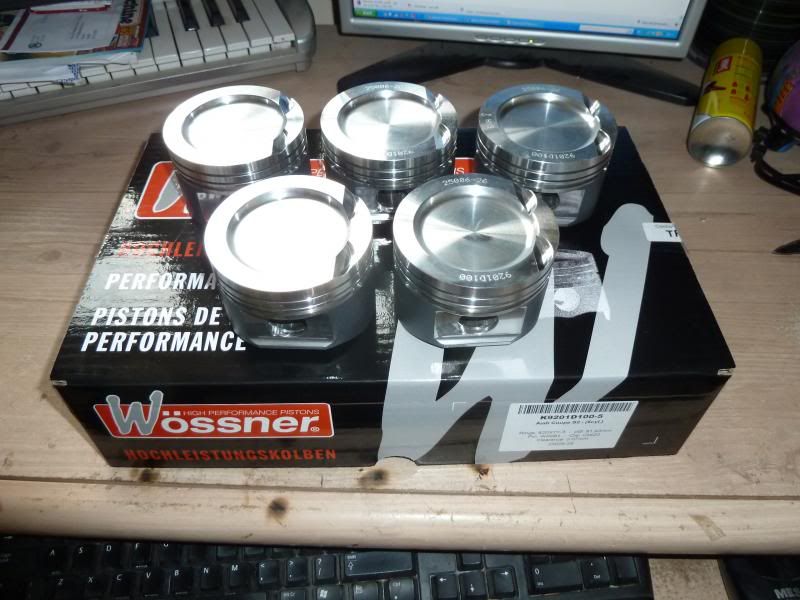
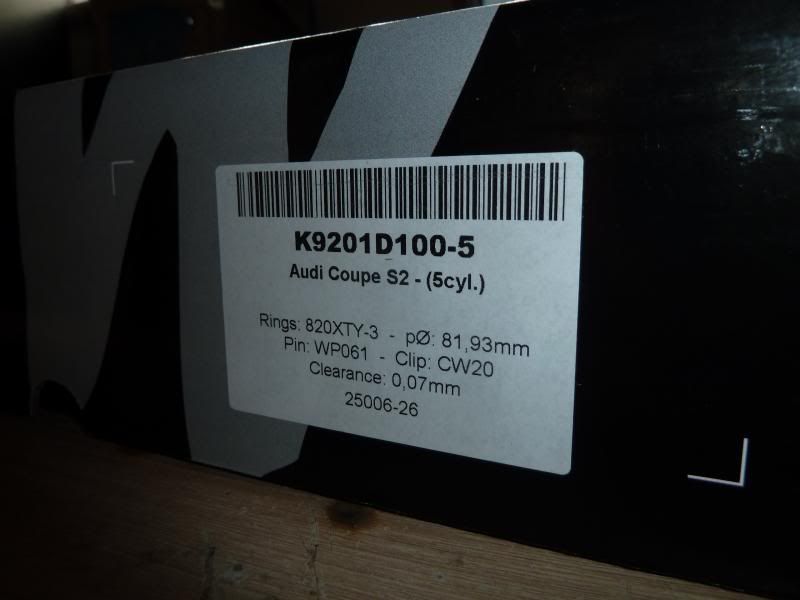
I measured the pistons and weighed them, matching them up with their respective rods. The pistons are within 0.012mm of each other so I will get the block bored to suit the largest piston - better to have a tad too much clearance than not enough. Worth noting that they averaged around 81.94 so just building it going by the box spec would have meant some of them were only running 0.055mm bore clearance - bad news! Always check!
 Panthero Coupé quattro 20vt
Indigo ABY coupé
Imola B6 S4 AvantComment
-
Very very interesting. Never seen a detailed crank before, what's the thinking behind it ?
How do you match rods and pistons, by combined weight ?
I was wondering how accurate the measurements on the box were.Comment
-
Detailing the crank is mostly just to reduce the risk of any issues (very rare on these engines so not really necessary TBH) but as you know I am just a bit a-nal about this stuff
If the journals are fairly evenly worn an still in spec you can swap the shells around to give you an even oil clearance on each journal, so they get even support and cooling from the oil film
Easiest way to balance the rods and pistons just switch them round so that their combined weights are equal or as close as you can. Then if necessary to perfectly balance each combination normally you can take some material from the piston pin boss or the bottom of the rod cap, but with decent quality kit normally you can match them up really well straight out the box.Panthero Coupé quattro 20vt
Indigo ABY coupé
Imola B6 S4 AvantComment
-
Alex, before you go too far on the cranks, have you checked that they are true? Put a pulley on them an check with a DTI.
My original 3B crank had taken a hit through the pulley, and was out by 7 thou IIRC. Sgt Balancer refused to balance it, so I had use another crank.SSComment
-
Current-2004 Impreza PPP wagon
Sold-92 3B coupe-RS2+, 996s, konis, rear torsen, forged rods........
Sold ABY-stockComment
-
Originally posted by 4WheelDrifter View Post
Cheers Stu, yes i did run it up when I was taking it apart, with just the 1st and 6th main cap fitted and with the DTI on journal 4 and it didn't even flicker, so I assume it is fine, didn't have a pulley fitted though, you think that would make a difference?
Andy yes I have found not all shells are equal, so you have a bit of variation to play with.
Panthero Coupé quattro 20vt
Indigo ABY coupé
Imola B6 S4 AvantComment


Comment